 | Home > Technical (L322) > TDV8 Alternatorh how to change/replacement pics |
 
|
|
|
| Googsy Member Since: 02 Jun 2011 Location: Where men are men and sheep are nervous. Posts: 2947  
|
Respect |
||
|
| Prop Member Since: 26 Sep 2012 Location: Gloucestershire Posts: 675 
|
T24RES, I would be very interested to know what the voltages are with the new alternator, especially the under load readings you get. I noticed you were getting 11.7 volts with everything turned on with the old alternator, does the new one improve this at all? |
||
|
| T24RES Member Since: 22 Nov 2010 Location: Henley-on-Thames Posts: 936
|
About 2hrs to get the alternator out. Hopefully less going back in as now I know my way around. Just in from work, fingers crossed for a couple of dry hours to finish off.
|
||
|
| T24RES Member Since: 22 Nov 2010 Location: Henley-on-Thames Posts: 936
|
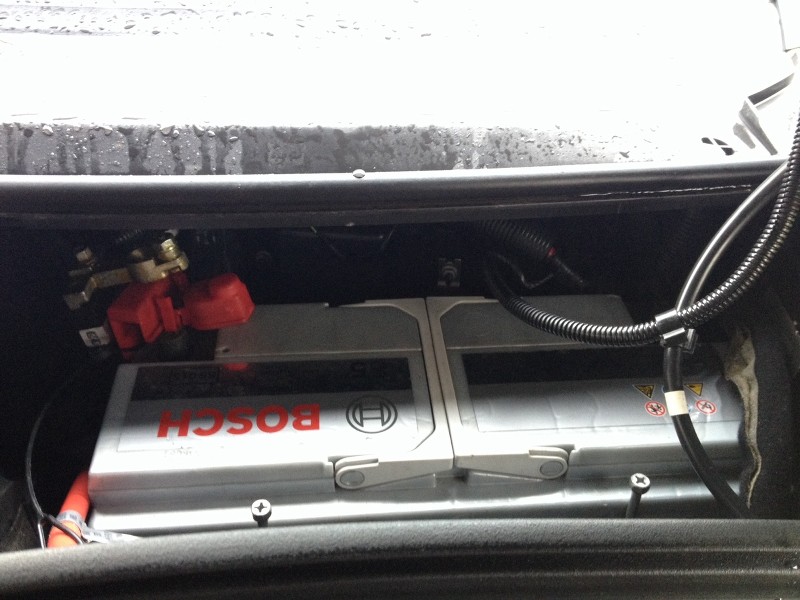
Remove the under trays x2, most people will be able to get underneath on extended mode. I left the drivers door open for a few minutes whilst disconnecting the battery so the suspension didn�t come down.
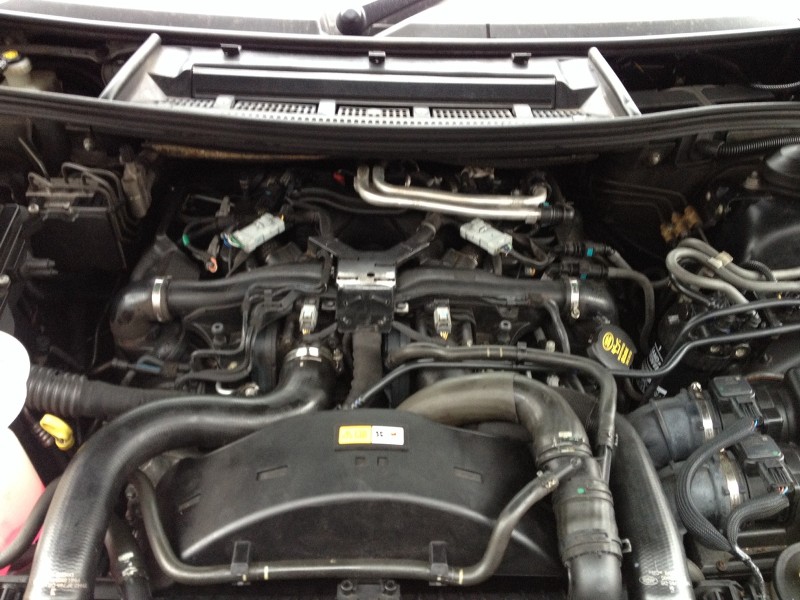
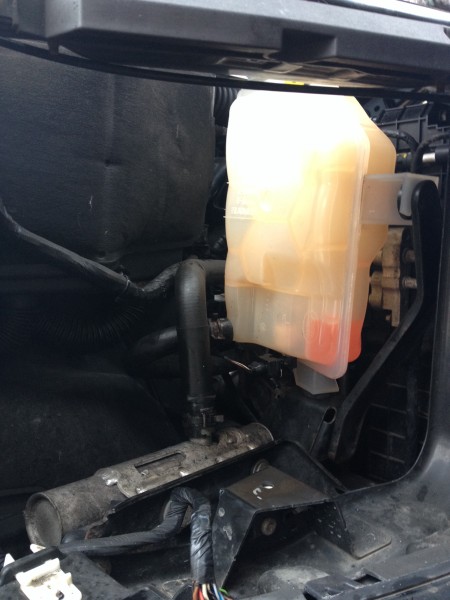
This is the view into the engine bay with the top cover removed. Just pulls off.
The next thing to remove is the top of the viscous fan cover, there are two 10mm bolts either side that need to be removed. The top portion then lifts up after disconnecting the pipe that runs along the front of it. The viscous fan as mentioned elsewhere requires a 36mm spanner. My adjustable wrench was exactly the right size. It is a LEFT HANDED thread which means it needs to be undone in a clockwise motion. The holder may be held with a long screwdriver wedged amongst the bolts that hold the pulley.
The two top intercooler pipes need to be removed. You can see a fair bit of plumbing, with hard and soft pipes that run across the front of the engine. I followed the pipes and undid them at the ends. One runs all the way to the bottom of the radiator and a small cooler, the others to the block and over to the header and another radiator inside the O/S wheel arch. (That�s why the inner arch has the air ducts at the leading edge)
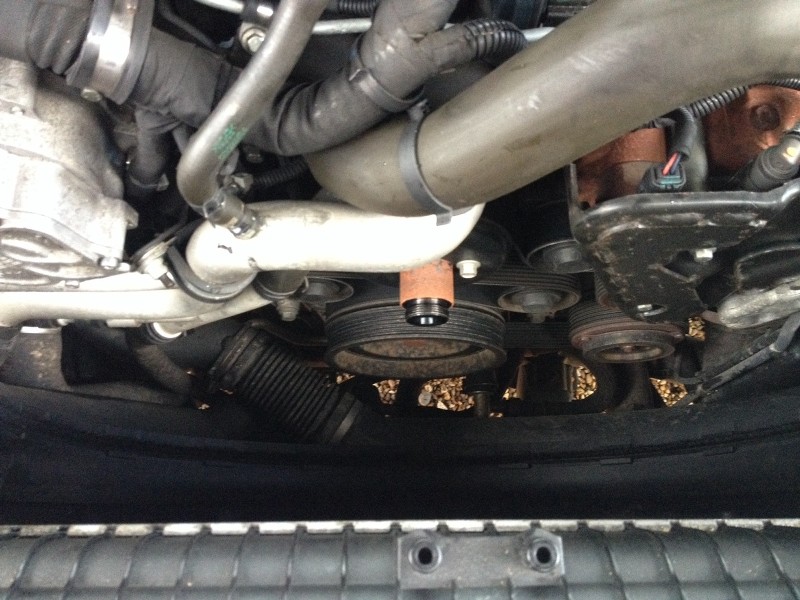
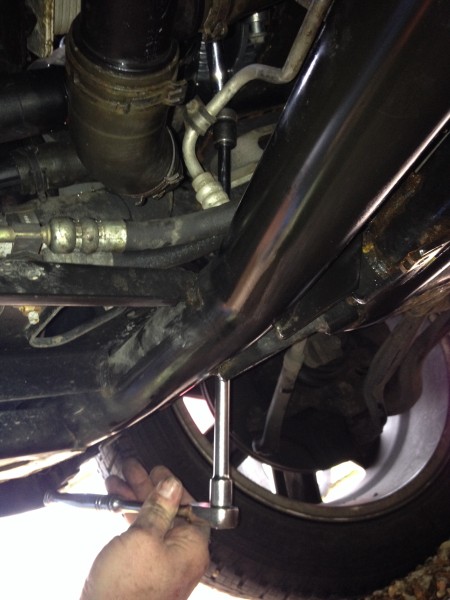
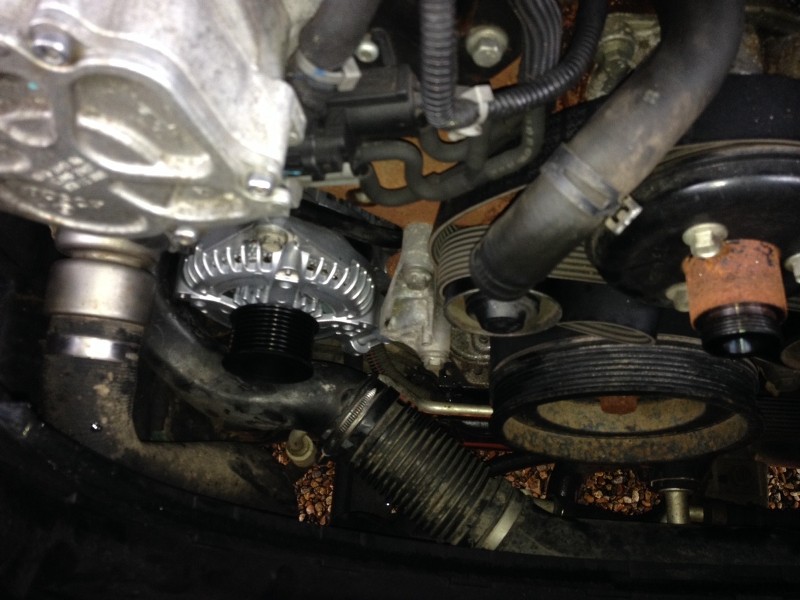
This is the bottom of the water radiator, there is a drain plug here. Although i thought a fair bit of water had come out, there was plenty left to drown my face when i pulled of the bottom hose at the small cooler. The serpentine belt needs to be taken off the alternator, the tensioner requires a socket with a long bar to make slack to enable the belt to be slipped off the alternator.
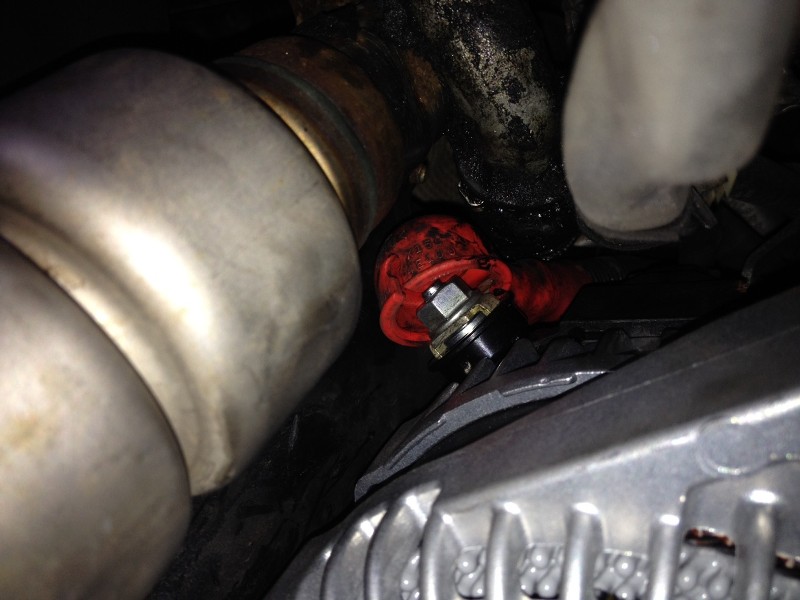
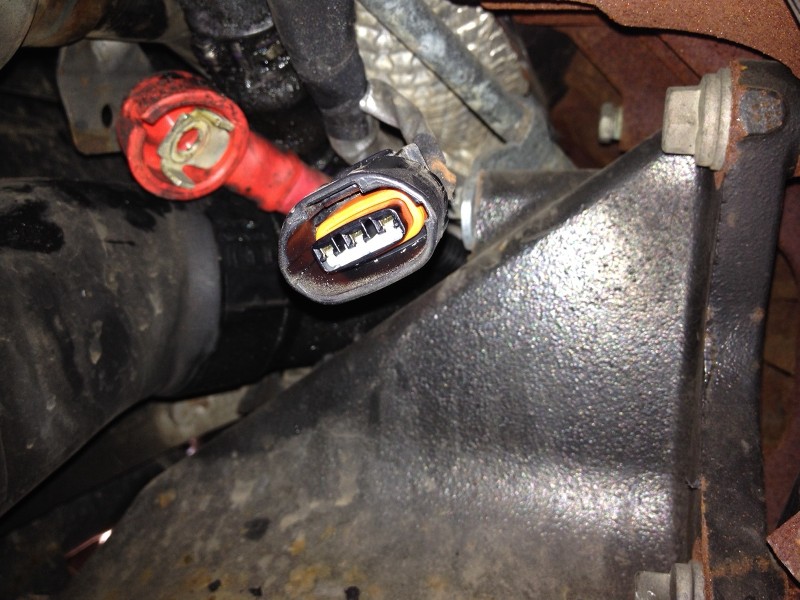
This is the connector on top of the alternator, just visible under the red rubber jacket.
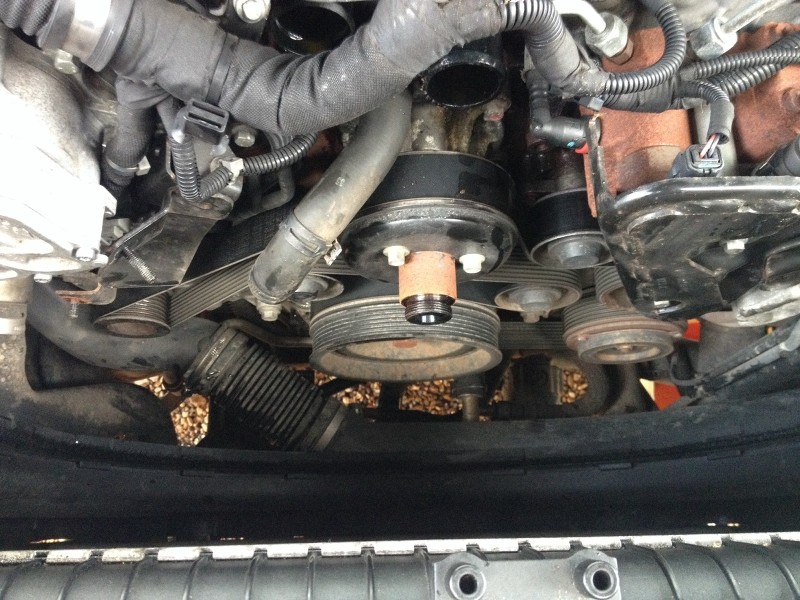
There are three bolts to undo to detach the alternator, i found a wobble bar and socket invaluable to undo the bottom most bolts;
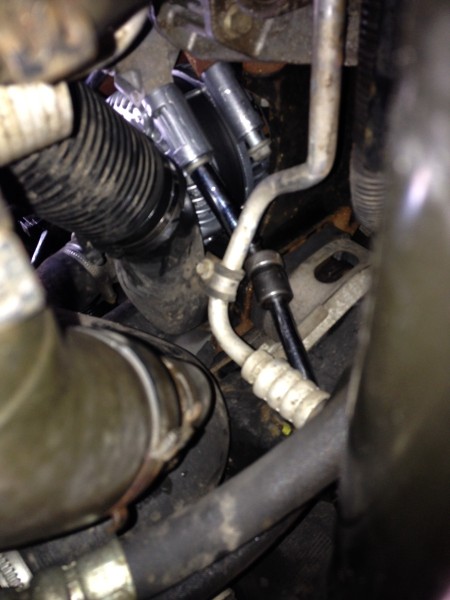
You can see the bracket to the right of the alternator, this needs to be removed prior to taking out the alternator itself.
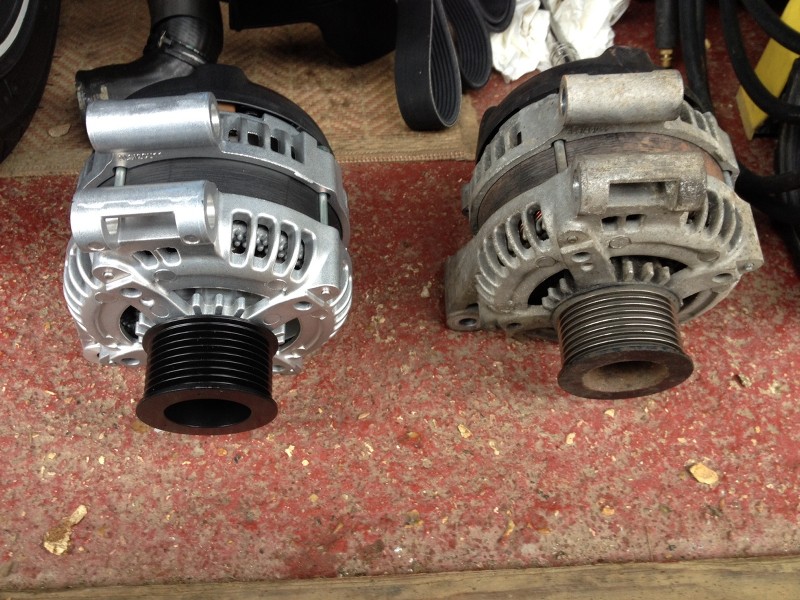
The alternator needs to be rotated clockwise to clear the mountings, not to much but it will become clear. The alternator has a multi plug at the rear, this is the last part before you gently lift it clear.
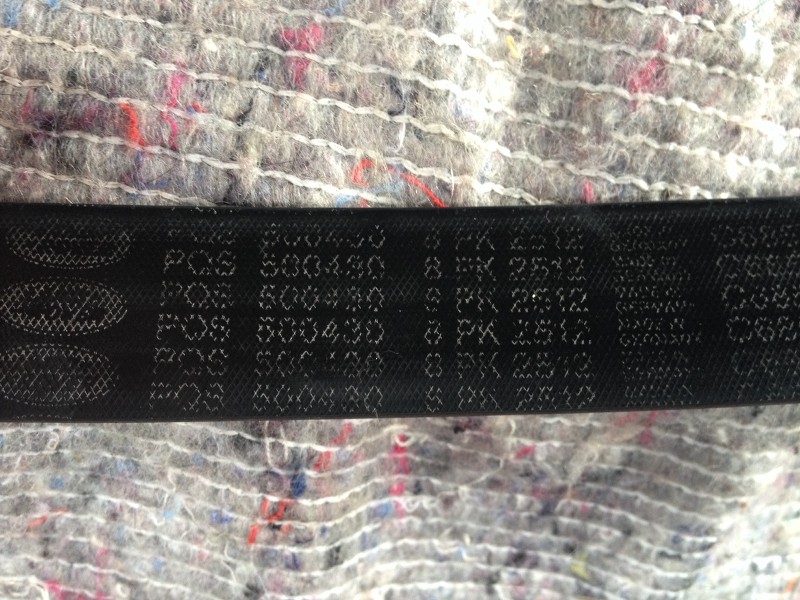
Refitting is the reversal of the removal as they say Others have mentioned removing the O/S inner wing, i did remove it but personally found no benefit so re-fitted prior to refitting. I also undid the big red wire feeding the starter motor as described elsewhere, this gave me no gain so imo, this can be left as is. I would have changed the serpentine belt, but CP4Less only list a belt that is too short. I enquired and was tld that was for the RR without air-con. I laughed, the belt number you will need for the TDV8 is 8PK2512 if replacing it.
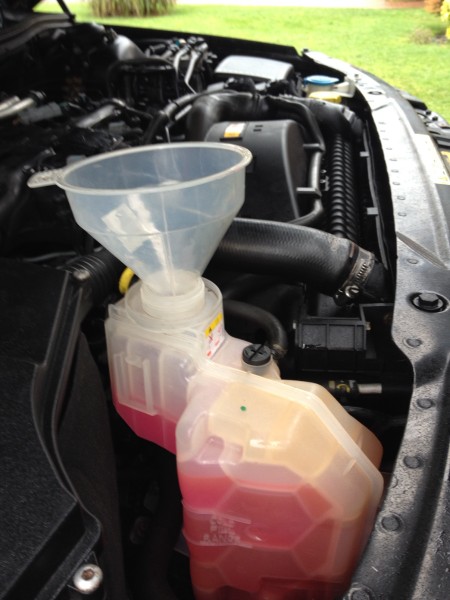
The small black plug on the header is a bleed screw, this helps when refilling the coolant.
It is not a difficult job, a little fiddly. Took around 4 hours all in. Any hints and tips, please feel free to ask. |
||||||||||||||||||||||||||||
|

| Googsy Member Since: 02 Jun 2011 Location: Where men are men and sheep are nervous. Posts: 2947
|
Excellent work well done |
||
|
| Prop Member Since: 26 Sep 2012 Location: Gloucestershire Posts: 675
|
Nice job T24RES and great pics and description of work. |
||
|
| T24RES Member Since: 22 Nov 2010 Location: Henley-on-Thames Posts: 936
|
Sounds like reasonable figures to me. I'll test in a similar fashion as soon as the rain slows up for comparison. |
||
|
| northernmonkeyjones Member Since: 24 Mar 2012 Location: derby Posts: 8750 
|
Great write up, i shall pass have a go now i have some pics to go by😄
|
||
|
| T24RES Member Since: 22 Nov 2010 Location: Henley-on-Thames Posts: 936
|
Bleeding the system was ok, slowly does it. Took out the black plug on the header tank, this helps to bleed the system. Then allowed to cool and topped up later |
||
|
| stan Site Moderator Member Since: 13 Jul 2010 Location: a moderate moderated moderator moderating moderately in moderation Posts: 35650
|
nice write up, wiki'fied... |
||
|
| Prop Member Since: 26 Sep 2012 Location: Gloucestershire Posts: 675
|
T24RES did you ever get a chance to check the voltages since fitting the new alternator. I am still curious to see how the new alternator behaves under extreme load compared to the old one. |
||
|
| Andy_J Member Since: 14 Nov 2011 Location: Muir of Ord Posts: 479 
|
Any tips on how to get the alternator past the black pipe in front of it, got mine loose and I just can't find a way of getting it pat the pipe.
|
||
|
| T24RES Member Since: 22 Nov 2010 Location: Henley-on-Thames Posts: 936
|
Pm sent Ian |
||
|
| T24RES Member Since: 22 Nov 2010 Location: Henley-on-Thames Posts: 936
|
These are the voltages read from the IID display: Tickover = 14.1 - 14.2v Full Load @ tickover = 12.2-12.3v ((rear seats/front seats/front & Rear screen/full fan/headlights/radio) Full load @ 2000rpm = 14.1 14.2v Ian |
||
|

|
|
| All times are GMT + 1 Hour |
< Previous Topic | Next Topic > |
Posting Rules
|
Site Copyright © 2006-2025 Futuranet Ltd & Martin Lewis
![]()
