Home > Maintenance & Mods (L322) > Auxiliary Sockets : How to convert to ignition control |
|
|
nicedayforit Member Since: 11 Jun 2011 Location: Beside the Solway Posts: 3978 |
Following on from this thread,
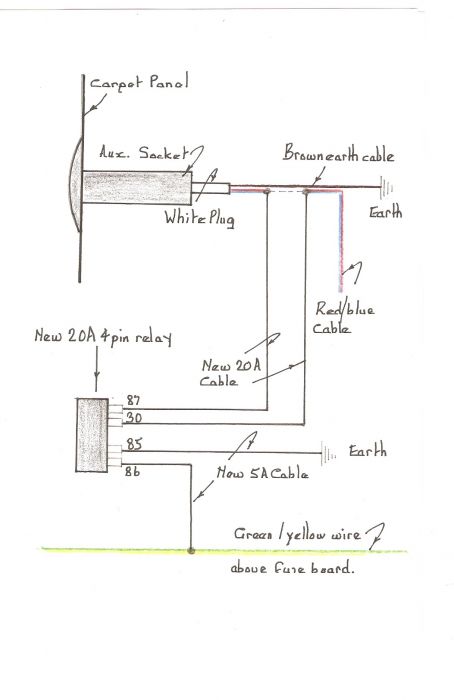
You will then see on the back of the aux socket a white plastic plug, remove this from the auxiliary socket. There are two wires to the plug, you are interested in the red / blue wire, the other is brown. ie Earth. Take hold of the wires at the plug and gently pull, there should be a bit of spare cable you can pull out to make things easier. Take off the black binding on the two wires and about 70-100mm from the white plug cut the red / blue wire. Cut away about 12mm of the insulation on both the cut ends of the red / blue wires. Connect a length of your new 20A cable to each of the red / blue cut ends and insulate the joints as required. Position you new cables thro into the opening in front of the fuseboard. Connect one of your new cables ( it doesn't matter which) to terminal 87 of your relay. Connect your other new cable to terminal 30 of your relay. As per diagram below.
Refit white plug to Aux socket. You now need to find the green / yellow ignition operated cable, this is in the small wiring harness above the rear fuseboard. As per photo below. Find a convenient point for yourself on the cable and connect to it a length of your new 5A cable and insulate the joint. The other end of this cable should be connected to terminal 86 of your relay. You then need to connect a piece of 5A cable to terminal 85 of your relay and connect the other end of the cable to a convenient earth point. A bolt head into metalwork at the top of the compartment opening will work. Re- inset Fuse 7 and re-connect battery terminal if appropriate. You auxiliary socket should now be ignition controlled. Now just tidy-up the wiring and mount the relay if required. This should give you everything you need, if you need anything clarified just ask. FRONT AUXILIARY SOCKET If you have a need to convert the operation of this socket to ignition control it can be done in a similar manner working in the rear side compartment. The socket is fed from Fuse1 on the rear Fuseboard. On the front face of the Fuseboard, top left is a plug connector onto the Fuseboard with a 20A Red / Green cable coming out of it. This is the cable that runs to feed the Front Auxiliary Socket. There is sufficient slack in the cable to allow you to cut it and install a 30A 12V 4 pin relay in the cable as per that installed for the Luggage Space Auxiliary Socket. The relay could be switched from the ignition source ie Green/ Yellow cable as above. You would then have both Auxiliary Sockets ignition controlled. Last edited by nicedayforit on 1st Jul 2015 3:43pm. Edited 1 time in total |
||||||||
1st Jul 2015 1:51pm |
|
Weegie Member Since: 09 Jun 2014 Location: East Sussex Posts: 3237 |
Nice write up NDFI John
|
||
1st Jul 2015 2:17pm |
|
stan Site Moderator Member Since: 13 Jul 2010 Location: a moderate moderated moderator moderating moderately in moderation Posts: 35377 |
put in wiki Dave ... - .- -.
|
||
1st Jul 2015 2:42pm |
|
nicedayforit Member Since: 11 Jun 2011 Location: Beside the Solway Posts: 3978 |
^ Ta |
||
1st Jul 2015 3:10pm |
|
pietertje Member Since: 30 Nov 2014 Location: Rotterdam Posts: 152 |
Just did this conversion.
|
||
2nd Jul 2015 12:33pm |
|
nicedayforit Member Since: 11 Jun 2011 Location: Beside the Solway Posts: 3978 |
Welcome to the forum.
|
||||
11th Oct 2022 9:05am |
|
silentdrew Member Since: 10 Oct 2022 Location: New York Posts: 15 |
Thank you very much for your kind reply.
|
||
11th Oct 2022 11:37am |
|
nicedayforit Member Since: 11 Jun 2011 Location: Beside the Solway Posts: 3978 |
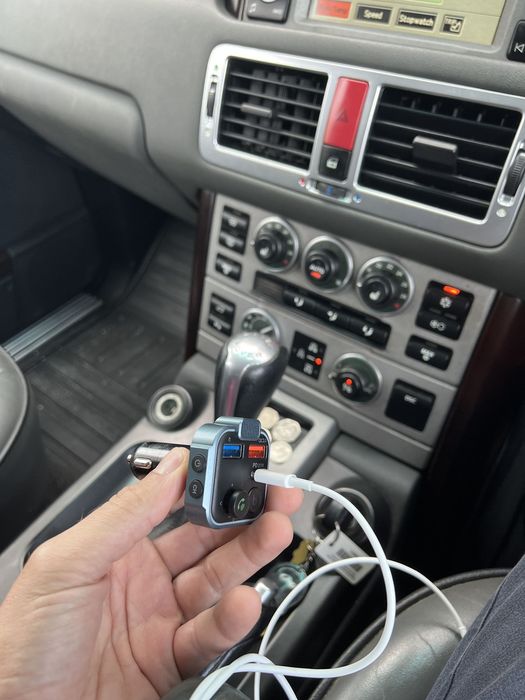
Have you a picture of the Bluetooth transmitter you are using.
|
||
11th Oct 2022 12:05pm |
|
silentdrew Member Since: 10 Oct 2022 Location: New York Posts: 15 |
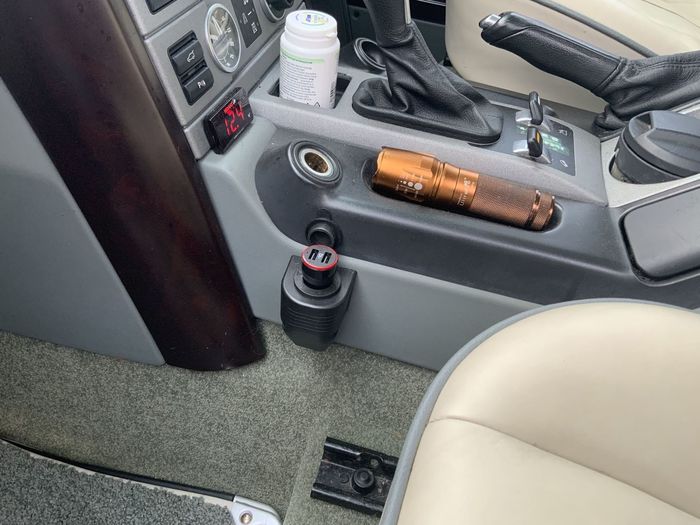
Yes. It should be pictured here. Essentially if I plug this into the socket near the shifter it remains on all the time. I’d love to rewire this socket, or the socket in the armrest to be ignition controlled!
|
||||
11th Oct 2022 12:13pm |
|
nicedayforit Member Since: 11 Jun 2011 Location: Beside the Solway Posts: 3978 |
You might be in luck.
|
||||
11th Oct 2022 12:19pm |
|
silentdrew Member Since: 10 Oct 2022 Location: New York Posts: 15 |
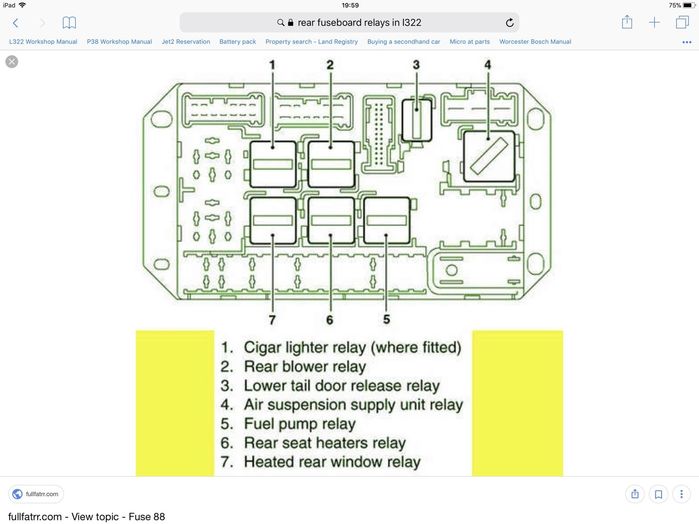
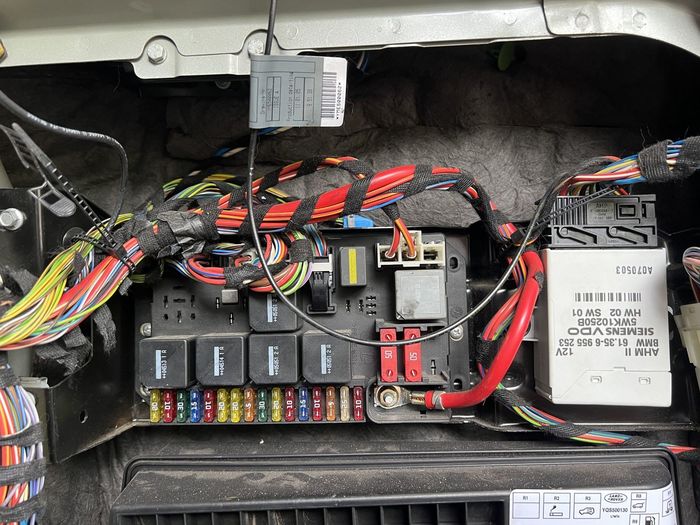
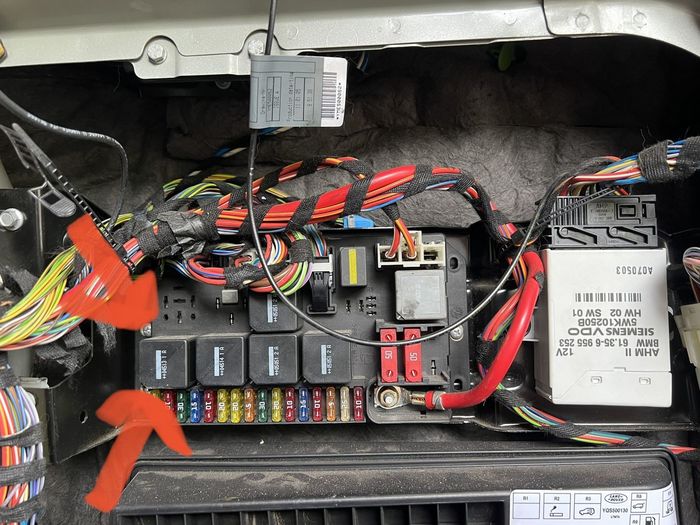
It appears to just be a jumper of some sort, pictured below. There also appears to be a relay in the bottom left position which is not the same as the diagram.
|
||||
11th Oct 2022 12:43pm |
|
nicedayforit Member Since: 11 Jun 2011 Location: Beside the Solway Posts: 3978 |
It is indeed a jumper which is why your 2 cigarette lighter sockets are permanently live.
|
||
11th Oct 2022 12:56pm |
|
silentdrew Member Since: 10 Oct 2022 Location: New York Posts: 15 |
Thanks so much for this, Is it ok to just pull the relays and jumper out with the battery still connected? Also, it appears there is an extra relay in the bottom left position, should I try that one for position 1 and leave the seat heaters relay where it is? See picture below…
|
||||
11th Oct 2022 1:04pm |
|
nicedayforit Member Since: 11 Jun 2011 Location: Beside the Solway Posts: 3978 |
Pull the jumper and reposition relay 2, you don’t need to disconnect the battery. Nothing untoward will happen, l just tried it on my own car with no issue.
|
||
11th Oct 2022 1:09pm |
|
|
All times are GMT |
< Previous Topic | Next Topic > |
Posting Rules
|
Site Copyright © 2006-2025 Futuranet Ltd & Martin Lewis