 | Home > Technical (L322) > 2011 fuel gauge |
 
|
|
|
| tj2k Member Since: 10 Dec 2017 Location: Shropshire Posts: 34  
|
Hmf, Stratstone quoted:
|
||
|
| cass Member Since: 12 Oct 2011 Location: northumberland Posts: 755
|
As a guide I reckon I could do the whole job in under 2 hours now I know where everything is and how it comes apart, obviously it took me a lot longer than that but I’m a cautious amateur.
|
||
|
| tj2k Member Since: 10 Dec 2017 Location: Shropshire Posts: 34
|
Just had this back from Hatfields (Mike is the parts guy):
|
||
|
| Baltic Blue Member Since: 13 Aug 2015 Location: North Wales Posts: 3812 
|
Are you able to send the bulletin to Stan for inclusion in Wiki ?
|
||
|
| kgeddes Member Since: 11 Jan 2015 Location: UK Posts: 289 
|
Is this any good?
|
||
|
| tj2k Member Since: 10 Dec 2017 Location: Shropshire Posts: 34
|
Ok, very long post with pics follows:
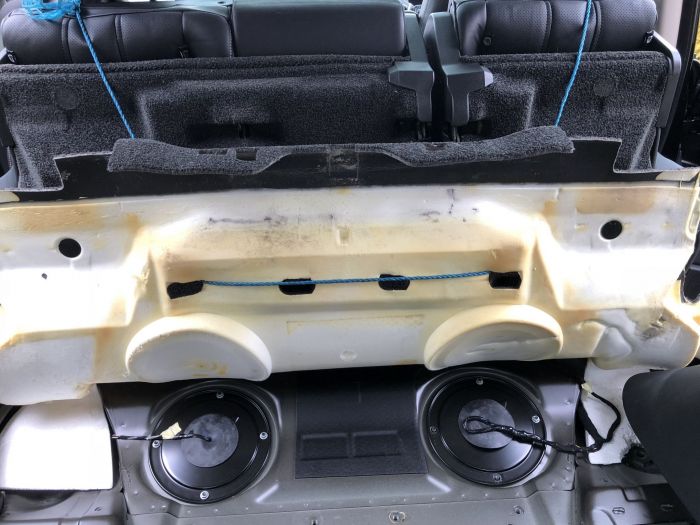
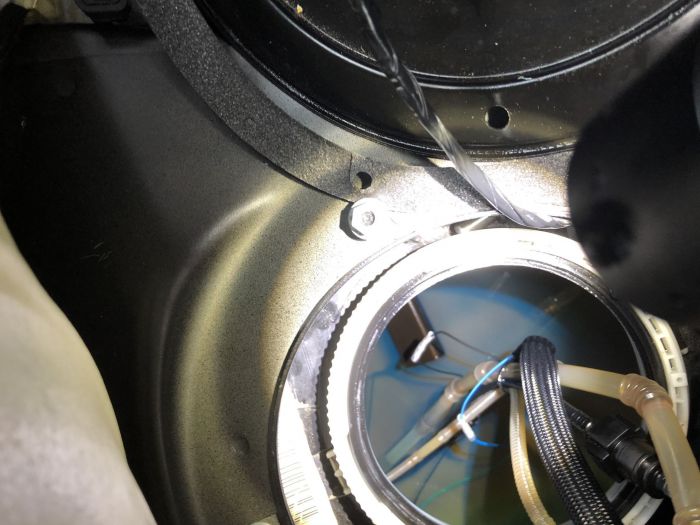
The right hand side inspection cover (the rear right level sensor wires are combined here & go through the grommet):
This is under the R.H. inspection panel - I cleaned mine up a bit - didn't want dust / muck contaminants getting into the fuel / system:
This isn't showing much other than fuel-return pipe disconnected and fuel-out pipe and the rubber Webasto / FBH fuel pipe still connected:
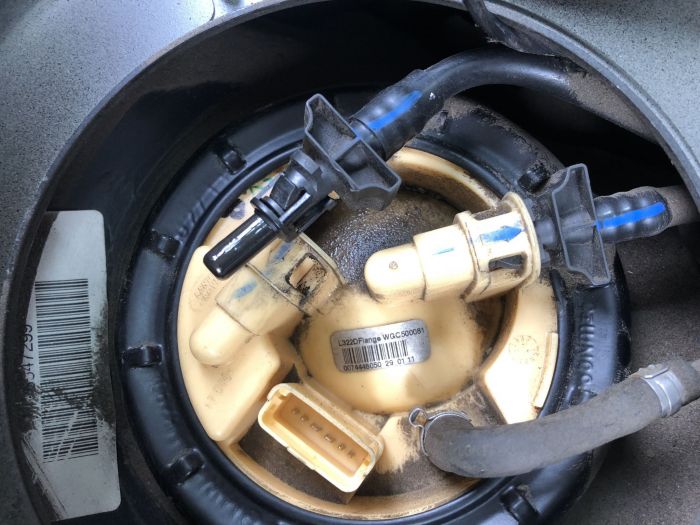
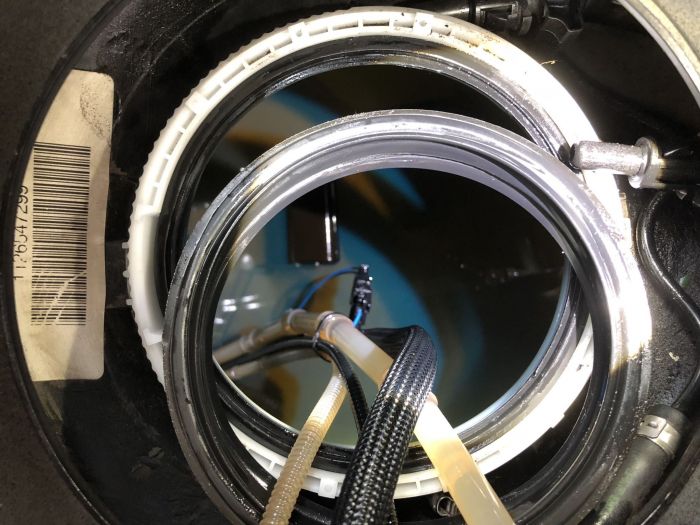
Ok, so the tank-cap removed, you can see the black connector - upper-most / dead-centre which I removed and replaced with 2 x crimps:
You can now see my 2 x crimped connections with the black-plug having been removed:
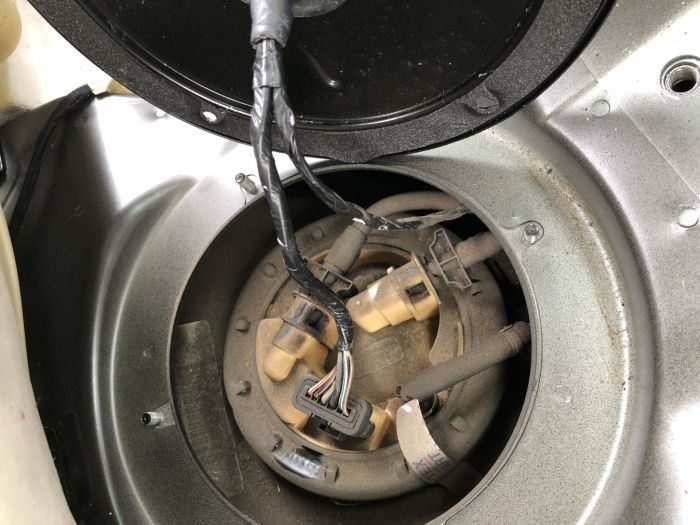
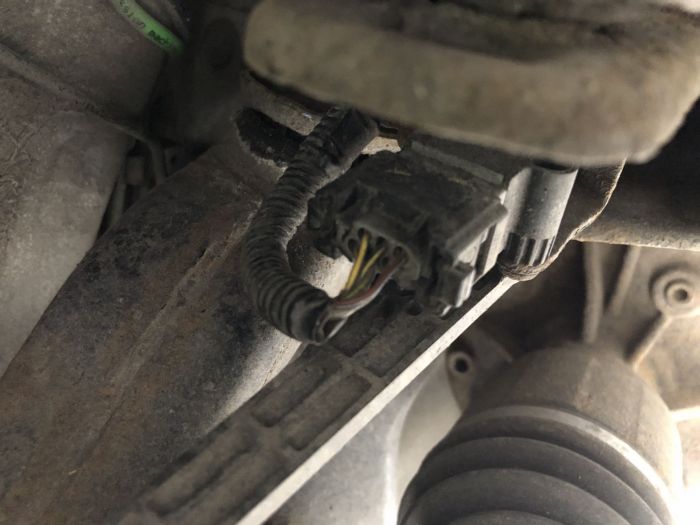
So, you can just about see that the fuel level is quite high - so at this point I replaced the rubber flanges and made it drivable for a test after crimping the 2 x wires into the connector which is now gone. The fuel gauge reported accurately - however, with 2 x residual connectors (4 x wires or points of weakness) still in there somewhere needing to be replaced, I cannot be certain that the fuel gauge problem won't resurface. Thats when I got the suspension fault!! I was just a bit p*ssed off! (saying to myself: "FFS, I've just fixed one f*cking fault only to get another!!"). So the rear right level sensor wire traverses that grommet, then once out of the interior of the car (that grommet being the barrier between inside & outside of the car) it goes straight to the level sensor - and it's fairly tight too - so quite easy to see how I might have caused the issue. There is a small possibility that where the wires join just outside of the inspection panel (inside the car) - that there's a short in there - so I should really peel that thick insulation back and check but my guess is that it's outside of the car between that grommet and the plug (right next to the plug in fact) - & given what I say above about the plug & the car dropping - it's very likely to be right there. I also noticed that there is a hanger or tab receptacle to secure the level sensors wire-loom to the chassis just down & out of sight from the fuel tank inspection hatch. Well, the wires are not hung and the loop to hang the wires on is free / loose. I don't know where it hangs / clips to - or even, if I dislodged it or it was already like that. In any case, I *think* I need to replace the wires between the plug and where the wires running into it - are known to be good. Here's some pics: Level sensor and the connector block:
Close-up of the connector block shortly before my car nearly tried to kill me (my own STUPID fault!):
Any similar experiences / advice appreciated (apart from criticism of my own stupidity please!?) |
||||||||||||||||||
|

| cass Member Since: 12 Oct 2011 Location: northumberland Posts: 755
|
Sorry can’t help with your suspension problem but can suggest some pump removal help.
|
||
|
| tj2k Member Since: 10 Dec 2017 Location: Shropshire Posts: 34
|
So, both faults fixed but I had a bit of a game on mine:
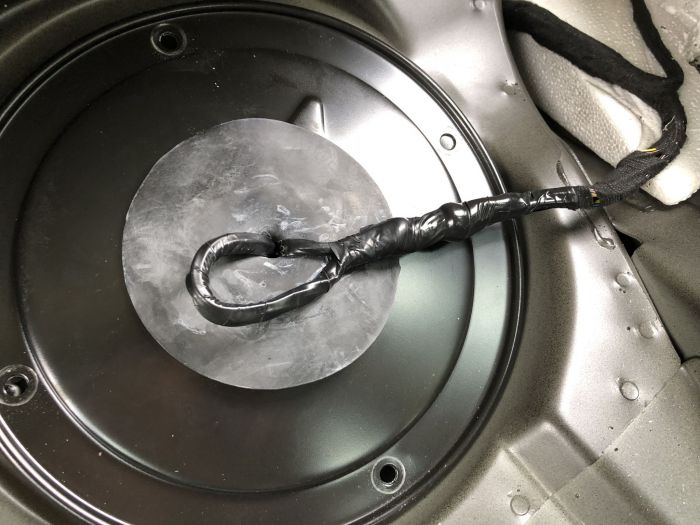
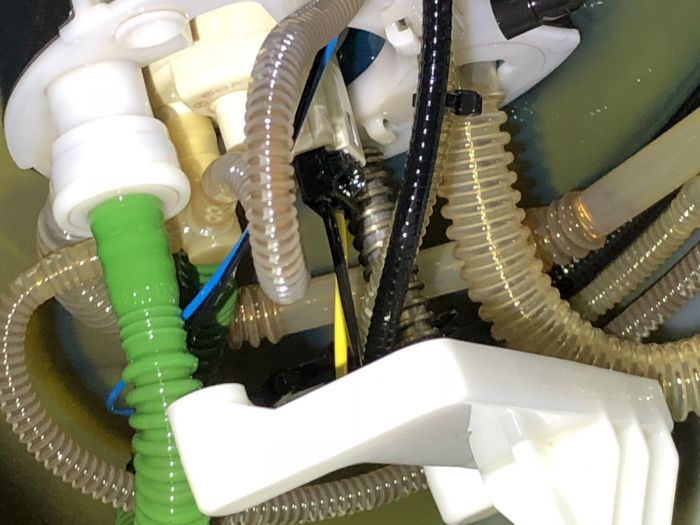
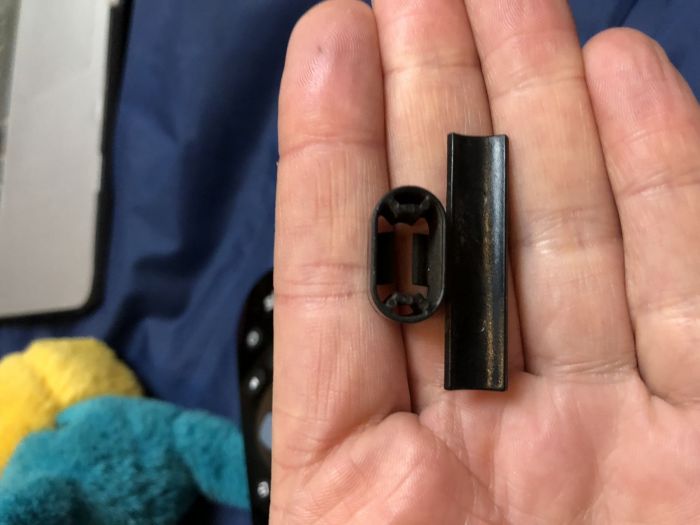
The spring sprang out & the bar it surrounded, dropped into the pump. I sorted that by flipping the pump & refitting it into the clamp bar - but it was mega fiddly. Getting the pump back in was a game to say the least, compressing the bar whilst aiming the base of the pump without it slipping back (& the bar dropping / spring springing out again) was really difficult at first - diesel being slippy of course. Anyways, finally got it in (I used large cable-ties to partly compress the bars to help me get it back into place) - job done, fuel gauge TB fixed As for the suspension? Well, this lil begger:
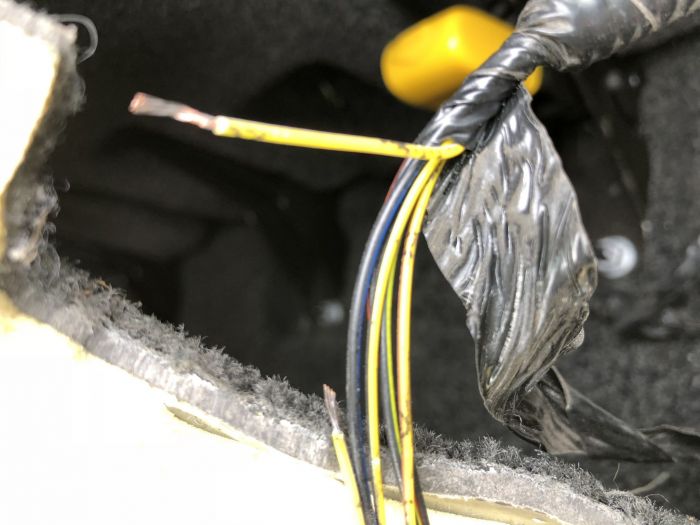
...had caused this - through vibration - one edge of this hanger thing was embedded in the wire:
There was probably one strand left when I came to do the Fuel gauge TB & as the loom passes through the fuel tank inspection panel, in doing the TB I must have broke the last strand causing the suspension fault. The fault was really annoying as the car was dropping from the rear right corner progressively over a few hours until eventually the whole car was sat on the floor (lower than access point mode). When I stripped back the insulation to crimp / bridge the wire, you can see from this pic that the copper beneath the insulation either side of the break was already oxidising & so had been going for some time....
So job done. |
||||||||||
|

| MikeO Member Since: 02 Jan 2018 Location: The Cotswolds Posts: 526  
|
Having just done this job I can second tj2k's comments about being careful releasing the pump spring clamp. I also lost the bar / spring and then spent 5mins with my hand in the tank trying to find the bar only to discover it drops into the pump assembly. Having put it back together the |
||
|
| tj2k Member Since: 10 Dec 2017 Location: Shropshire Posts: 34
|
Well done 👍My house stank of diesel for a long time afterwards! |
||
|
| dexion7 Member Since: 06 Jun 2013 Location: Tynemouth Posts: 291 
|
ive also just done this job on my 2010VSE tdv8
|
||
|
| DMRR Member Since: 14 Apr 2010 Location: Northamptonshire Posts: 2027  
|
Mine is the same year and I have a fuel sender 2 issue. Is that the easy one to sort or do I have to remove the pump? I don't get much time off from work so would need to plan well in advance! Land Rover Addict XXXXXXXXXXXXXXXXXXXXXXX Previous XXXXXXXXXXXXXXXX 2009 5.0V8SC Autobiography 2006 4.2V8SC Autobiography 2004 4.4V8 Vogue |
||
|
| MikeO Member Since: 02 Jan 2018 Location: The Cotswolds Posts: 526
|
I don't know which one is which but it's a relatively easy job to do what dexion7 did and you have a 50% chance of success. You only need to remove the right hand cover plates and reach inside.
|
||
|
| dexion7 Member Since: 06 Jun 2013 Location: Tynemouth Posts: 291
|
i dont have an OBD tool either so don't know which code relates to which sender. i can say however that when you unplug the external fuel tank connector, the left most pair of 2 pins (8 pins in a line) go to the most easily accessible internal connector. put your ohm meter across each pair of pins BEFORE you pull it apart. if you do this and the strange reading is the left pair then you are in luck and should have the easy fix. as i said in my last post, the way that internal connector just hangs there is not very good and it probably minutely flexes every time you go around a bend resulting in fretting. good access is possible to the first internal connector and unplugging / replugging a few times might be a 100% solution. the second pair of wires for the other sender's internal connector (both sender units have a black and a blue wire) can be seen dissapearing off somewhere else in the tank (presumeably access to that connector is only possible after removal of the other, left, access cover). however, the fretting which takes place is just that - "fretting" as apposed to "pitting". pitting is caused by arcing from high current and microwelds with high resistance whereas fretting doesn't and means you can move the male and female pins relative to each other and thus hopefully resume a point of good contact. why is this relevant? well, since the current flowing across the pins in the connectors is very low, even a poor connection between the male and female pins will be ok and (just my guess) the effects of fretting on the inaccessible internal connector might be negated simply by gentle tugging on the wires which go to it. like i said, mine had this problem a few years ago and it went away an returned 20k miles later. once you have had the right cover off and replugged the acceible one and tugged a little on the other one i reckon you have a pretty good chance of fixing it. also, you mentioned the time involved - try doing a dummy run which just involves external stuff like learning how to get the trim off etc and meauring the reistance. fitting the trim bakc on is really quick too. you will then find that the full job including the in tank work is simple (assuming you don't need to pull the pump!) |
||
|

|
|
| All times are GMT + 1 Hour |
< Previous Topic | Next Topic > |
Posting Rules
|
Site Copyright © 2006-2025 Futuranet Ltd & Martin Lewis
![]()
