Advertise on fullfatrr.com »

Home > Maintenance & Mods (L322) > 4.4 TDV8 Oil Cooler gaskets change - my attempt and tips
Post Reply  Down to end
Page 1 of 1
Print this entire topic · 
KristoffL322


Member Since: 20 Jun 2022
Location: North West
Posts: 27

United Kingdom 2012 Range Rover Westminster 4.4 V8 Orkney Grey
4.4 TDV8 Oil Cooler gaskets change - my attempt and tips

I decided to use the nice weather this weekend to change the gaskets in the oil cooler.

I was told this job had already been done when I bought the car from a Land Rover specialist independent dealer last year but clearly they were fibbing, as after 9 months and 3k miles I had oil on my driveway. Investigations revealed oil was coming from the back of the engine, the turbo drains looked good so the next suspect was the oil cooler.

With an endoscope I could see oil on the V of the engine so it was time to swap the oil cooler gaskets.

mm289 has written up an excellent article on how to do this which is in the forum wiki, so I won’t detail it step by step. This article helped massively in terms of what order to take things off. I would have wasted a lot of time unbolting unnecessary stuff without it.

I will just post up a few things in this thread that I found out a long the way which may help others out doing this job.

It took me 8 hours from start to finish including 20 mins for lunch and about 2 hours trying to clean out the induction manifold and throttle body. It’s definitely a job a keen DIY mechanic can do at home. Access is easy its just a case of being methodical and battling the odd broken or rounded bolt left in there by previous ham-fisted mechanics who seemingly didn’t own a torque wrench.

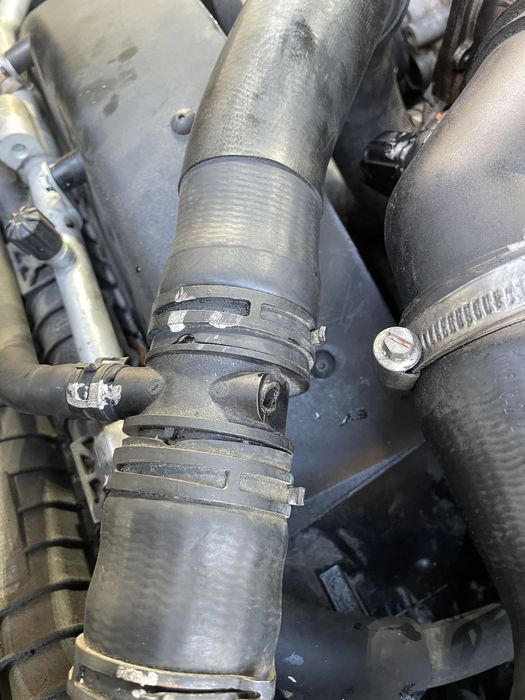
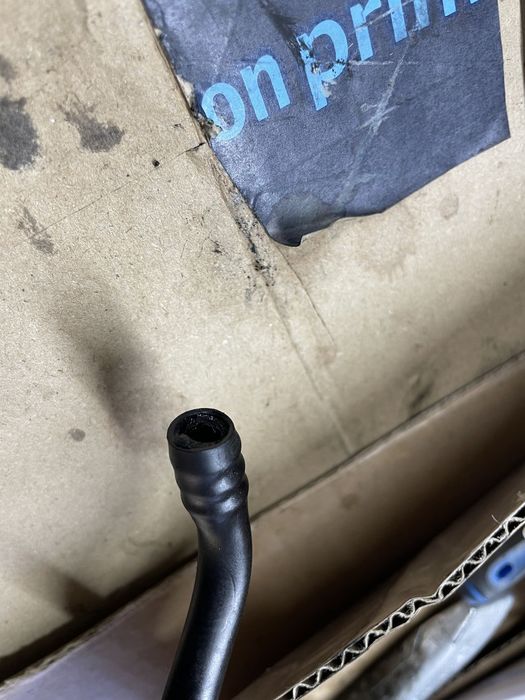
First step is to break off the brittle water pipe by simply looking at it. Easy job to start with and I did it no problem. Laughing

Click image to enlarge


Click image to enlarge


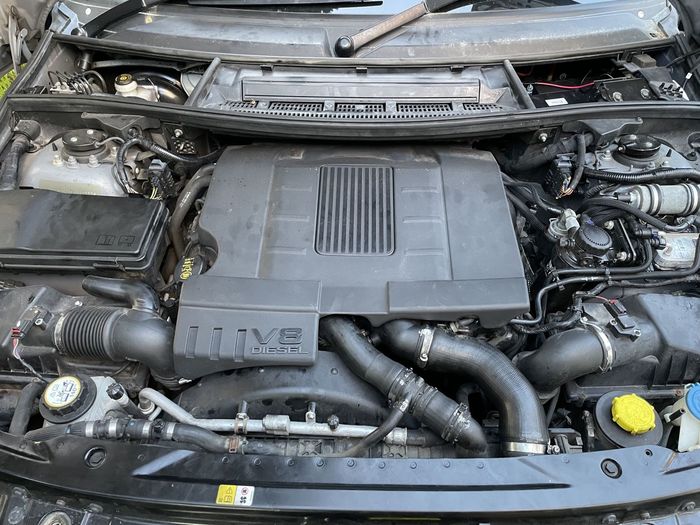
I had some issues getting the plastic torx fittings off that hold the engine cover in place. Circled red in this photo. Someone in the past had cranked these down when they should be almost finger tight. The plastic shafts simply twist when you apply torque and then they snap.

I removed the throttle body at this stage to give me more room get some knipex cobras in on the base of the plastic shaft and managed to get them off without snapping them. Stupid design IMO. (the throttle body bolts are the two bolts circled blue, two more underneath those making 4 bolts)

I put them back with some antisieze on when reassembling.


Speaking of stupid designs, who I wonder came up with he idea to use E5 sized torque bolts to hold the bracket on? E5? Its like the sort of size used in watchmaking. Rolling Eyes

Needless to say the bolts circled in green in the photo above had been put in previously over torqued, and when I tried to take them out the top of both of them simply snapped off.

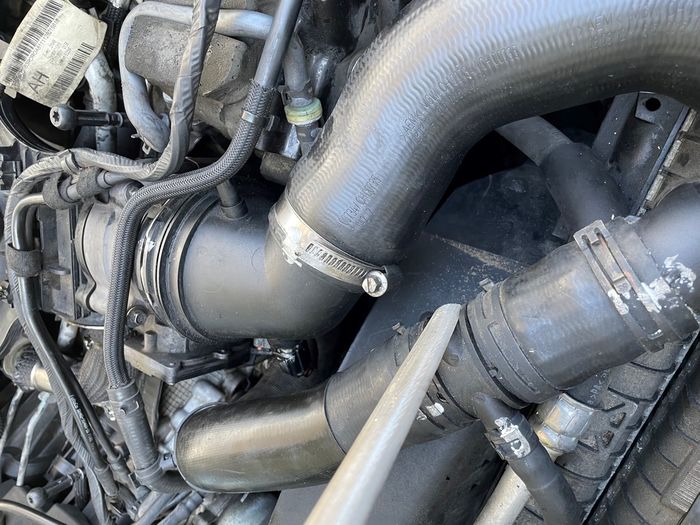
I managed to get the one on the left off with a set of vice grips, the one on the right you can see the photo below that I had to drift it off with a hammer and chisel. I replaced both these with new bolts when refitting.

Edit - what I should have done here was probably used the "jam nut" technique and wound two nuts on to snapped bolt, tightened them against each other, and treated it like I was removing head studs. That would have saved the need for the hammer and drift, but I just didn’t think of doing that at the time, and I knew I need to replace the bolts anyway at that point.


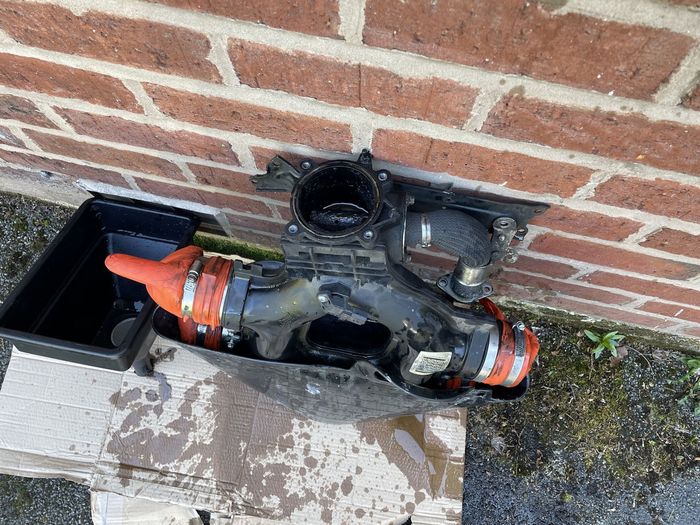
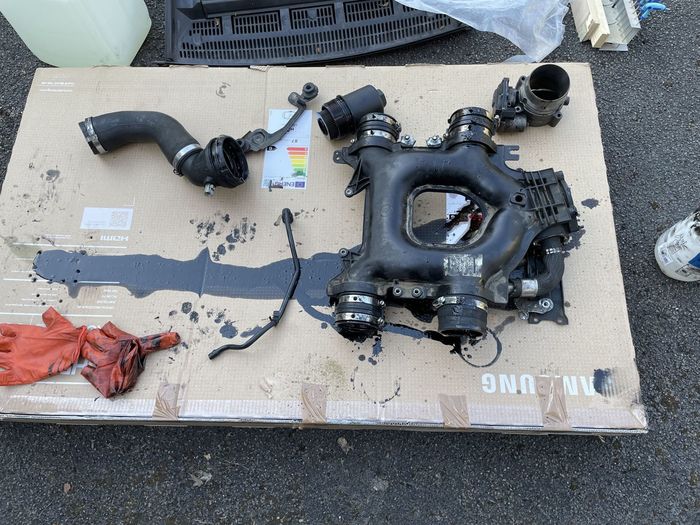
The manifold and throttle body was simply disgusting so I spent two hours in total with degreaser cleaning out as much as I could. I filled the whole manifold with degreaser and sat it in a bucket for an hour too whilst I worked on the oil cooler.


Click image to enlarge


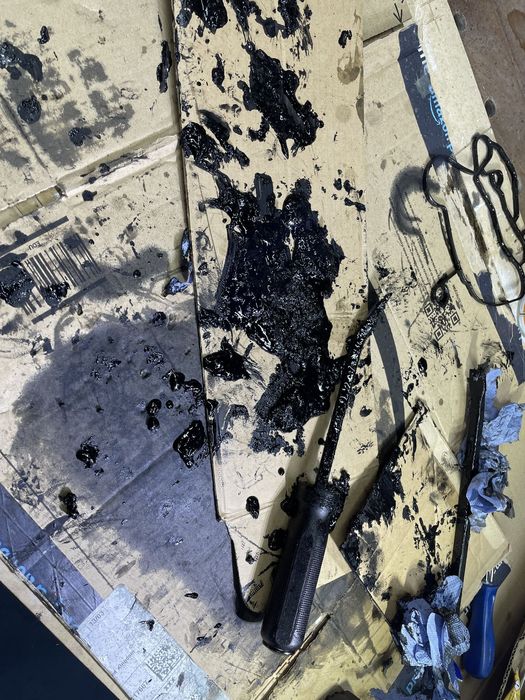
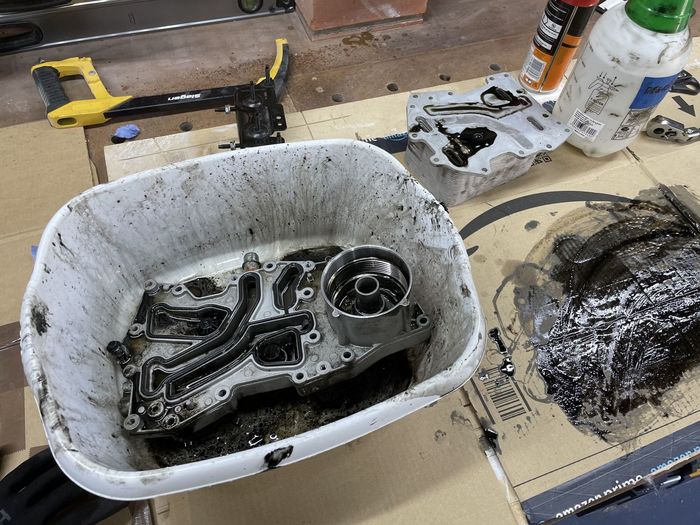
I separated and cleaned the oil cooler in a washing up bowl just like I think the pros do in nascar. Laughing


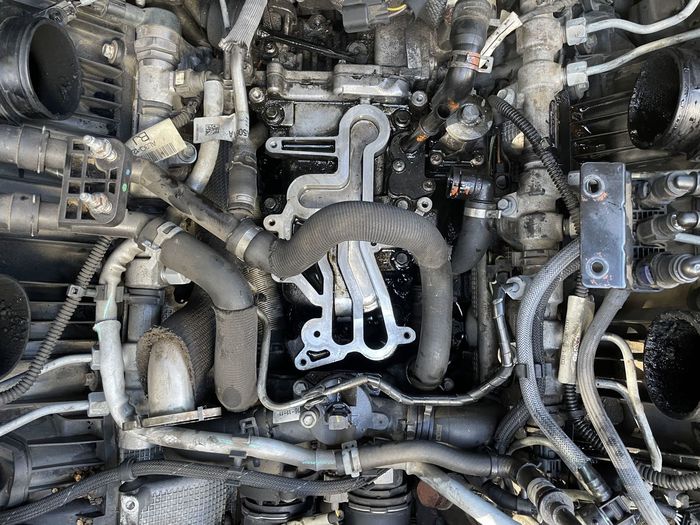
I didn't need to take off this hidden bolt at the back of the engine that the guide said to remove, I managed to get the oil cooler in and out without needing to.


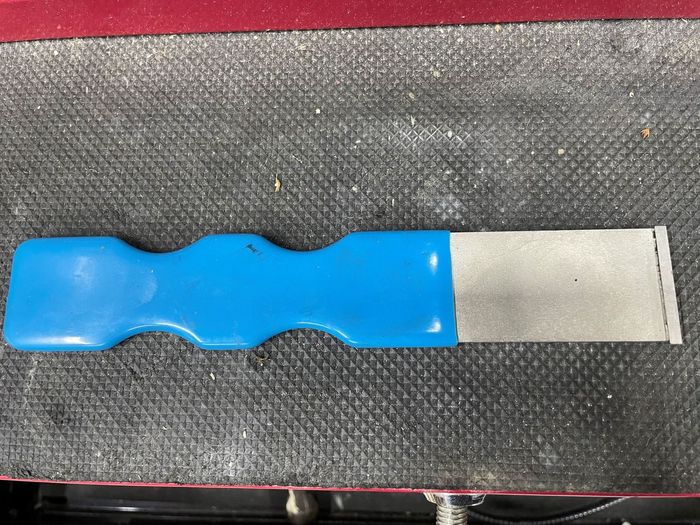
And I used an awesome precision ground carbide scraper that I picked up recently to clean all the mating surfaces. I have been using steel gasket scraper my whole life, I should have got one of these bad boys years ago. So easy.


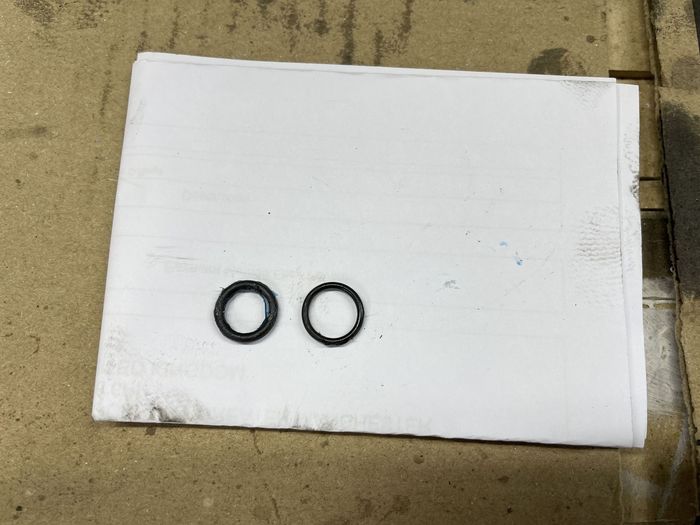
I changed the O rings to the forum favourite Viton ones. The original on the right of this photo, the new Viton BS611 1.78mm Section 8.73mm Bore, is on the left.

I use hylomar blue on all the gaskets, I love that stuff.


I then put it all back together bar the broken water pipe thats on order. Fingers crossed that has the oil leak fixed.


Do-able in a day and quite satisfying really. Cool 2012 4.4 TDV8 Westminster

Last edited by KristoffL322 on 3rd Apr 2023 4:11pm. Edited 2 times in total

Post #660969 3rd Apr 2023 11:50am
View user's profile Send private message View poster's gallery Reply with quote
GraemeS


Member Since: 06 Mar 2015
Location: Wagga area
Posts: 2461

Australia 2012 Range Rover Autobiography TDV8 Bournville

Presumably your new gaskets are the later versions so there's just a little hope that they won't need replacing again, especially with the sealant. The new gaskets weren't available when I did mine, also fitted with sealant hoping to make them last longer. Mine's EGR was disabled several months ago so hopefully without hot exhaust gases the oil cooler won't get so hot.

Post #660970 3rd Apr 2023 12:15pm
View user's profile Send private message View poster's gallery Reply with quote
KristoffL322


Member Since: 20 Jun 2022
Location: North West
Posts: 27

United Kingdom 2012 Range Rover Westminster 4.4 V8 Orkney Grey

Yeah I bought the new style gaskets, so fingers crossed.

With regards to sealant I notice some people say use nothing on them, some say just use oil, and others say use a gasket dressing of some sort. I'm a big fan of hylomar blue for gaskets, it's the best non-setting dressing there is IMO, so I went with it. Just a light smear nothing too crazy.

When you disabled the EGR did it throw up any codes? How was it disabled, just a simple blanking plate? 2012 4.4 TDV8 Westminster

Post #660973 3rd Apr 2023 12:23pm
View user's profile Send private message View poster's gallery Reply with quote
GraemeS


Member Since: 06 Mar 2015
Location: Wagga area
Posts: 2461

Australia 2012 Range Rover Autobiography TDV8 Bournville

ECM was remapped to stop the EGR opening in normal operation. I intend fitting a blanking plate.

Post #660988 3rd Apr 2023 8:33pm
View user's profile Send private message View poster's gallery Reply with quote
KristoffL322


Member Since: 20 Jun 2022
Location: North West
Posts: 27

United Kingdom 2012 Range Rover Westminster 4.4 V8 Orkney Grey

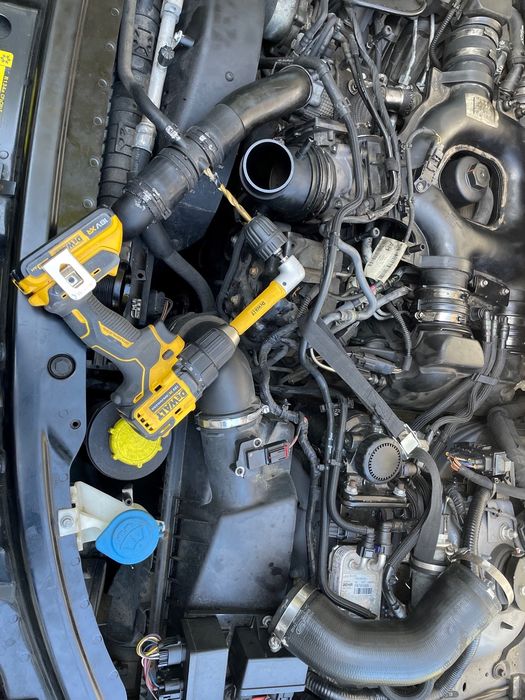
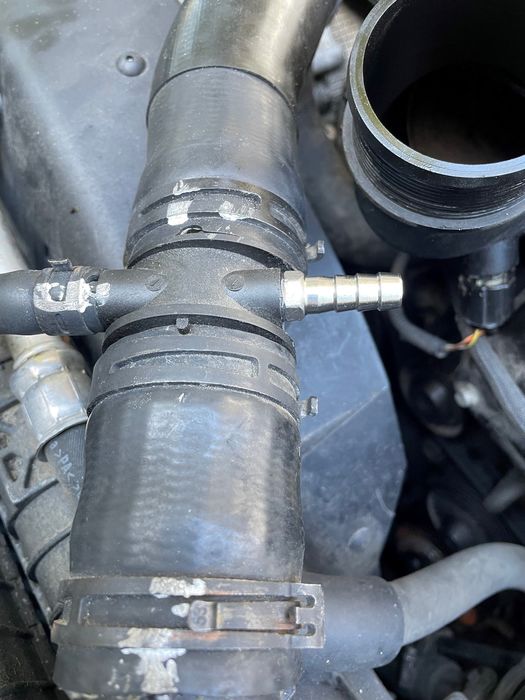
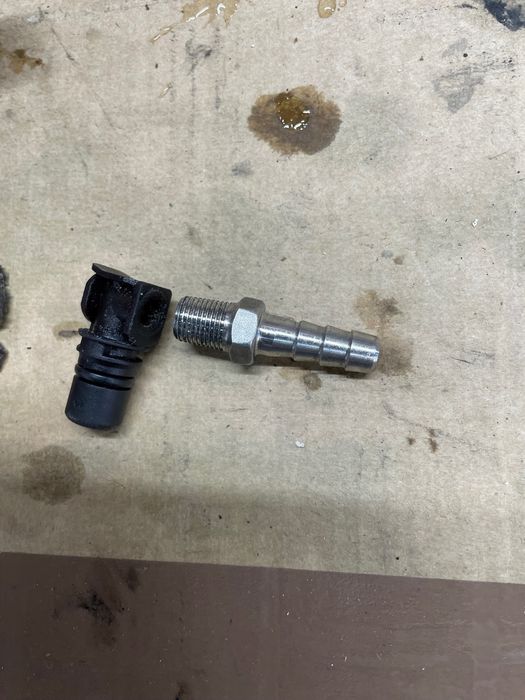
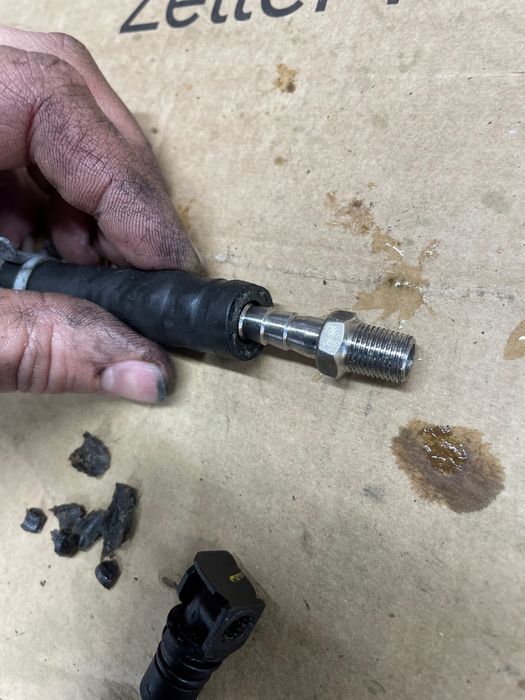
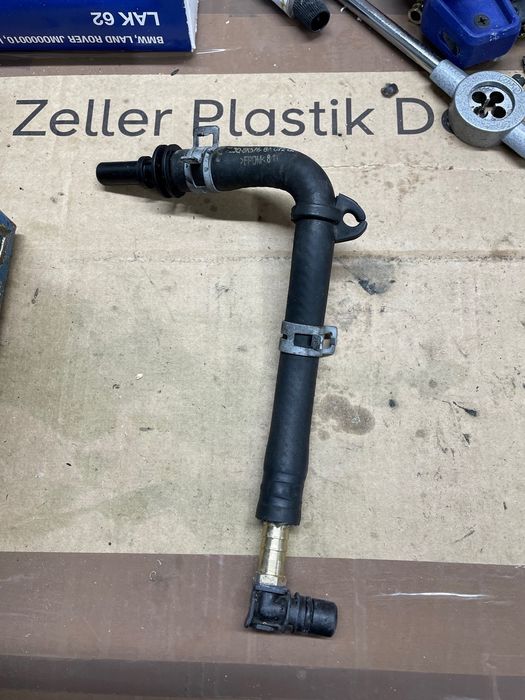
So today I attempted to fix the broken water pipe by fitting a threaded barb fitting, with mixed results.

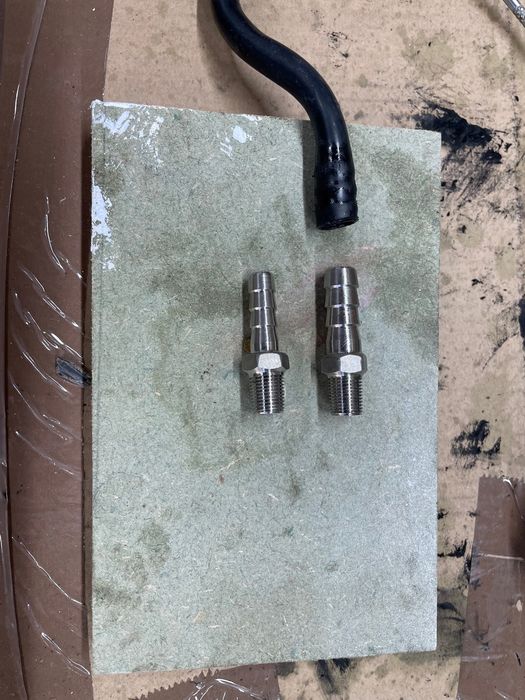
I ordered two sizes, 1/8 bsp to 8mm, and 1/8bsp to 10mm. The pipe was far too loose on the 8mm fitting so I went with the 10mm barb.


Click image to enlarge


First I prepared the snapped end with a hacksaw blade and a file.


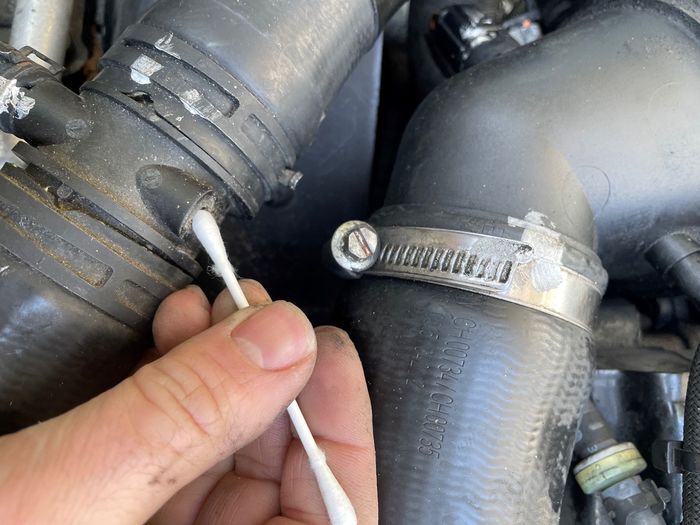
I then drilled the hole out and cleaned it...


Click image to enlarge


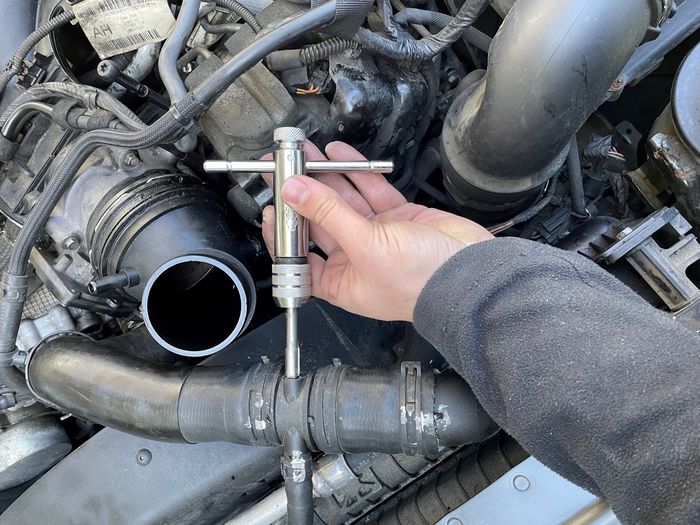
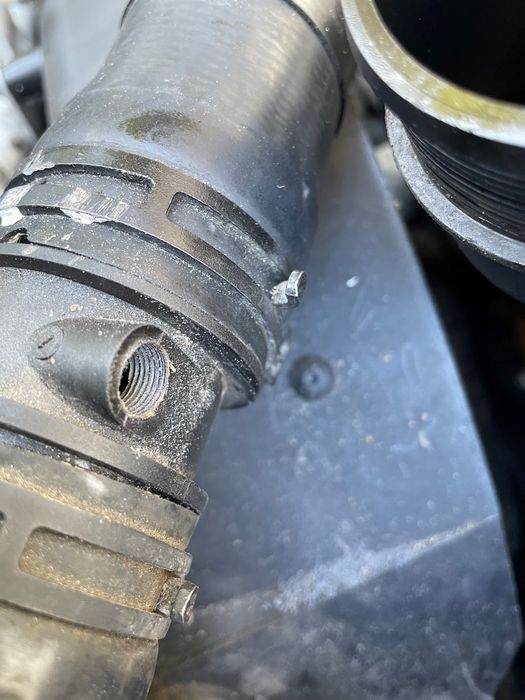
I then tapped it with the 1/8 bsp thread..


Click image to enlarge


I put some 2 part epoxy on the threads and screwed it in...

Click image to enlarge


I needed to heat the pipe a bit to get it to fit on, but I was quite happy with the outcome. So far so good.


Click image to enlarge


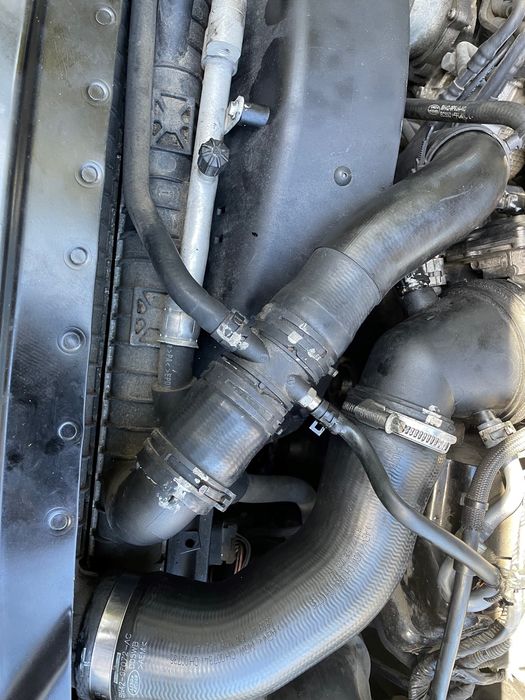
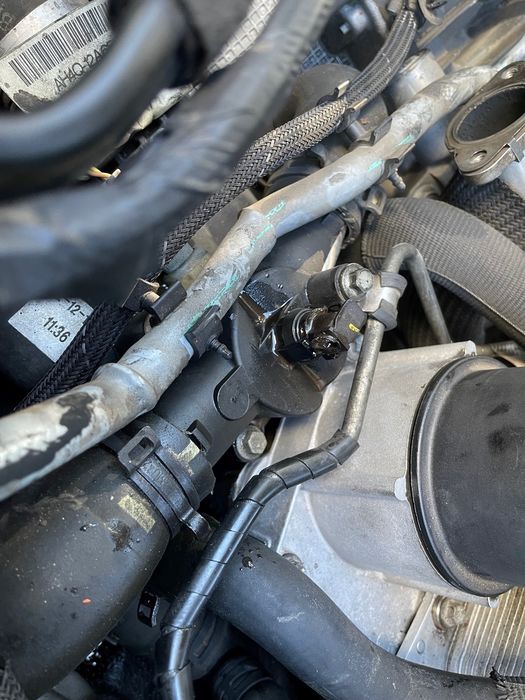
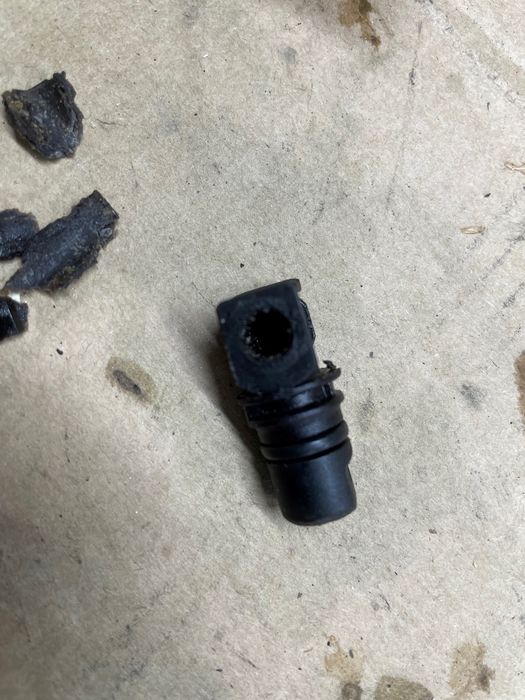
Unfortunately, my happiness was short-lived as when I started up the car, coolant began leaking out from somewhere under the inlet manifold. With a sigh, I spent the next hour removing the inlet manifold and I found another pipe that had become brittle and broken in exactly the same way.

What a stupid design. I didn't even remove this ftting as part of the oil cooler job. Just the slightest stress on it must have caused it to snap.


Click image to enlarge


This fitting is smaller than the other and there is no way I could get a 1/8 threaded barb fitting in there. The pipe that connects to the fitting is also quite big in diameter, I’d say it would need at least a 10mm barb for a snug fit with a clamp.

Click image to enlarge


Click image to enlarge


Click image to enlarge


So that would man I’d need a 6mm male thread to a 10mm barb fitting, and I can’t find one of those anywhere. I guess they don’t exist? The biggest I can find is M6 thread to 8mm barb. Theres no m6 thread to 10mm barb.

Does anyone know what part number the broken fitting is, and whether I can buy a replacement? I guess that’s my best option if it is available.

Or does anyone have any other ideas of how to fix this? I was thinkling maybe I could cut the top off the fitting and epoxy a 90 degree metal barb fitting in there? 2012 4.4 TDV8 Westminster

Post #661327 7th Apr 2023 6:40pm
View user's profile Send private message View poster's gallery Reply with quote
JayGee


Member Since: 27 Jul 2021
Location: London
Posts: 3173

United Kingdom 2012 Range Rover Vogue 4.4 V8 Orkney Grey

Click image to enlarge

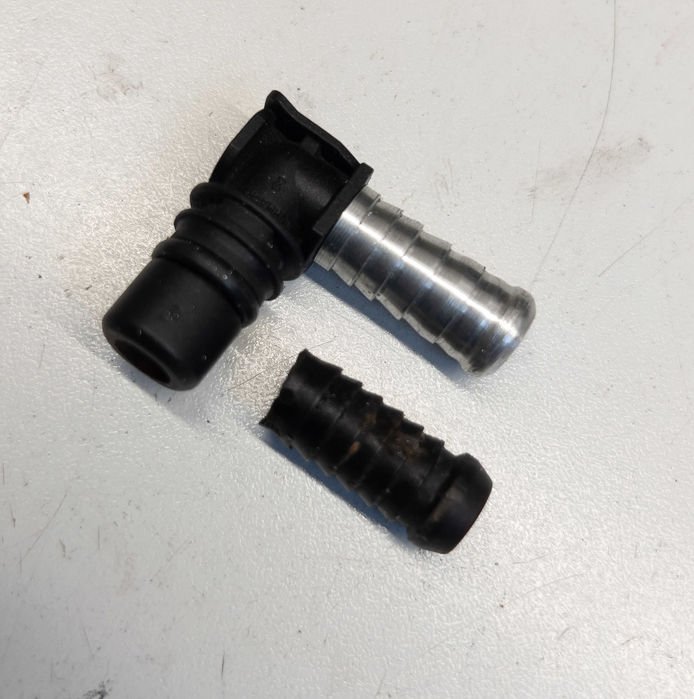
Made mine on my lathe. Just an interference fit secured with rubber impregnated cyanoacrylate. 2012 TDV8 Vogue (L322)

Post #661329 7th Apr 2023 9:07pm
View user's profile Send private message View poster's gallery Reply with quote
KristoffL322


Member Since: 20 Jun 2022
Location: North West
Posts: 27

United Kingdom 2012 Range Rover Westminster 4.4 V8 Orkney Grey

That’s a nice solution. I don't own a lathe unfortunately.

I have been and had another look at the fitting that has snapped. I've cleaned it up and a 6.5mm drill bit is a snug fit in it, so I think therefore I can tap it to an M7 thread.

Now I cant buy an M7 thread to 10mm barb fitting. But I can buy an M8 thread to 10mm barb fitting.


Click image to enlarge


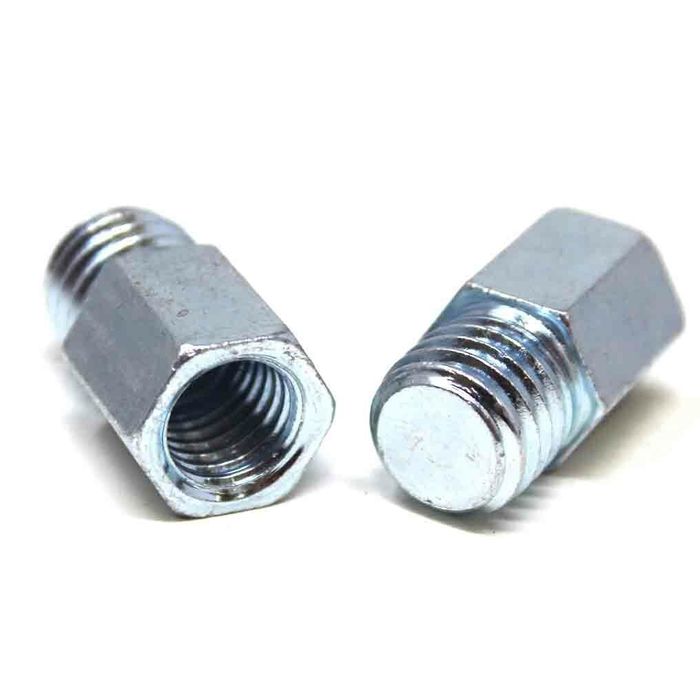
I was thinking that I could buy one of these M10 male to M8 female adapters and re thread the m10 end down to M7. I 've done this before using my drill press and a dremel, and then an M7 die. Its an approach that wouldn't pass for machining, but it works.


Click image to enlarge


I would then have M7 Male for winding into the fitting, an M8 female for my new barb fitting male end, and a 10mm barb for the water pipe.


I’m curious about the rubber impregnated cyanoacrylate you used. I was unsure what glue to use on my application. I used araldite but that is only rated in demanding applications to 80 deg C. I understand that in reality you are fine up to and maybe even a bit beyond 100 deg c, but I was wondering about using JB water weld for this one, as its rated to a higher temp and works on PVC and metal?

Is rubber impregnated cyanoacrylate basically super glue with some stuff added? What brand name does it trade under so I could buy some? 2012 4.4 TDV8 Westminster

Post #661331 7th Apr 2023 9:28pm
View user's profile Send private message View poster's gallery Reply with quote
Haylands


Member Since: 04 Mar 2014
Location: East Yorkshire
Posts: 8163

England 2014 Range Rover Autobiography SDV8 Loire Blue

JayGee wrote:
Click image to enlarge

Made mine on my lathe. Just an interference fit secured with rubber impregnated cyanoacrylate.


I note you copied the original but I wonder why they made it with the barbs the wrong way round...!!! Or am I cracking up... Pete

__________________________________________________
2014 L405 Autobiography SDV8 4.4 Loire Blue Ebony interior
2011 L322 Vogue SE 4.4 TDV8 Baltic Blue. Parchment over Navy Interior. Sold
2012 L322 Autobiography 5.0 Supercharged Ipanema Sand, Jet Interior. Sold
2002 L322 Vogue 4.4 V8 Epson Green, Ivory over Aspen Interior (Fatty Offroader) Sold
-Click for Project Fatty off roader-

Post #661336 8th Apr 2023 8:27am
View user's profile Send private message View poster's gallery Reply with quote
JayGee


Member Since: 27 Jul 2021
Location: London
Posts: 3173

United Kingdom 2012 Range Rover Vogue 4.4 V8 Orkney Grey

Not only did they make the barbs the wrong way round but they made it so weak it would break with the slightest touch 2012 TDV8 Vogue (L322)

Post #661339 8th Apr 2023 9:09am
View user's profile Send private message View poster's gallery Reply with quote
KristoffL322


Member Since: 20 Jun 2022
Location: North West
Posts: 27

United Kingdom 2012 Range Rover Westminster 4.4 V8 Orkney Grey

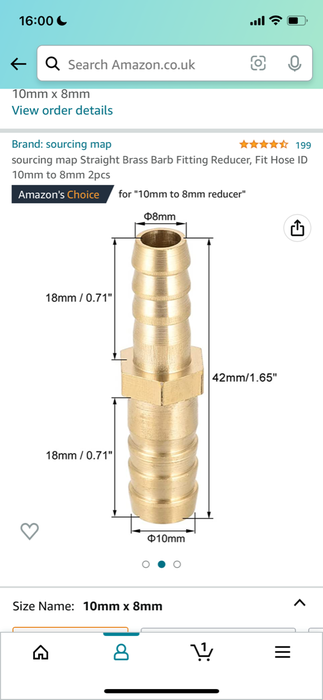
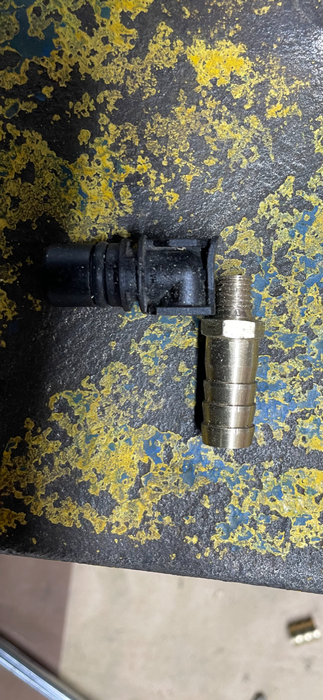
I had a good think about how to tackle this, as I don’t own a lathe, and its hard to find some of these small fittings in stock, from sellers that wouldn’t have me waiting weeks for delivery.

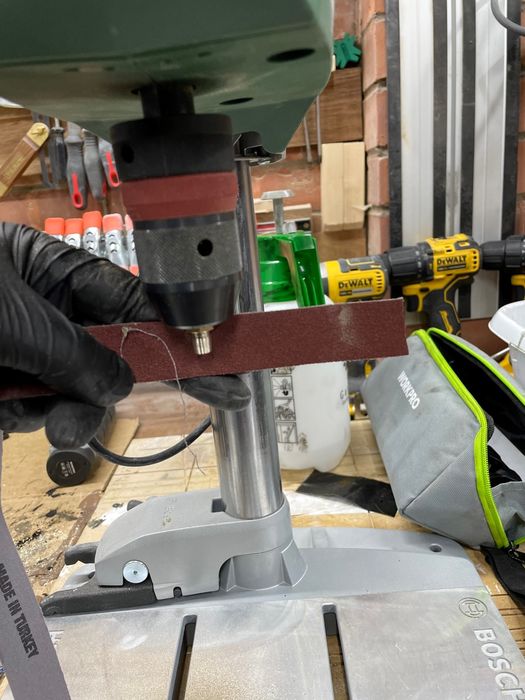
I managed to get a barb fitting that was 8mm on one end and 10mm on the other.


Click image to enlarge


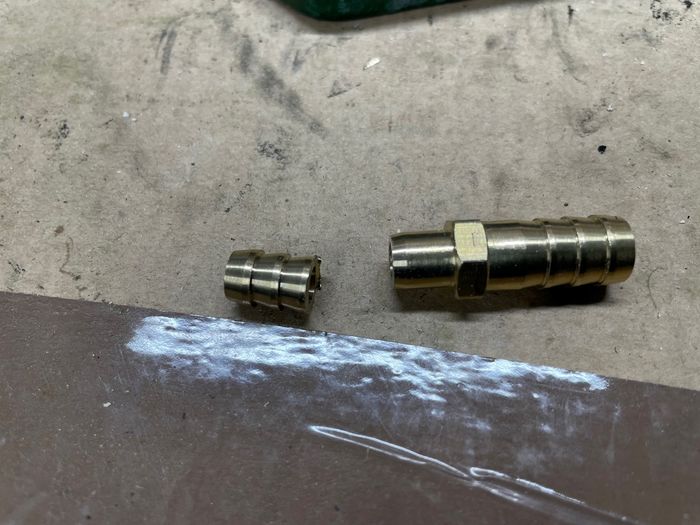
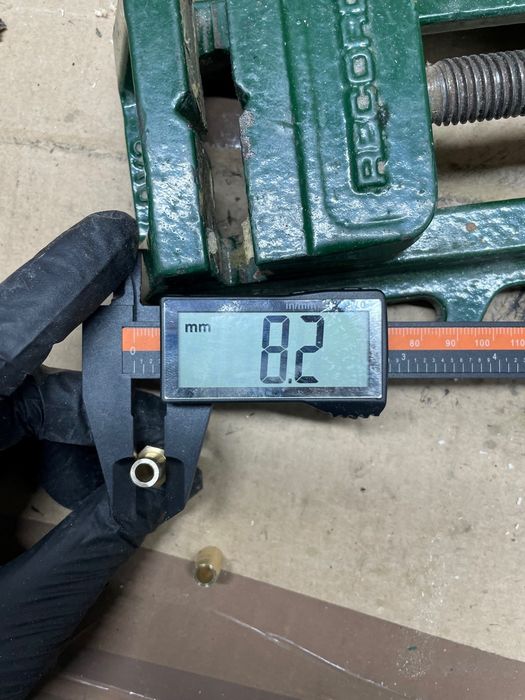
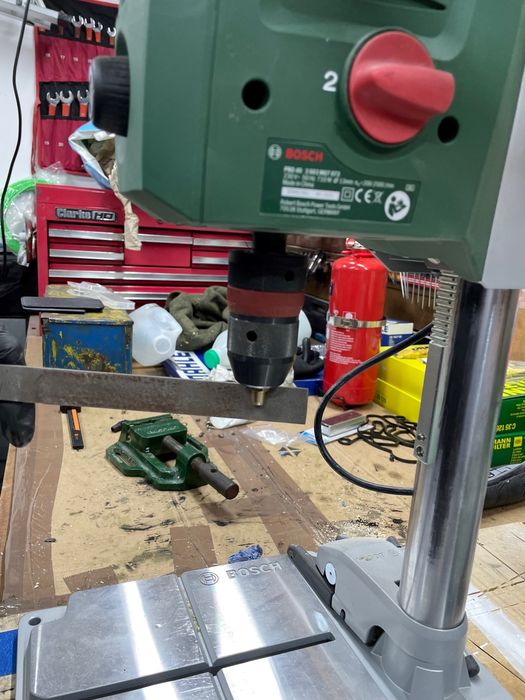
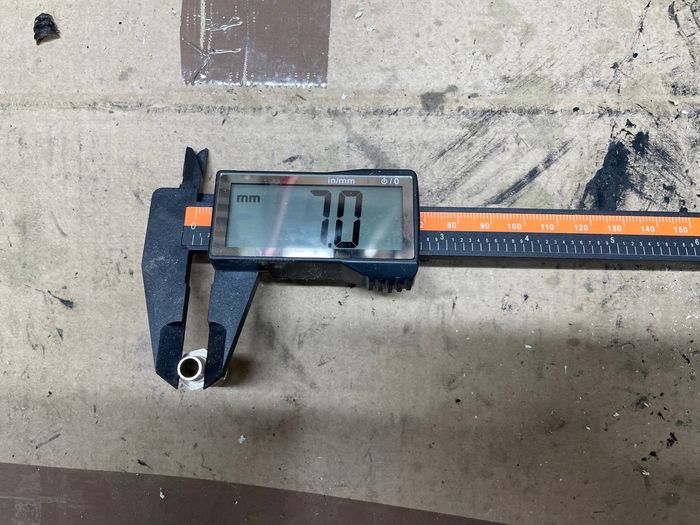
I cut the barb down and put it in the vertical lathe Very Happy with a file and some abrasive and turned it down to 7mm. You could obviously do this with a hand drill if that’s all you have.


Click image to enlarge


Click image to enlarge


Click image to enlarge


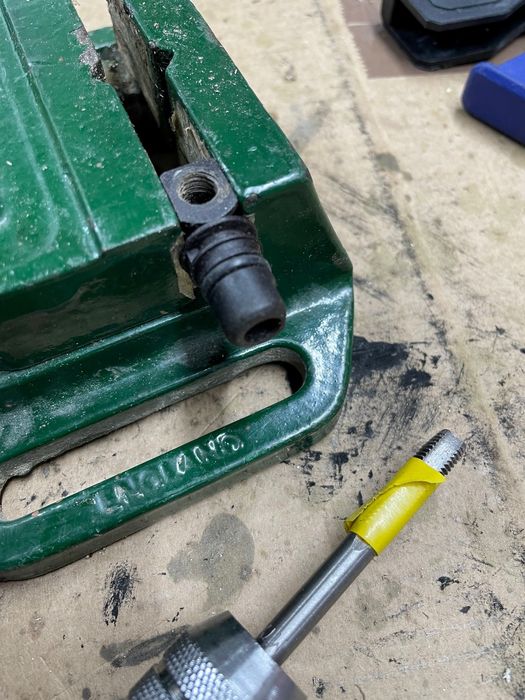
I then used an M7 die to cut some threads in it. I used an M7 tap on the broken fitting, and then JB welded the threads and wound it in.


Click image to enlarge


Click image to enlarge


Click image to enlarge


Seems to good to me. Time to put the car back together again and find out. 2012 4.4 TDV8 Westminster

Post #661627 11th Apr 2023 7:47pm
View user's profile Send private message View poster's gallery Reply with quote
KristoffL322


Member Since: 20 Jun 2022
Location: North West
Posts: 27

United Kingdom 2012 Range Rover Westminster 4.4 V8 Orkney Grey

Happy to report that the cars all back together and running fine now with these fixes and the new oil cooler gaskets.

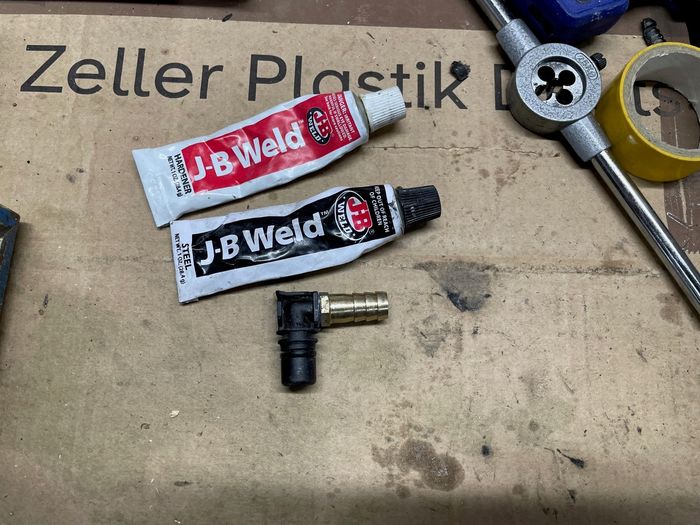
For anyone reading this thread in the future, JB weld original is the epoxy to use on these water fittings. I used a spare hose and a couple of broken plastic fittings off the car to test the various epoxies and glues. I made some cuts in the pipe and tried to glue it back together.

I tried JB weld original, JB water weld, JB plastic weld, araldite original, araldite rapid, araldite high heat and normal super glue.

I presume the water hoses and connectors are some type of pvc or polypropylene and the JB weld original was far and away the best. I literally could not sperate the pipe where I had used it, it was stronger than before I cut it.

The araldite pulled away worryingly easily, like it wasn’t attached to the pipe well at all, I could unpick it with my finger nail. I used araldite on a threaded fitting as a test and it seems ok on the plastic fitting itself, but it was useless on the semi flexible water pipes. JB weld is far superior.

That info may help someone in the future when doing this job I guess 2012 4.4 TDV8 Westminster

Post #662011 16th Apr 2023 10:58am
View user's profile Send private message View poster's gallery Reply with quote
pcourtney


Member Since: 14 Jan 2020
Location: Stansted
Posts: 803

England 2011 Range Rover Vogue 4.4 V8 Sumatra Black

smashing job, well done m8, something I really need to do soon as well - and thanks for the tips too Smile

ref : I had some issues getting the plastic torx fittings off that hold the engine cover in place. Circled red in this photo. Someone in the past had cranked these down when they should be almost finger tight. The plastic shafts simply twist when you apply torque and then they snap.
I removed the throttle body at this stage to give me more room get some knipex cobras in on the base of the plastic shaft and managed to get them off without snapping them.


You did better than me, I broke one of these stupid torx fittings simply by removing the engine cover, the most bizarre design ever IMHO

Post #662018 16th Apr 2023 12:29pm
View user's profile Send private message View poster's gallery Reply with quote
Merchy


Member Since: 14 Feb 2021
Location: North Wales
Posts: 1174

United Kingdom 2006 Range Rover Vogue Td6 Zermatt Silver

Cracking work there Sir, nice work on the pre-testing as well, always a good idea Bow down Thumbs Up

Post #662019 16th Apr 2023 12:37pm
View user's profile Send private message View poster's gallery Post Reply
Post Reply  Back to top
Page 1 of 1
All times are GMT

Jump to  
Previous Topic | Next Topic >
Posting Rules
You cannot post new topics in this forum
You cannot reply to topics in this forum
You cannot edit your posts in this forum
You cannot delete your posts in this forum
You cannot vote in polls in this forum


Site Copyright © 2006-2024 Futuranet Ltd & Martin Lewis
fullfatrr.com RSS Feed - All Forums


Switch to Mobile site