Advertise on fullfatrr.com »

Home > Maintenance & Mods (L322) > Lower arm replacement
Post Reply  Down to end
Page 1 of 3 123>
Print this entire topic · 
northernmonkeyjones


Member Since: 24 Mar 2012
Location: derby
Posts: 8508

United Kingdom 2016 Range Rover Autobiography SDV8 Santorini Black
Lower arm replacement

So my upper arm ball joints and lower arms turned up today..

Ordered them from Buycarparts.co.uk and for OE lemforder bits. looking at the ones which came off they are stamped, and the replacements are just laser etched with a L in a triangle rather than the owl, however a bit of research on the ZF aftermarket parts finder showed a pic of what had arrived and they were the same, apparently lemforder use both the owl and L in triangles depending on where things were made. The arms were made in turkey so came with an L. The old ones which came off were embossed with the p/n and stamped with the owl.

https://aftermarket.zf.com/go/en/aftermark...inder-app/

http://tecapp-portal.tecalliance.net/apps/...trol%20Arm

Thought I would do a quick how to.

You will need

2 jacks
axle stand
tape measure
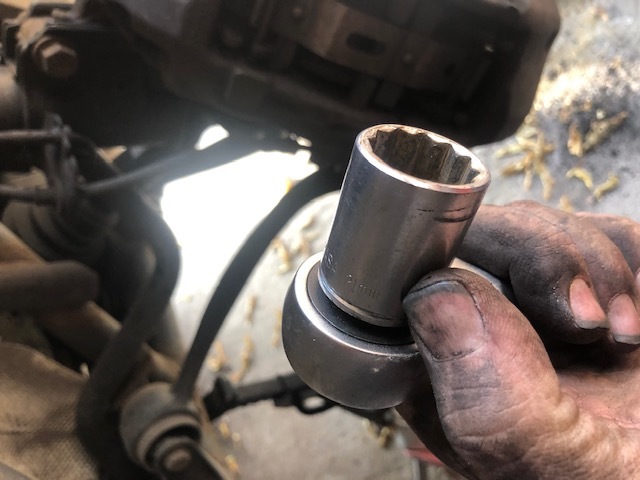
21mm multi point socket
strap
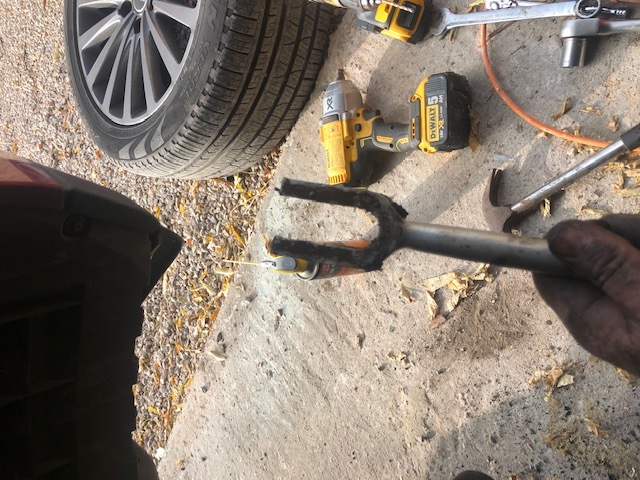
ball joint splitter
21mm spanner
long bar
torque wrench
penetrating oil
2 x 10mm spanners
torx head to remove backplate (can't remember size something like t25)

park the car on level ground and set the suspension to normal height.

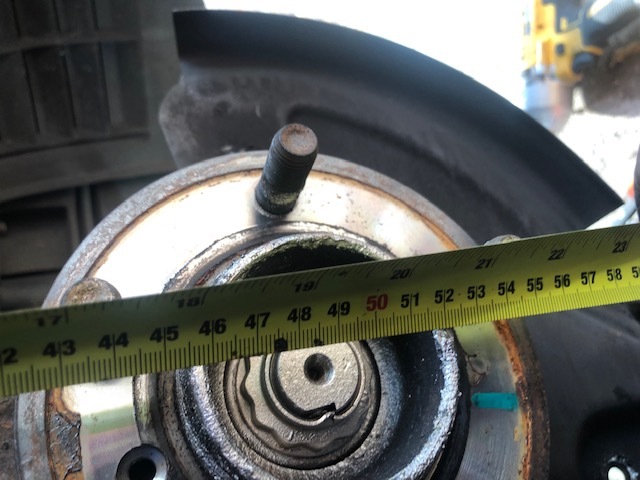
measure the distance from the centre of the hub to the underside of the wheel arch mine was 490mm give or take a mm or 2.

start Jacking up the car and put an axle stand under the subframe to support

remove the wheel (obvs)


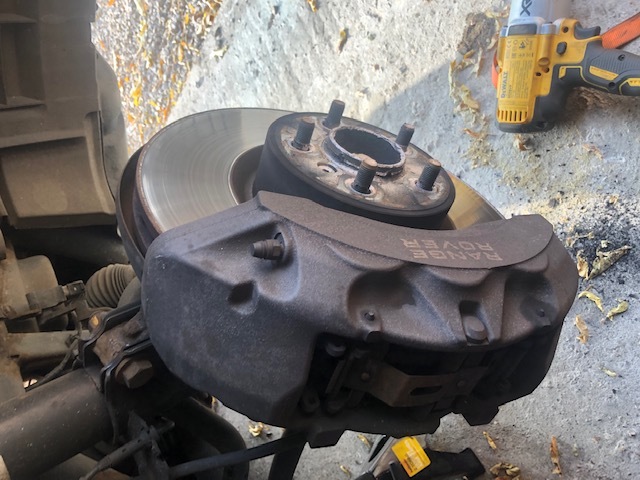
remove the calliper using the 21mm multipoint socket, there is no need to remove the pads from the calliper if the lip on the disc is small enough to pull the caliper and pads over.


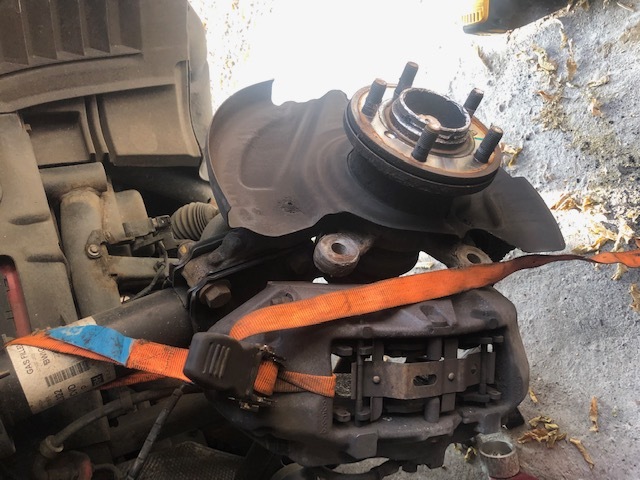
support the calliper off the strut with the strap and remove the disc and the backplate by removing the 3 tore screws, this means the the backplate can be rotated out of the way.


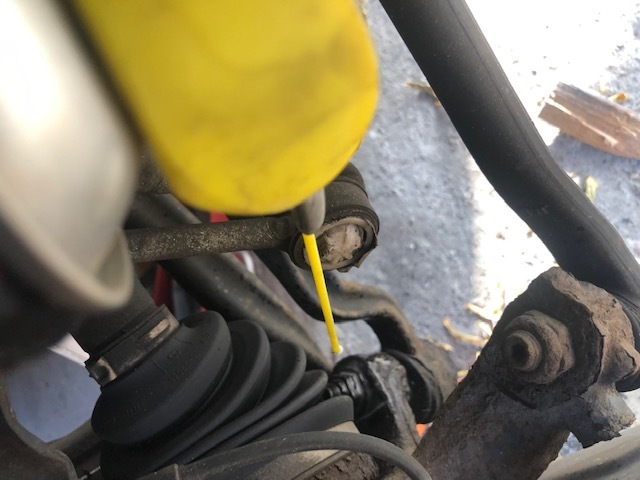
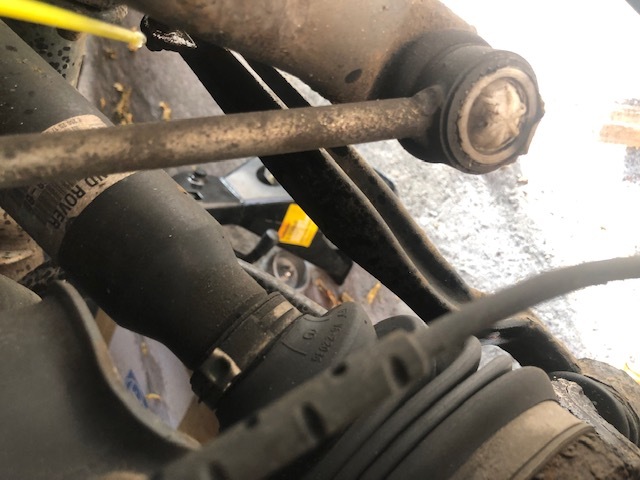
douse the nuts and bolts in penetrating spray


remove the height sensor from the top of the arm


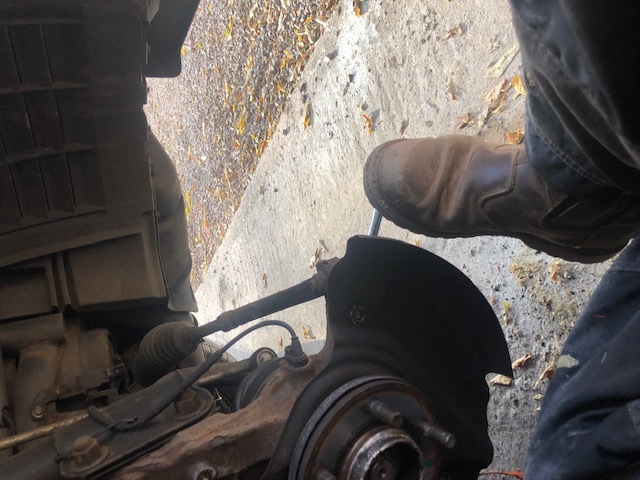
Crack off the 21mm nut on the lower arm ball joint, using foot in this case.......


Wind the nut all the way off with the spanner, then put it back on a couple of turns to prevent it coming apart when you crack the ball joint taper.

put the ball joint forks on the ball joint


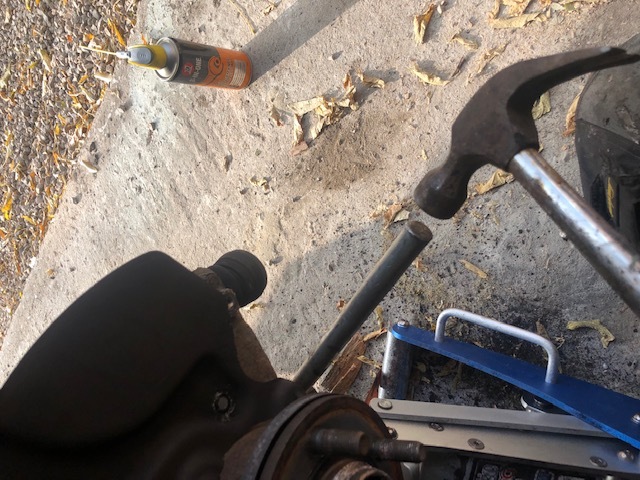
and smash it with a hammer until the taper breaks. (I really needed a bigger hammer but it was at site...)


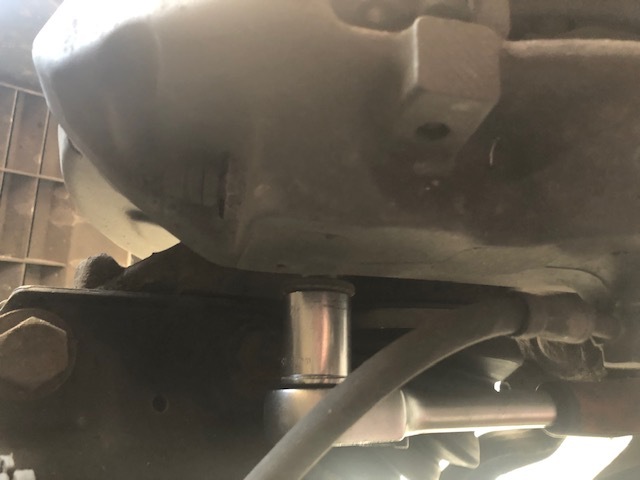
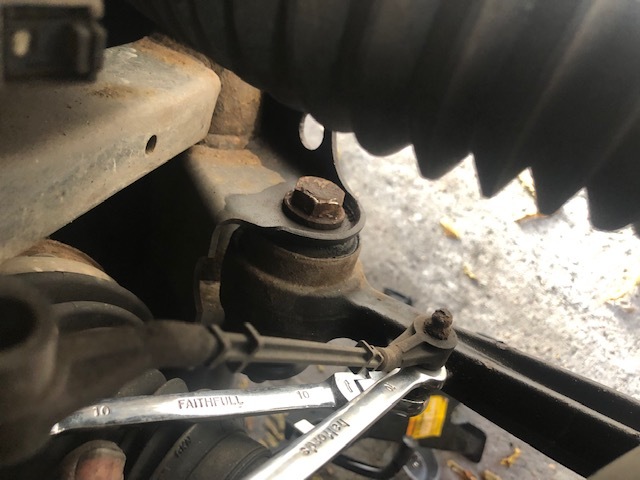
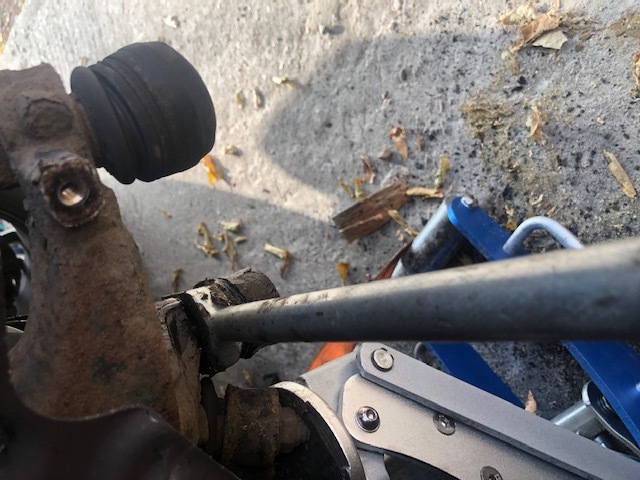
using the long bar and a couple of 22 mm sockets remove the inner bolt.

one of these helped but could be done without


now remove the nut off the outer joint and then remove the whole arm.

Put the inner end of the new arm into position first and slide the bolt through.

Next pop the thread of the ball joint into the taper and put the new nut on the top. Tighten this up to 80NM, in reality you can't get a torque wrench on this so spanner FT.

Put the nut on the inner bolt, the nut goes towards the back how it came off, incase you forgot..... Do this up losely

Now put the other jack under the end of the new arm and jack up the hub so that its centre is 490mm from the underside of the wheel arch, you may need to lower the car body slightly if your jack doesn't have enough reach.


Now the position of the arm is the same as if the car were on the ground or a 4 post lift. Its important that the bolt not be torqued up until the arm is in the right position otherwise it will be under stress in its normal operating position (lots of use of the word position) and will fail quickly.

You can so this with the wheels back on and the car on the ground but it is a PITA.

Torque up the nut and bolt to 165NM and then an extra 90deg.

Remove the jack from under the hub, refit the backplate, disc and calliper, tightening the rear calliper bolts to FT with a big bar. Rave says 265NM, but my torque wrench didn't go that high.......

Refit the wheels nuts to 140NM, and take it for a test. Thumbs Up Thumbs Up Thumbs Up There is nothing that can't be fixed with a hammer😜😜
FFRR 4.4 SDV8 Autobiography Santorini Black.
Fiat 500x 1.4 multiair Lounge 2015
2010 LR D4 Commercial 2.7 TDV6

Last edited by northernmonkeyjones on 17th Nov 2018 6:04pm. Edited 6 times in total

Post #495809 17th Nov 2018 2:49pm
View user's profile Send private message View poster's gallery Reply with quote
stan
Site Moderator


Member Since: 13 Jul 2010
Location: a moderate moderated moderator moderating moderately in moderation
Posts: 35281

United Kingdom 

thank you Mark, put in the wiki.. Thumbs Up

Post #495816 17th Nov 2018 4:10pm
View user's profile Send private message View poster's gallery Reply with quote
northernmonkeyjones


Member Since: 24 Mar 2012
Location: derby
Posts: 8508

United Kingdom 2016 Range Rover Autobiography SDV8 Santorini Black

Thumbs Up

Also did the upper arm ball joint on the NS, but there was no real technique in that other than take off the nut and use a splitter to get the arm off it.

Then it was simply a case of smashing 7 shades of Censored out of it grinding it cutting it and drilling at it until it comes out...

Then refit the new one and use the bolts to pull it back into the knuckle 1/8 turn at a time alternating sides. Thumbs Up There is nothing that can't be fixed with a hammer😜😜
FFRR 4.4 SDV8 Autobiography Santorini Black.
Fiat 500x 1.4 multiair Lounge 2015
2010 LR D4 Commercial 2.7 TDV6

Post #495817 17th Nov 2018 4:18pm
View user's profile Send private message View poster's gallery Reply with quote
Henda


Member Since: 02 Aug 2018
Location: Gateshead
Posts: 282

United Kingdom 2006 Range Rover Vogue TDV8 Zambezi Silver

Good one Thumbs Up

Post #495832 17th Nov 2018 6:20pm
View user's profile Send private message View poster's gallery Reply with quote
northernmonkeyjones


Member Since: 24 Mar 2012
Location: derby
Posts: 8508

United Kingdom 2016 Range Rover Autobiography SDV8 Santorini Black

For info

The old lemforder supplied arms were lemforder/ZF part number 29581 01 which were the embossed and owl stamped ones these superseded to the ones I have which are lemforder/ZF part number 37482 01 and have the L in a triangle and no embossing or owls....... Thumbs Up

So if peeps Is buying Lemforder bits and they come and don’t have the owls on them don’t panic and think you have fake bits like I did. Have a look at the linky above and there are detailed pics of the parts and what they should look like Thumbs Up There is nothing that can't be fixed with a hammer😜😜
FFRR 4.4 SDV8 Autobiography Santorini Black.
Fiat 500x 1.4 multiair Lounge 2015
2010 LR D4 Commercial 2.7 TDV6

Post #495834 17th Nov 2018 6:39pm
View user's profile Send private message View poster's gallery Reply with quote
Bazzer79


Member Since: 26 Apr 2016
Location: Thames Ditton, Surrey
Posts: 43

United Kingdom 2007 Range Rover Supercharged 4.2 SC V8 Barolo Black

I did this job at the weekend, but I followed another how to guide on you tube. The guide video didn't have the step of measuring the hub to underside of wheelarch and setting the suspension at the height again before tightening the bolt fixing the suspension arm to the subframe.

Is this absolutely necessary? If it is how urgently should I do this - can it wait until the weekend. I'll only be doing a few miles this week, say less than 100.

Post #507298 4th Mar 2019 12:58pm
View user's profile Send private message View poster's gallery Reply with quote
Joe90


Member Since: 29 Apr 2010
Location: Hampshire
Posts: 6408

England 

It is important, otherwise the inner bush will be under unnecessary stress "at rest" and at play !

I think my LH one must have been tightened " off the ground" as the bush was completely loose in the arm hole (and failed MOT because of it!) .
Experience is the only genuine knowledge, but as time passes, I have forgotten more than I can remember Wink
Volvo V70 P2 2006 2.4 Petrol 170bhp Estate SE
MG Midget Mk1 1962

Previous: L322 Range Rover TDV8 3.6 2008; L322 Range Rover TD6 3.0 2002; P38A Range Rover V8 1999

Post #507320 4th Mar 2019 3:17pm
View user's profile Send private message View poster's gallery Reply with quote
northernmonkeyjones


Member Since: 24 Mar 2012
Location: derby
Posts: 8508

United Kingdom 2016 Range Rover Autobiography SDV8 Santorini Black

Super important to either torque up on a 4 post lift or set the hub in the right position with a jack. As Joe90 says the bush will be twisted when the car is on the ground if you torqued it with the hub hanging at the end of the suspension travel. There is nothing that can't be fixed with a hammer😜😜
FFRR 4.4 SDV8 Autobiography Santorini Black.
Fiat 500x 1.4 multiair Lounge 2015
2010 LR D4 Commercial 2.7 TDV6

Post #507350 4th Mar 2019 7:30pm
View user's profile Send private message View poster's gallery Reply with quote
bgennette


Member Since: 13 Jan 2013
Location: Newcastle
Posts: 74

Australia 2003 Range Rover HSE Td6 Java Black
Some more information on actually doing it

I've just done the Compression links. And there are several extra, annoying things that need to be known about to make the job easy (or very hard if you are not prepared).

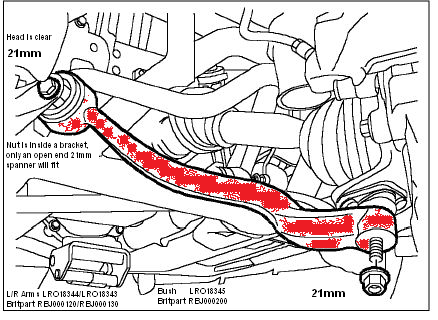
L322 Front Lower Control Arm aka Compression Link
This attaches underneath the wheel hub pivot bracket, rising to the rear and inwards to a bracket on the sub frame.


Arms Left LRO18344 Right LRO18343 Alternate Britpart Left RBJ000130 Right RBJ000120
Bush LR018345 Alternate Britpart RBJ000200
Nut RYH501100

Gotchas -
* The ball joint and the bushing bolt use the same nuts. The nuts are a special self locking type. If the threads appear to be damaged they must be replaced.
* The bolts are metricated imperial. The actual size is somewhere between M12 & M14 so their heads are 21mm across the flats (which is a smig under 7/16" whitworth and something like 13/16" SAE)
* The bolts and the ball joint taper fit will be very tight. Soaking in penetrating oil (WD40, RP7, etc) twice a day for 3 or more days will help a LOT.
* Get the vehicle sub frame onto 2 axle stands and remove the front wheels. You will be working UNDER the wheel hubs, so it is crucial that the vehicle is raised and properly supported !
* Start with the ball joints. The ball joint nut has ample clearance for a socket driver. Unscrew to less than finger tight before breaking the taper grip. Do NOT use a wedge type separator as it will rip the rubber grease retainer and ruin the ball joint.
* Lots of tension from a clam shell or puller type ball joint separator, a longish drift bar (250mm + 125mm socket extensions) and a few whacks from a 4lb hammer (fbh) will be needed to 'break' the taper grip.
* The Bushing bolt heads have ample clearance for a socket driver. But on one side the air conditioner condensate drain cover blocks its withdrawal, some of the plastic inner guard needs to be cut away (it's only polyethylene, so scissors will do it). Cut this plastic away before you start undoing the bolt. You will need 120mm clearance from the mounting bracket to pull the bolt out easily.
* At the nut end only an open ended spanner can gain access. You will need a socket and a 'breaker' bar to start undoing the very tight bolt.
* Once loosened the bolt will be easy to pull out, and so will the arm - be careful !
* Change the bushings with the shop press -
# The bushing should have an arrow moulded into the rubber that needs to be aligned with the ridge formed into the outer side of each arm. If there is no arrow use an old bush to see how the new bush should be set. Use a felt pen or black pencil to draw a line on the outside of the new bushings to aid in correct fitting. Also draw a line 13.5mm in from each end to show how far the bushing needs to be pressed into the arm.
# Examine the bushing holes in the arms. Clean out any corrosion. If the edges were damaged during press out, replace badly damaged arms. For small nicks or dings grind out with a dremel mini belt sander. Finish all cleaning/grinding with a light hand sanding up and down, across the holes (do NOT leave sanding lines going around the hole).
* To refit hold the arms temporarily in place with some string through the pivot bolt holes, then fit the ball joint end first.
* During refitting the special nut will grip and then spin the ball before the taper joint binds against the link - you will need a large, thick (16mm) nut to use as a spacer to set the ball taper back into the Compression Link, back off, remove the spacer then tighten the locking nut. Torque this while you are still underneath the wheel hub as it will be difficult to access after the wheel is refitted.
* The wheel hub will move out of alignment while the link arm is off. You will need a big, strong assistant or a small block-and-tackle or a come-along to pull it back into position to remove the string and fit the bolt into place. Do NOT push the bolt past the forward bracket to leave enough space to fit the nut
* The link arm pivot bolts should not be tightened until the axle height is set correctly. Only finger tighten initially. Do not use thread locker glue, the special nuts will lock in place on their own.
* Fit the wheels and remove stands, chocks, etc. Start the engine and drive back and forward to settle the suspension. Running the compressor too much will flattern the battery quickly, so keep the engine running until the correct height is set.
* Place some insulation tape on the wheel centres and wheel arches; mark the measuring points clearly. For each wheel have a helper in the drivers seat lower the car to access height, then set it to rise while you monitor the axle centre to wheel arch distance on one side. The suspension computer will not change height if any door is open or any wheel is suspended off the ground (but it will flash the lights as if it was changing height !!!)
* Tell the helper to switch off the engine when 493mm is hit (if calibrated correctly this will be 'normal' height). Torque that side, then repeat for the other. If rising to 'normal' height is not enough, select low range, then raise towards off-road height.
* Re-check the axle heights after 100km. If needed, re-calibrate the air suspension and/or get a full wheel alignment.

Tools (in order of use) -
Penetrating oil
[Battery charger]
Wheel chocks
Wheel brace
Jack
Axle stands (2)
Scissors
21mm socket + driver/breaker bar
Ball joint seperater
370mm drift bar
Hammer (fbh)
21mm open end spanner
[felt pen & ruler]
[25 tonne shop press plus large hardened cups]
[Dremel]
16mm thick spacer nut to set the taper grip
Torque wrench
Block-and-tackle
Insulation tape
Tape measure

Torque values -
Ball joint - 21mm socket - 60ft/lb 80Nm
Bushing Bolt - 21mm socket - stage 1 110 ft/lb 150Nm, stage 2 190ft/lb 260Nm, stage 3 90° more

If the compression link bush is worn out, chances are the transverse link arm bushing is also worn. The transverse link arm attaches from the wheel hub pivot bracket, running under the drive axle to a bracket on the sub frame. The front height sensors attach to the upper edge.
This bushing is only 2/3 the size of the compression link bushing, with good access all round. Except for undoing the fragile height sensor link, replacement is very similar, with the same torque values.

Transverse Links
Arm LRO500920 Alternate Britpart RBJ500920
Bush RBX000070 Alternate Britpart RBJ000070
Nut RYH501100 2003 TD6, EGR delete, vortex crankcase breather update, performance chip, UHF 2 way, Android head unit, crash camera on dash, always-on rear view camera to mirror screen, LED DRL`s, Electric trailer brake controller. FSR replaced. Pulling 3T caravan all about Australia

Post #516030 21st May 2019 2:09am
View user's profile Send private message View poster's gallery Reply with quote
MikeO


Member Since: 02 Jan 2018
Location: The Cotswolds
Posts: 517

Scotland 2009 Range Rover Vogue TDV8 Buckingham Blue

I did my front lower arms today and Censored me it was hard work. A couple of observations others might find useful.

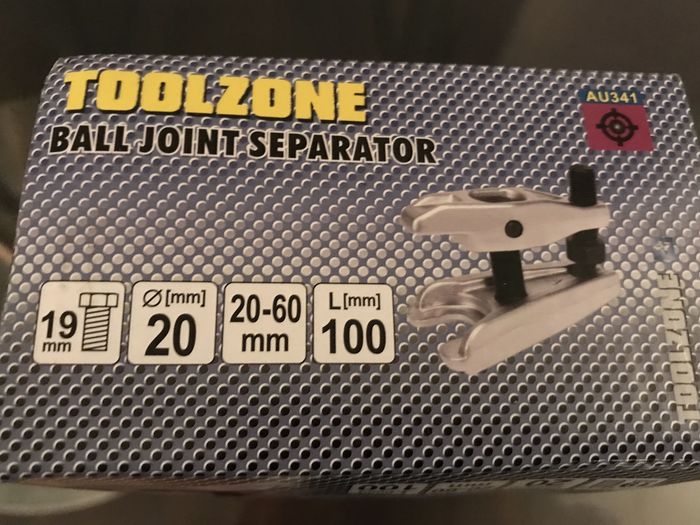
If you're using a pickle fork splitter it needs to be around 20mm, maybe a little bigger. I ordered a 19mm one and when it arrived I didn't think it looked big enough. So I then ordered a 35mm one which was too big... The 19mm one did the job - just.

You need a decent 21mm spanner - you can't get a socket on the top of the balljoint. It's also useful for the nut on the subframe when tightening the bolt.

I also needed a 22mm spanner as the arms I ordered had 22mm nuts on the balljoints instead of 21mm. Worth checking in advance as I had neither a 21mm nor 22mm spanner in my toolbox. 2016 Skoda Octavia VRS Estate
<gone>2009 FF Vogue TDV8 Buckingham Blue</gone>
<gone>2015 BMW 520D SE (not my favourite car)</gone>
<gone>2009 D3 HSE Galway Green</gone>

Post #530099 5th Oct 2019 3:13pm
View user's profile Send private message View poster's gallery Reply with quote
MikeO


Member Since: 02 Jan 2018
Location: The Cotswolds
Posts: 517

Scotland 2009 Range Rover Vogue TDV8 Buckingham Blue

I neglected to say a big thank you to northernmonkeyjones for the original howto which was extremely helpful. 2016 Skoda Octavia VRS Estate
<gone>2009 FF Vogue TDV8 Buckingham Blue</gone>
<gone>2015 BMW 520D SE (not my favourite car)</gone>
<gone>2009 D3 HSE Galway Green</gone>

Post #530113 5th Oct 2019 6:05pm
View user's profile Send private message View poster's gallery Reply with quote
GGDR


Member Since: 26 Nov 2016
Location: London
Posts: 3542

United Kingdom 2011 Range Rover Vogue SE TDV8 Stornoway Grey

duplicate post Cheers, Greg
- - - - - - - - - - - - - - - - - - - - - - - - - - - - - - - - - - - - - - - - - -
2011 Vogue SE 4.4 with lots of toys in Stornaway


Last edited by GGDR on 5th Oct 2019 8:56pm. Edited 1 time in total

Post #530126 5th Oct 2019 8:54pm
View user's profile Send private message View poster's gallery Reply with quote
GGDR


Member Since: 26 Nov 2016
Location: London
Posts: 3542

United Kingdom 2011 Range Rover Vogue SE TDV8 Stornoway Grey

So I got this ball joint tool as linked I think earlier up in this thread but reading your warning bgennette I'm concerned about damaging the rubber boot.

Noting your comments MikeO I'm glad I have a 20mm size but how did you split your joint without damaging the boot?

 Cheers, Greg
- - - - - - - - - - - - - - - - - - - - - - - - - - - - - - - - - - - - - - - - - -
2011 Vogue SE 4.4 with lots of toys in Stornaway

Post #530127 5th Oct 2019 8:56pm
View user's profile Send private message View poster's gallery Reply with quote
GGDR


Member Since: 26 Nov 2016
Location: London
Posts: 3542

United Kingdom 2011 Range Rover Vogue SE TDV8 Stornoway Grey

MikeO - Or were you changing the ball joint cassette so didn't matter if you damaged the boot?

I'm due to do my arms but the ball joint cassette seems ok. So want to preserve the rubber boot.

. Cheers, Greg
- - - - - - - - - - - - - - - - - - - - - - - - - - - - - - - - - - - - - - - - - -
2011 Vogue SE 4.4 with lots of toys in Stornaway

Post #530129 5th Oct 2019 8:59pm
View user's profile Send private message View poster's gallery Reply with quote
MikeO


Member Since: 02 Jan 2018
Location: The Cotswolds
Posts: 517

Scotland 2009 Range Rover Vogue TDV8 Buckingham Blue

I wasn't concerned about the boot. I trashed it. I also had a similar Toolzone separator but it didn't fit. Probably a smaller size than the one on your picture. I can't imagine it would have been up to the job of the one on the drivers side. It took so much force with the separator I had and a sledge hammer to get it out... 2016 Skoda Octavia VRS Estate
<gone>2009 FF Vogue TDV8 Buckingham Blue</gone>
<gone>2015 BMW 520D SE (not my favourite car)</gone>
<gone>2009 D3 HSE Galway Green</gone>

Post #530130 5th Oct 2019 9:05pm
View user's profile Send private message View poster's gallery Reply with quote
Post Reply  Back to top
Page 1 of 3 123>
All times are GMT

Jump to  
Previous Topic | Next Topic >
Posting Rules
You cannot post new topics in this forum
You cannot reply to topics in this forum
You cannot edit your posts in this forum
You cannot delete your posts in this forum
You cannot vote in polls in this forum


Site Copyright © 2006-2024 Futuranet Ltd & Martin Lewis
fullfatrr.com RSS Feed - All Forums


Switch to Mobile site