Advertise on fullfatrr.com »

Home > My Range Rover > Back with another Supercharged
Post Reply  Down to end
Page 22 of 58 <123 ... 212223 ... 565758>
Print this entire topic · 
dhallworth


Member Since: 10 Oct 2011
Location: Glasgow
Posts: 3059

United Kingdom 2012 Range Rover Autobiography TDV8 Baltic Blue

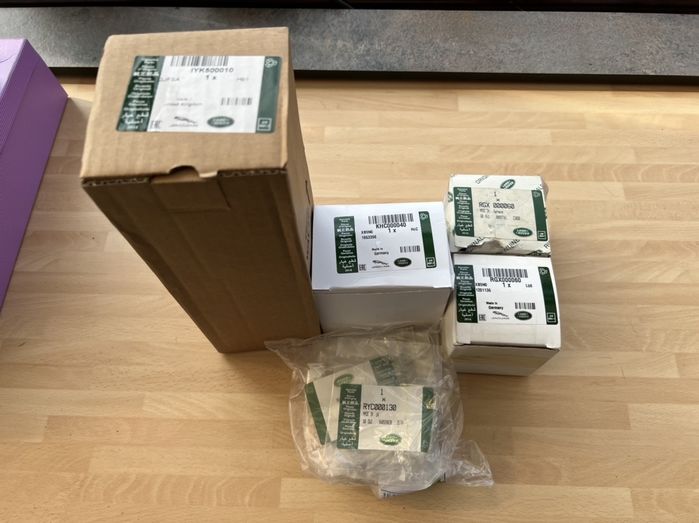
One of the bushes I need before doing much more is still on back order unfortunately so I’m doing other things amongst the car at the moment. However, I’m still doing little bits so it’s not all on the back burner until the bush arrives.

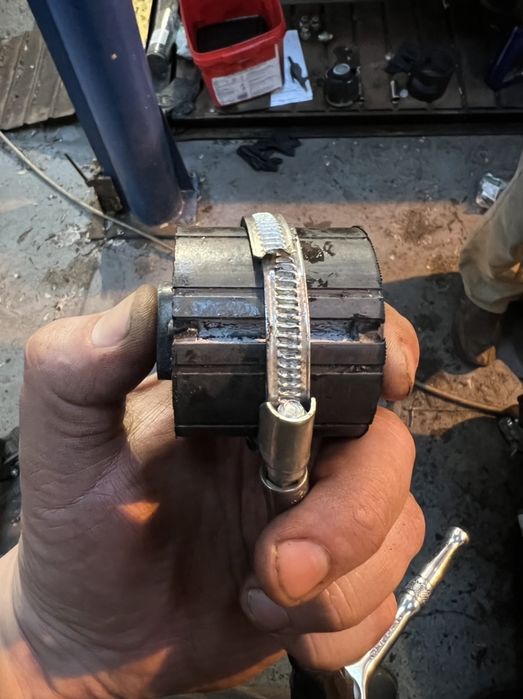
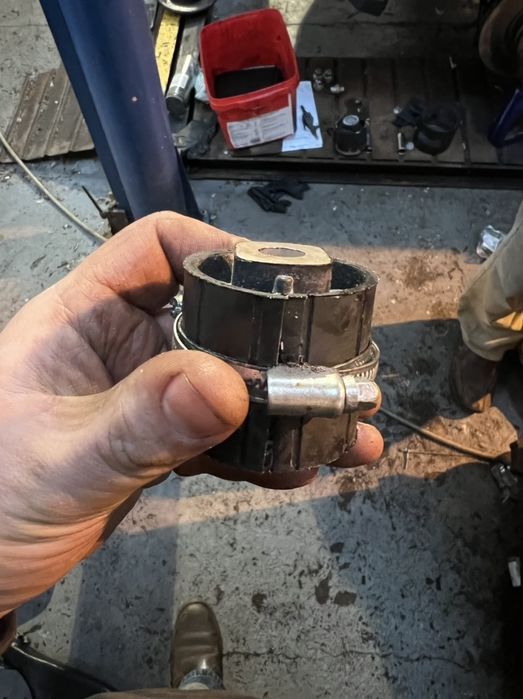
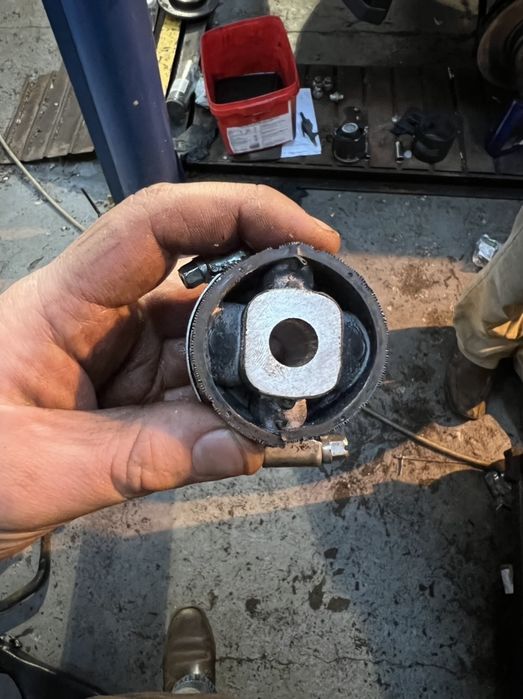
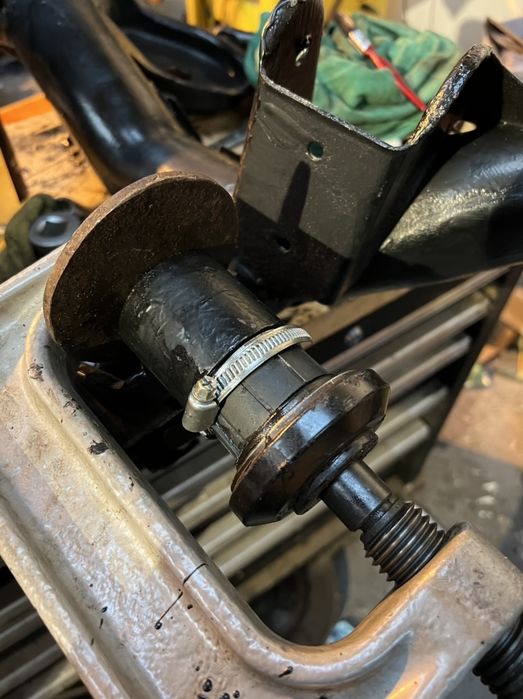
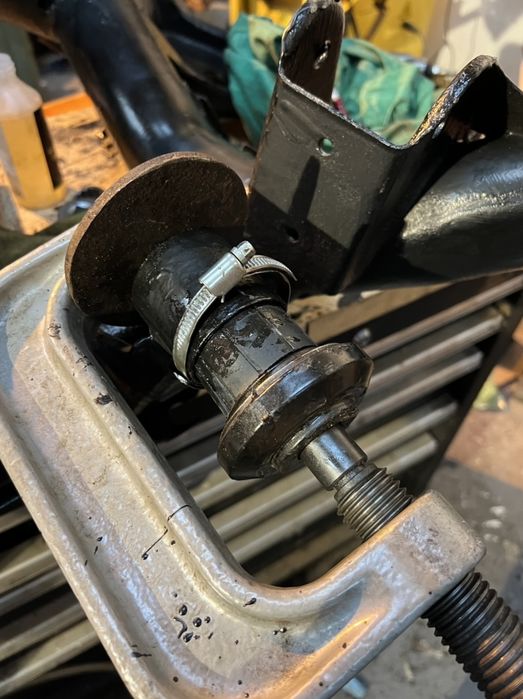
First job today was to replace the 2 smaller bushes that hold the rear diff. They need to be compressed slightly before they go into the subframe so I used a couple of jubilee clips.

Pre compression:

Click image to enlarge


Compressed:

Click image to enlarge


Click image to enlarge


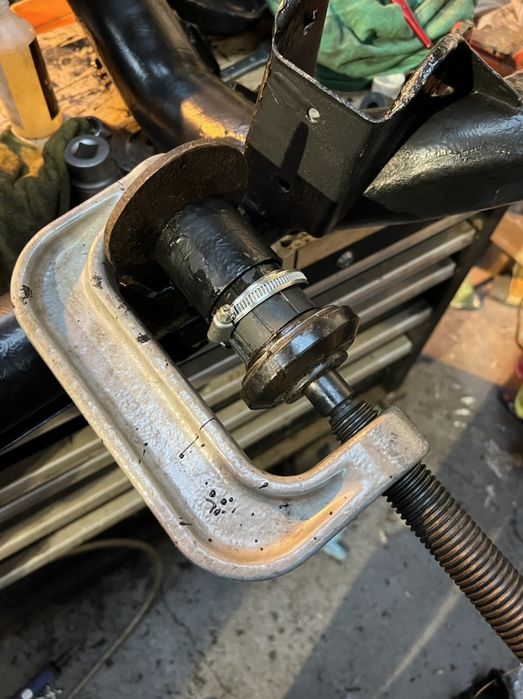
I then gave the front half of the bush a coating with the Land Rover lubricant and started it in the hole.

Click image to enlarge


Click image to enlarge


Once the jubilee clip was touching the subframe I removed it and gave the rest of the bush a coating with the Land Rover lubricant.

Click image to enlarge


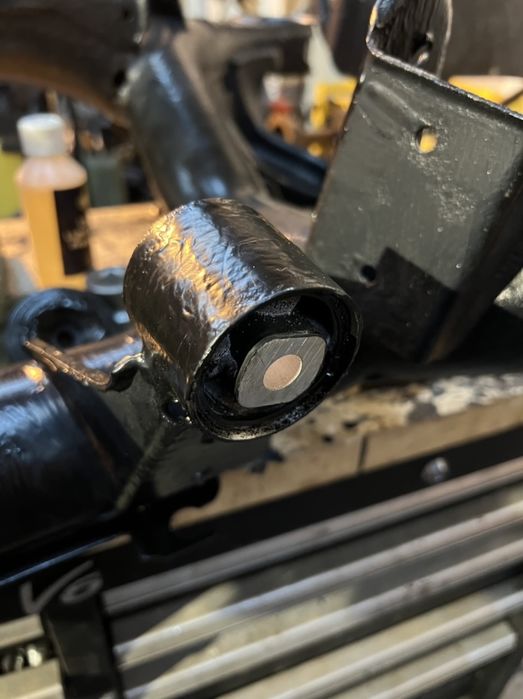
New bush fully inserted:

Click image to enlarge


I then turned my attention to the huge subframe bushes that mount the subframe to the car. As the tool was a disaster I did these in the press too. I gave them a good coating of the Land Rover rubber lubricant and then put the subframe in the press and drove the bush home.

Video of it going in:


The special rubber lubricant needs 24hrs to set now before any load is placed on them. That’s not going to be an issue seeing as I need the last bush to arrive.

Tomorrow in amongst other jobs I’m going to get the 4 wishbone bushes changed.

David. 2002 4.6 Vogue SE - Alveston Red with Lightstone Leather
2007 Range Rover Supercharged in Java Black with Ivory Leather
2012 Range Rover 5.0 SC Autobiography in Indus Silver with Jet/Ivory Interior
2012 Range Rover 4.4 TDV8 Autobiography in Baltic Blue with Sand Interior

Post #626846 23rd Mar 2022 8:45pm
View user's profile Send private message View poster's gallery Reply with quote
dhallworth


Member Since: 10 Oct 2011
Location: Glasgow
Posts: 3059

United Kingdom 2012 Range Rover Autobiography TDV8 Baltic Blue

Well, it’s been a trying few days…

Thursday:

The rest of the bits I was waiting on from Land Rover turned up. Smile


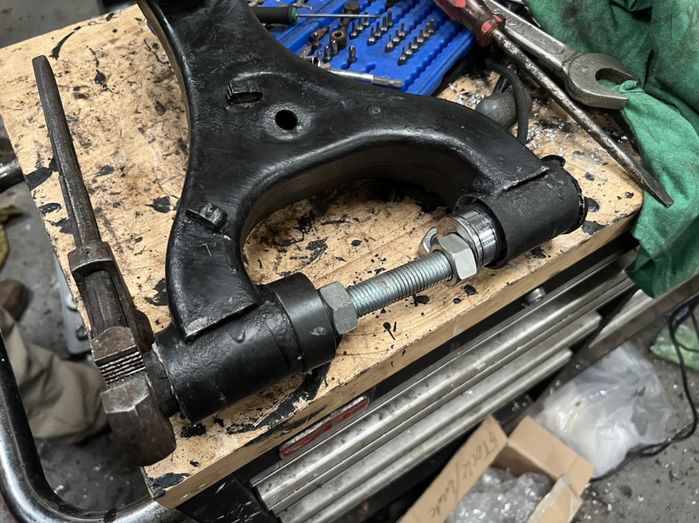
I then set about trying to change the wishbone bushes. These were a pain in the ar$e to do as they are flanged on one side so have to be pressed out from the inside of the wishbone meaning it can’t go in the press. LR do a special tool for this.

I made my own version of this using some M16 threaded rod and some nuts. I drilled out the inner of the bush on one side so that it would allow the threaded rod to pass through it.


(Picture taken with no tension on the bar, it was square with the bush when tightening)

I then held one side of the threaded rod with a pair of stilsons and turned one of the nuts to put pressure on the socket. Needless to say that the bushes were in so tight that it didn’t work. Whoever decided to put aluminium bushes into a steel wishbone needs a kick in the nuts!

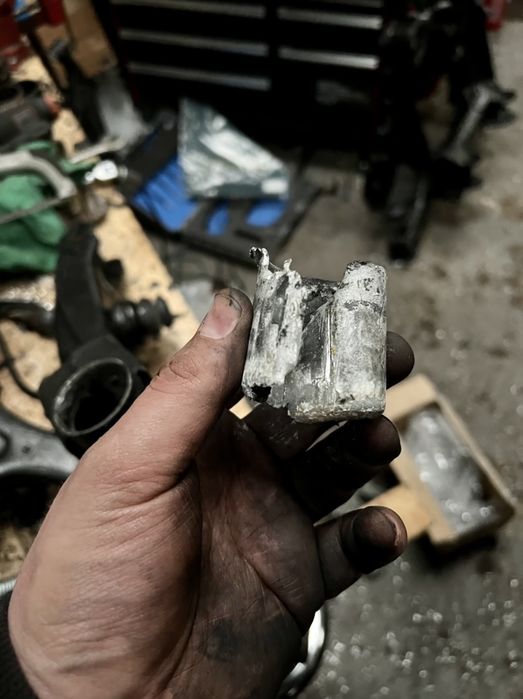
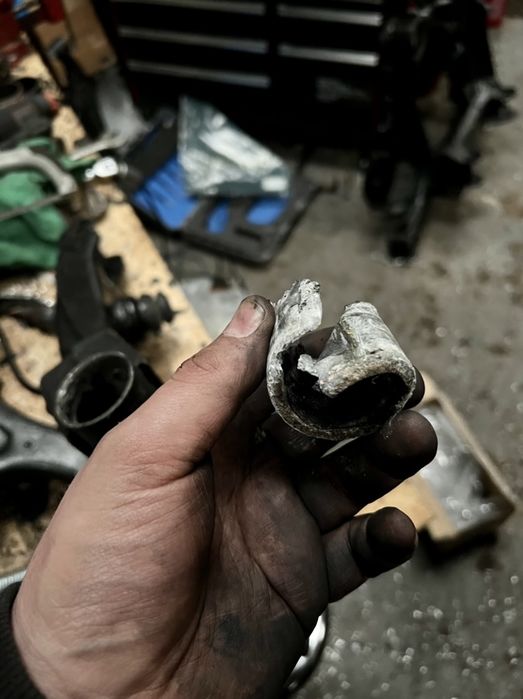
In the end I resorted to heating the inner of the bush so that the rubber melted and pulling it out with a pair of pliers. The outer of the bush was then removed with a hammer and a steel chisel. Plenty of nice powdery white corrosion visible!

Click image to enlarge


Click image to enlarge


Click image to enlarge

The bush doesn’t come right through the on the upper wishbone. I cleaned the inner lightly with some sand paper and was then able to use the press to fit the bushes back into the arms thankfully.

Friday:

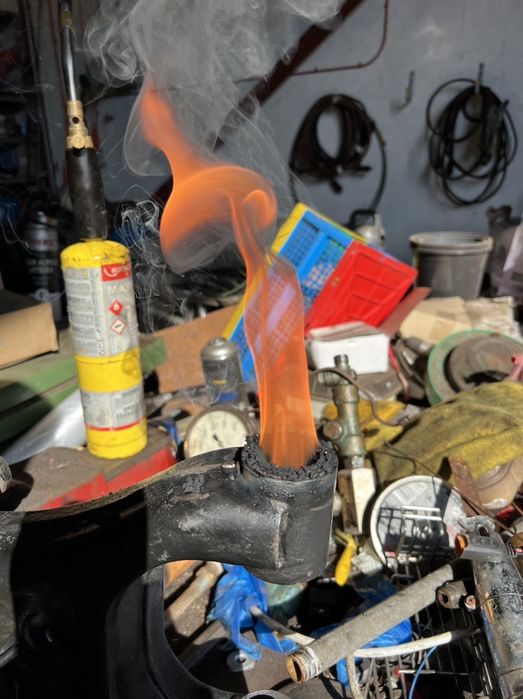
Friday was a nightmare of a day… the lower rear wishbones are huge and I couldn’t get them to sit square in the press either so I ended up burning the bushes out of them too.

Click image to enlarge


Once the inners were removed I let the rubber burn for a few minutes and then used a hacksaw to cut through the outer of the bush before removing it with a hammer and chisel. I had to do this on all 4 lower wishbone bushes.

It felt like this took forever yesterday and by 5pm I felt like I’d been working on this every day this week and hadn’t done anywhere near as much as I‘d wanted to the point where I was wondering why I’d even started! I packed in at this point and went out for a meal with my folks and wife.

Saturday (Today):

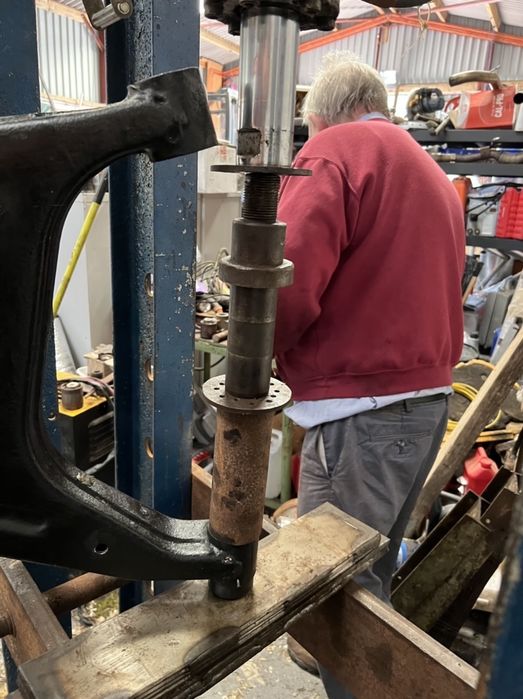
As the old bushes were removed and installing the new ones on the press didn’t need as much effort I thought I’d have a game of press Jenga so I dropped the bed of the press down a couple of notches and then used anything I could find that would take the force and made extensions for the ram.

I started the bushes in the vice to ensure that they were going in square and used the press to finish them off.

Dad was with me today and wasn’t amused when he saw what I’d put together but it did work thankfully, on all 4 of the wishbone bushes!

Click image to enlarge


So, that’s 19 bushes changed on the rear of the car.

4 bushes on the upper wishbones
4 bushes on the lower wishbones
2 bushes on each hub
4 MASSIVE subframe bushes
3 bushes that support the rear differential.

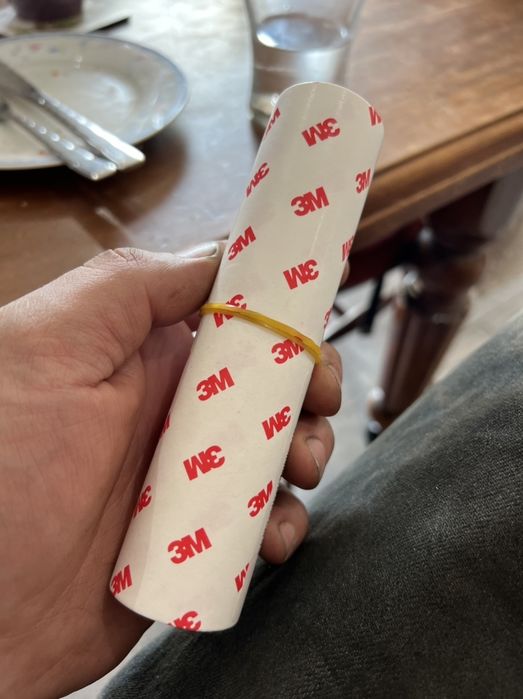
As we were sitting having lunch, Hermes turned up! They had the PPF that I’d ordered. Thanks again for the advice, Craig!

Click image to enlarge


Once the bushes were all done I chilled out a bit and started to make some progress with cleaning things up with the wire brush.

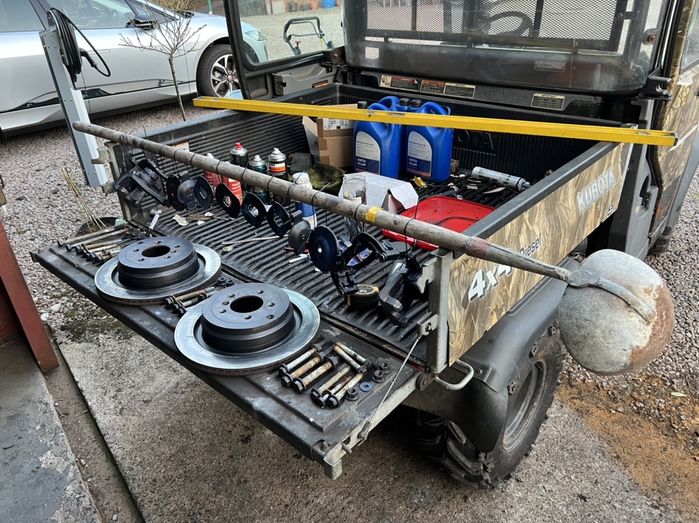
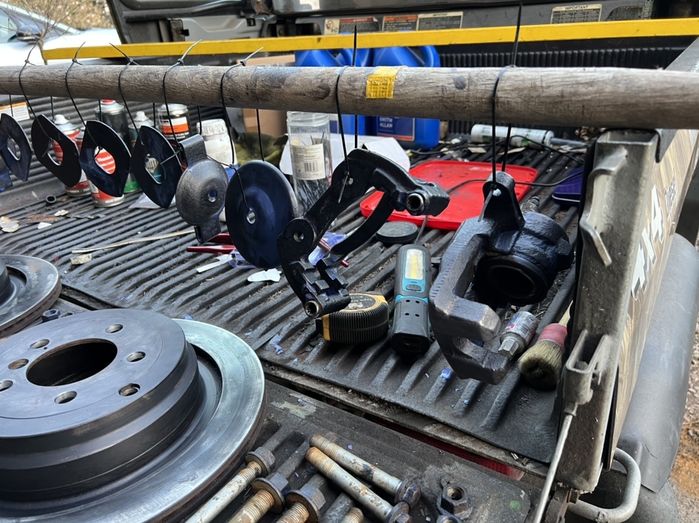
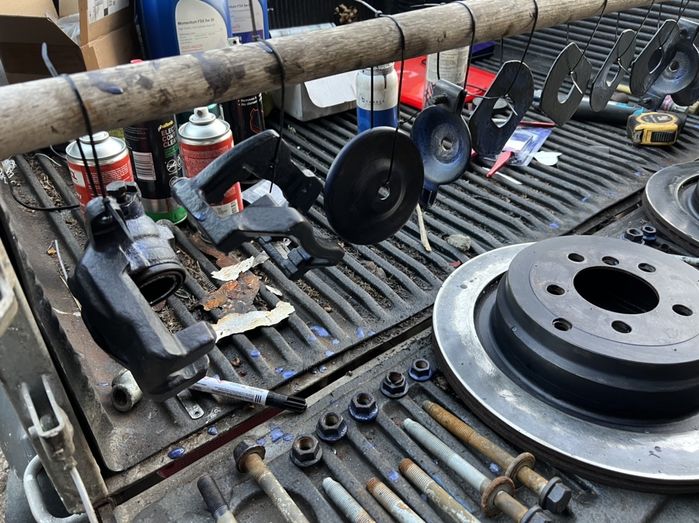
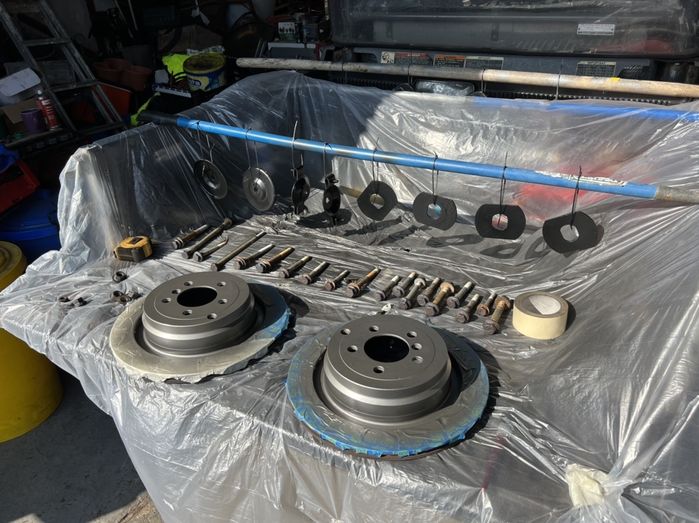
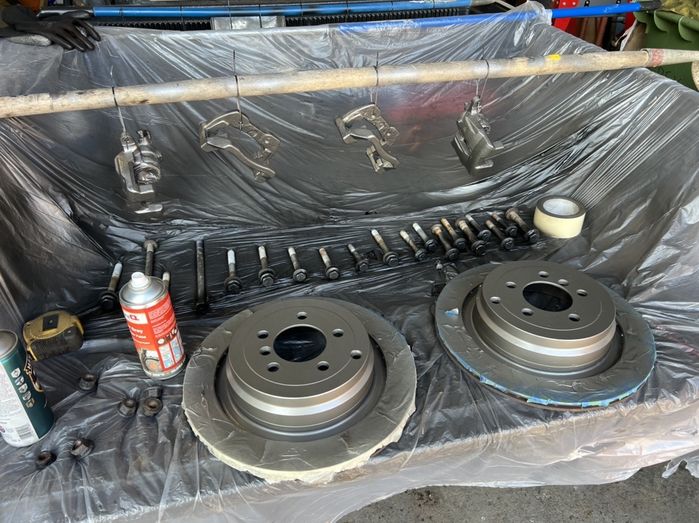
Both rear calipers were cleaned up, both rear carriers were cleaned up (seized sliders removed too), all of the subframe mounting plates and fasteners were then cleaned up too. I then looked at all the nuts and bolts and decided to gently wire brush the heads on them too as they were a bit crusty.

I measured the thickness of the brake discs and found them to be 19.8mm. The minimum thickness stamped on the edge of the disc is 17mm. As there was plenty of life left in them I put the flappy wheel on the grinder and removed the lip from them.

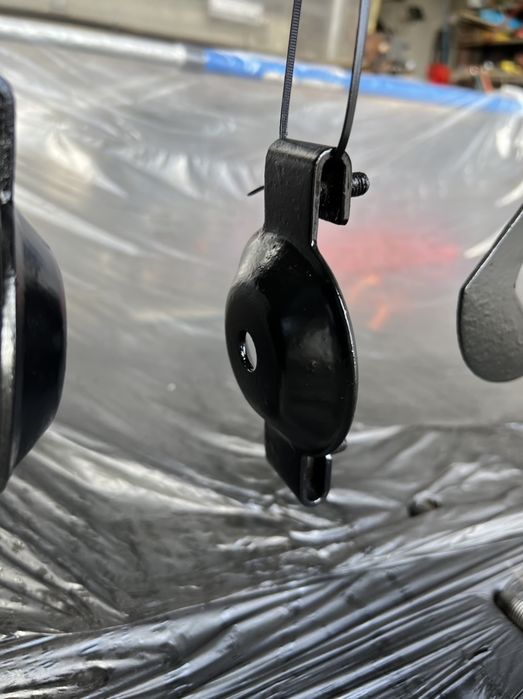
Once I’d finished cleaning everything up I got my bottle of Bilt Hamber Hydrate 80 off the shelf and hung everything on cable ties to coat them and let them dry. Hopefully I can get them painted tomorrow and reassembly can begin this week!


David. 2002 4.6 Vogue SE - Alveston Red with Lightstone Leather
2007 Range Rover Supercharged in Java Black with Ivory Leather
2012 Range Rover 5.0 SC Autobiography in Indus Silver with Jet/Ivory Interior
2012 Range Rover 4.4 TDV8 Autobiography in Baltic Blue with Sand Interior

Post #627066 26th Mar 2022 9:39pm
View user's profile Send private message View poster's gallery Reply with quote
dhallworth


Member Since: 10 Oct 2011
Location: Glasgow
Posts: 3059

United Kingdom 2012 Range Rover Autobiography TDV8 Baltic Blue

More progress today.

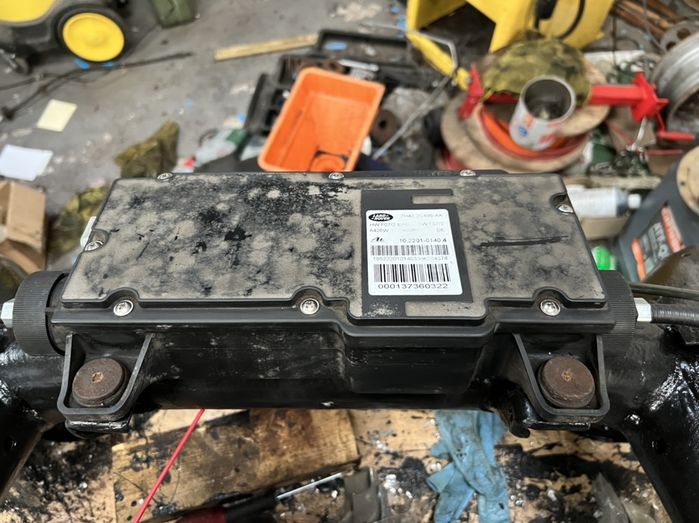
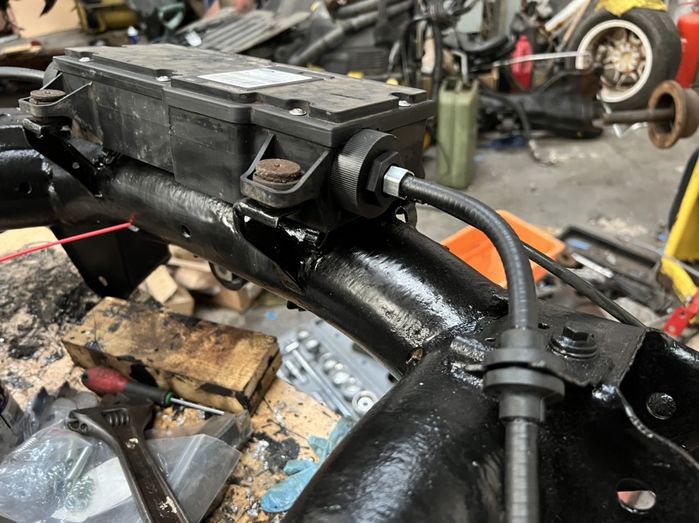
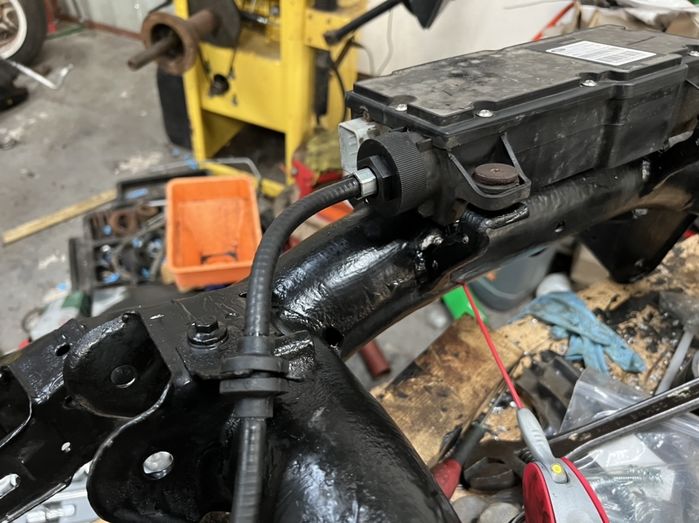
Handbrake module cleaned up, new cables fitted and the unit was reinstalled onto the subframe. The paint had clogged the threads on the subframe so had to get a tap out and clean the threads before refitting.

The screws in the unit originally were torx headed self tappers that were in a right old state. I spent a bit of time with a scribe, a hammer and a T20 torx bit and managed to remove them. I replaced them with stainless self tappers. At least it makes future maintenance a little easier if I ever need to open it up for any reason.


After that was done I started to build up some layers of paint on the fixings for the rear subframe.


Click image to enlarge


Brake discs and calipers had a couple of coats too. They’ll have another couple before they’re refitted.


I then turned my attention to the body of the car. Primarily, above where the rear subframe sits and in the rear wheel arches. There was a lot of brown hiding behind the arch liners. I attacked it with the wire brush on the angle grinder. Thankfully it was all surface rust and none of it had really bitten into the metal to do any damage.

I bought a bottle of Bilt Hamber Deox Gel which is designed to be brushed onto rust, left for an hour and then washed off. It’s supposed to dissolve the rust and leave it ready to treat. The instructions for that say to wash it off with soapy water after the hour which I couldn’t really do very easily as the car is inside on the ramp so I decided to do it the old filthy way with an angle grinder and wire brush.

After wire brushing I treated it with Bilt Hamber Hydrate 80. I’m by no means finished but I didn’t want to leave it unprotected after cleaning it up over night.

No pictures of this stage though as I was filthy from head to toe and didn’t want to touch my phone.

David. 2002 4.6 Vogue SE - Alveston Red with Lightstone Leather
2007 Range Rover Supercharged in Java Black with Ivory Leather
2012 Range Rover 5.0 SC Autobiography in Indus Silver with Jet/Ivory Interior
2012 Range Rover 4.4 TDV8 Autobiography in Baltic Blue with Sand Interior

Post #627114 27th Mar 2022 9:40pm
View user's profile Send private message View poster's gallery Reply with quote
KurtVerbose


Member Since: 08 Aug 2010
Location: Les Arses
Posts: 5848

Switzerland 2007 Range Rover Vogue TDV8 Stornoway Grey

Love the updates.

Post #627135 28th Mar 2022 8:09am
View user's profile Send private message View poster's gallery Reply with quote
dhallworth


Member Since: 10 Oct 2011
Location: Glasgow
Posts: 3059

United Kingdom 2012 Range Rover Autobiography TDV8 Baltic Blue

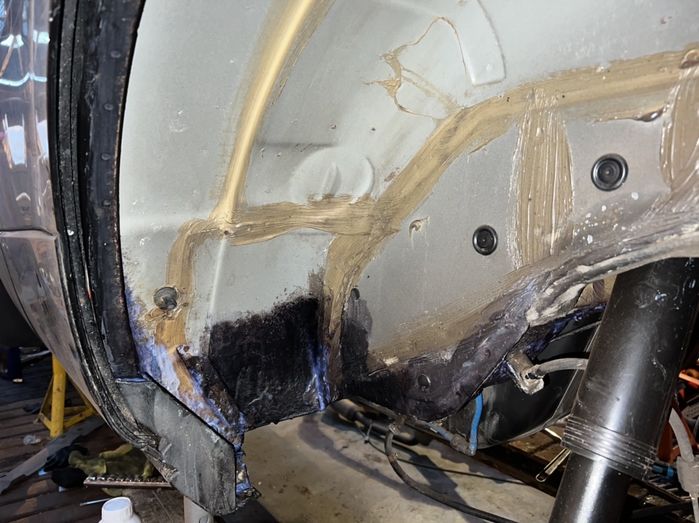
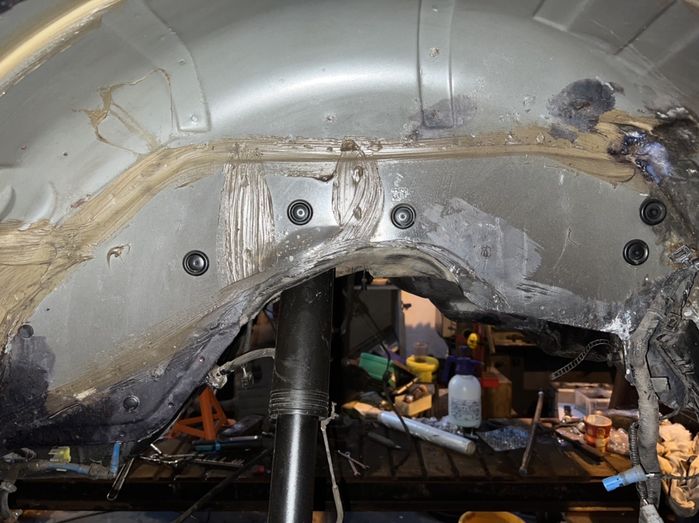
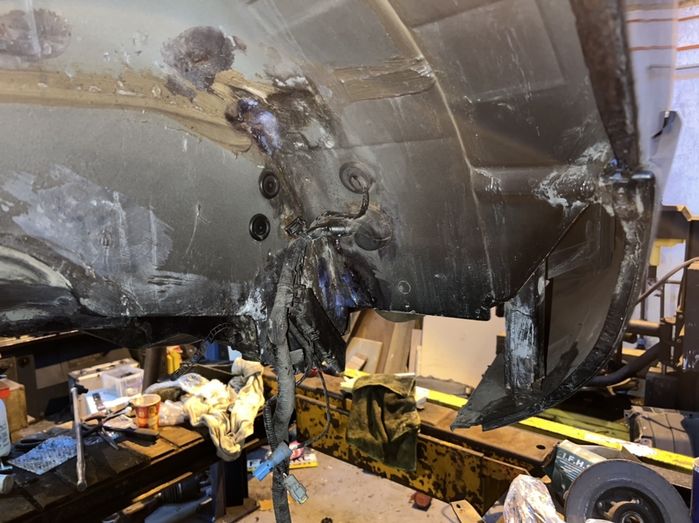
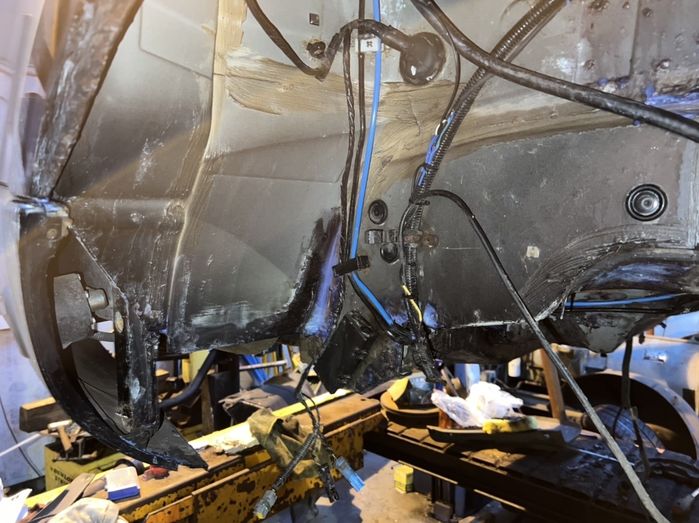
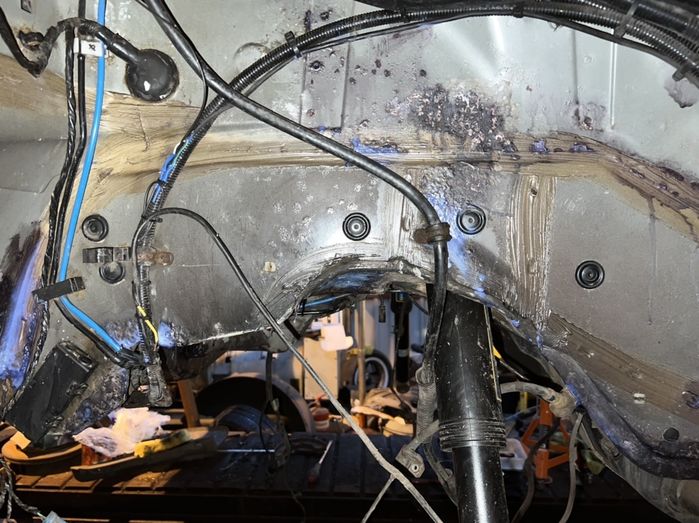
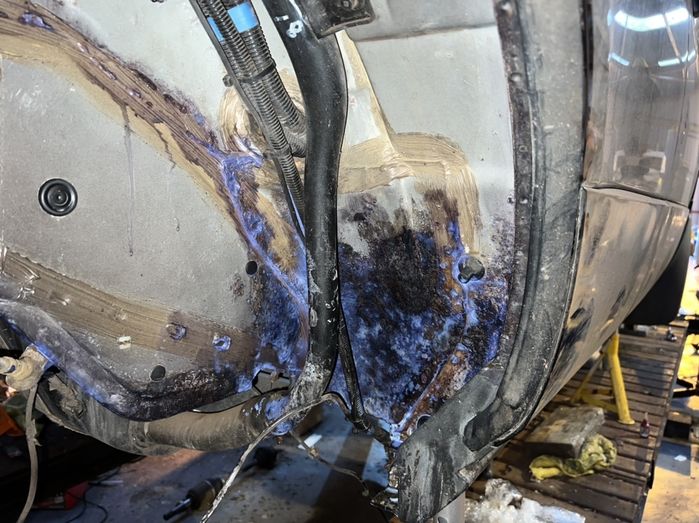
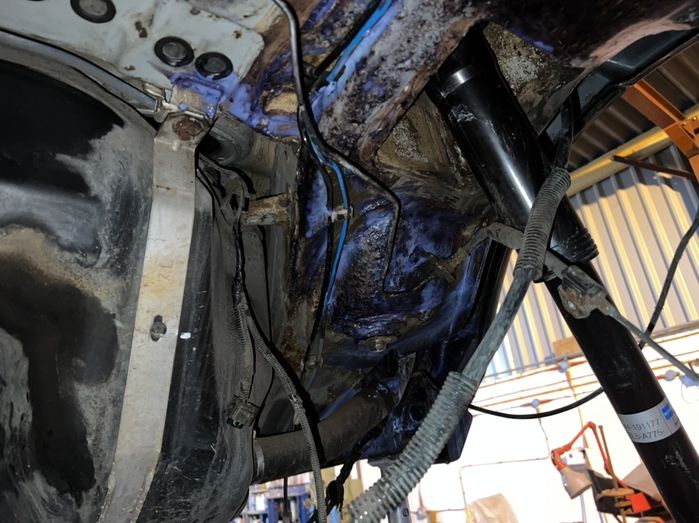
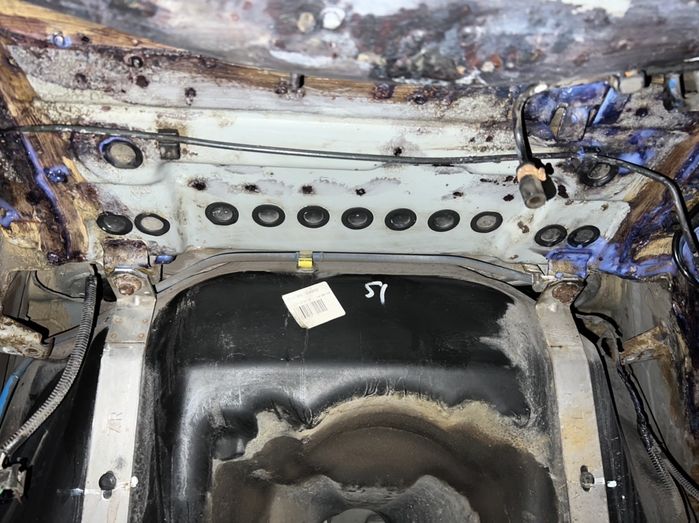
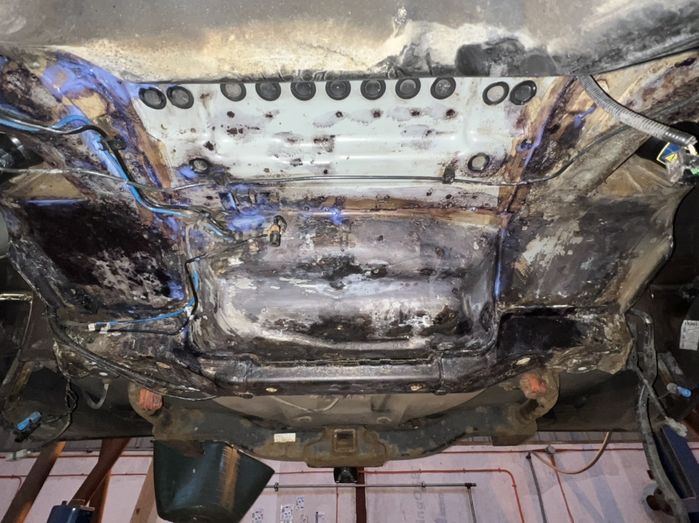
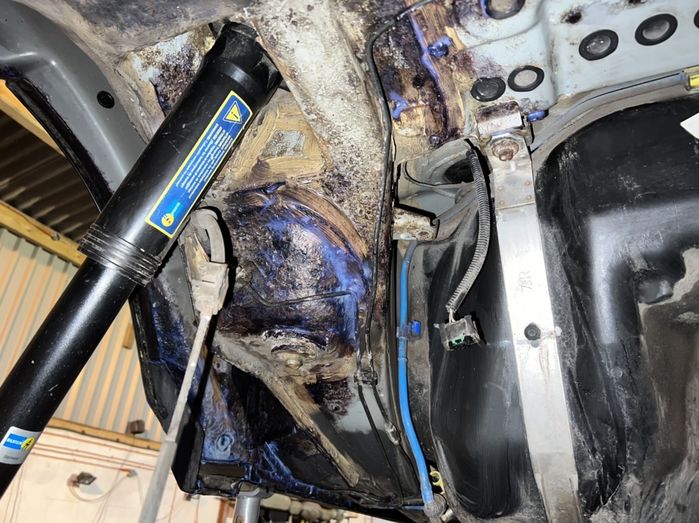
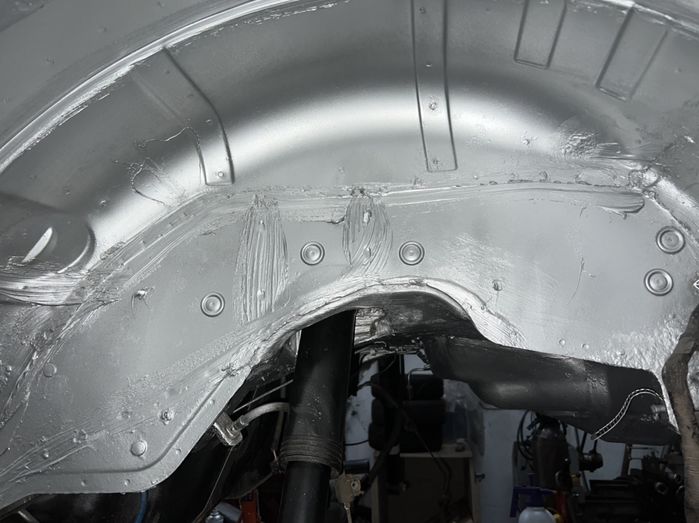
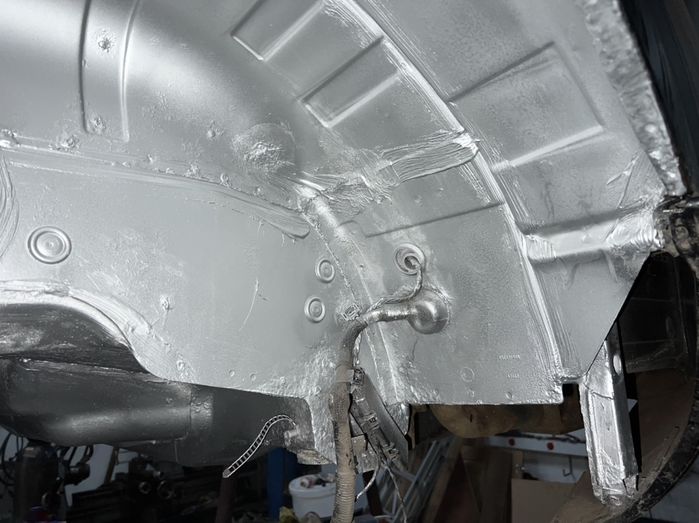
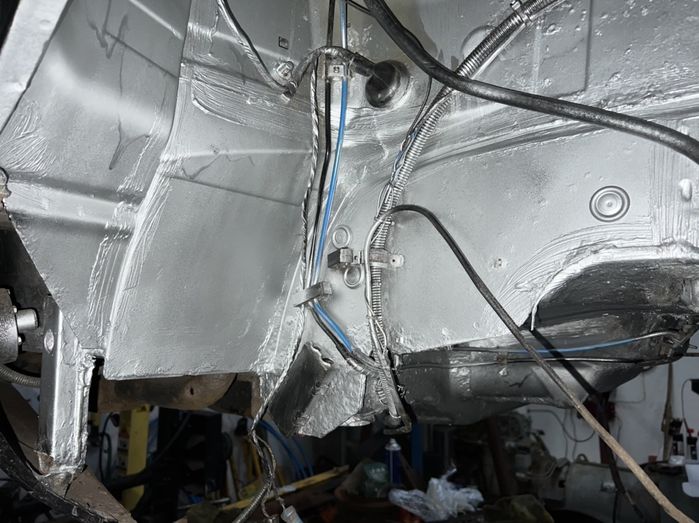
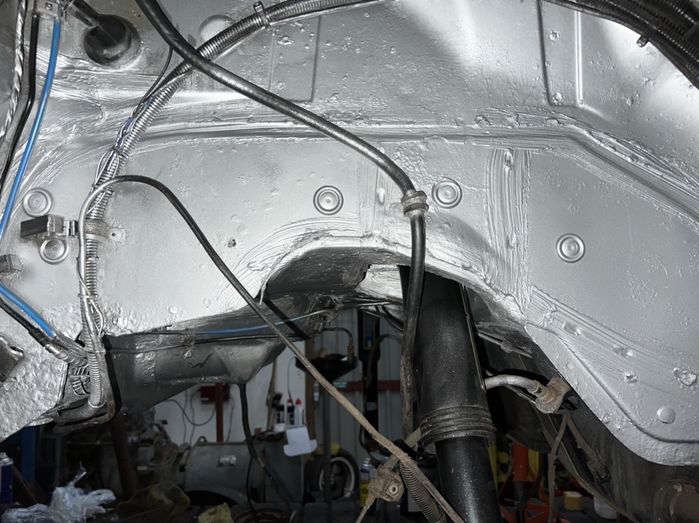
After 3 evenings of work I’ve done as much as I can underneath the car. Again, thankfully, everything has been surface rust and even after poking it very enthusiastically with a screwdriver no holes appeared. Smile

It started with a load of wire brushing, poking, scraping, etc. It’s had 2 coatings of Bilt Hamber Deox Gel applied thickly and then covered in cling film for a couple of hours before being washed off with soapy water, a little bit more scraping and brushing and then a good heavy coating of Bilt Hamber Hydrate 80.

Left Rear Wheel Arch:


Right Rear Wheel Arch:


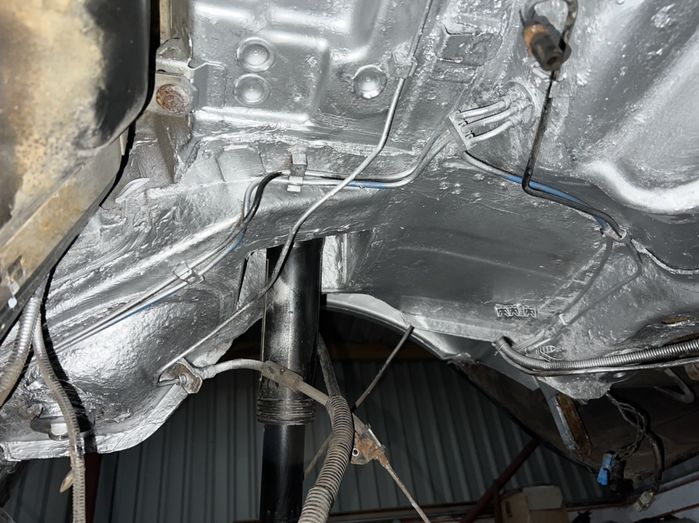
Underside of the car, above the rear subframe:


Primarily I’ve been concentrating on above the rear subframe and in the arches. I’m going to do the tow bar once I’ve got the rest of it finished off.

Tomorrow evening once the Hydrate 80 has cured properly I’m going to give it all a zinc coating and on Friday evening it’s getting a thick coating of Bilt Hamber Epoxy Mastic.

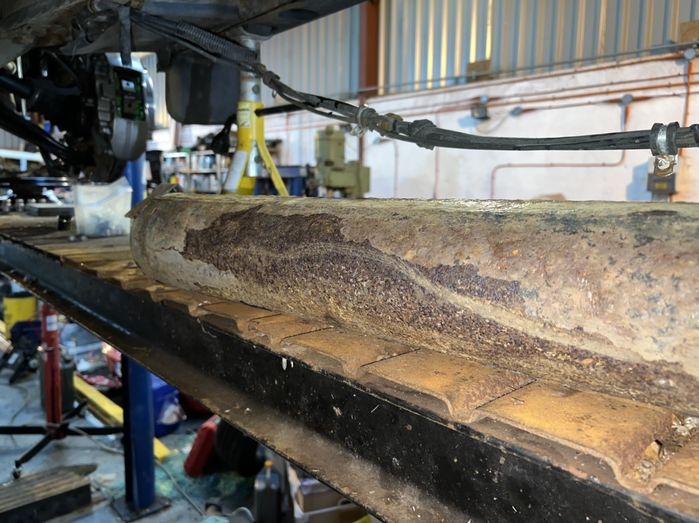
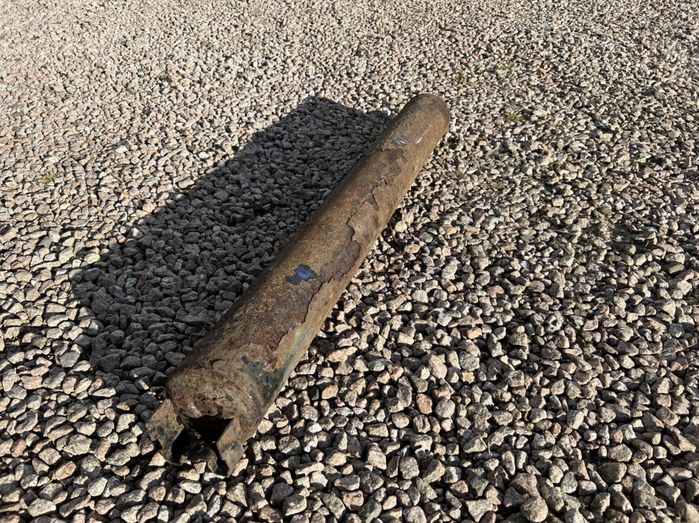
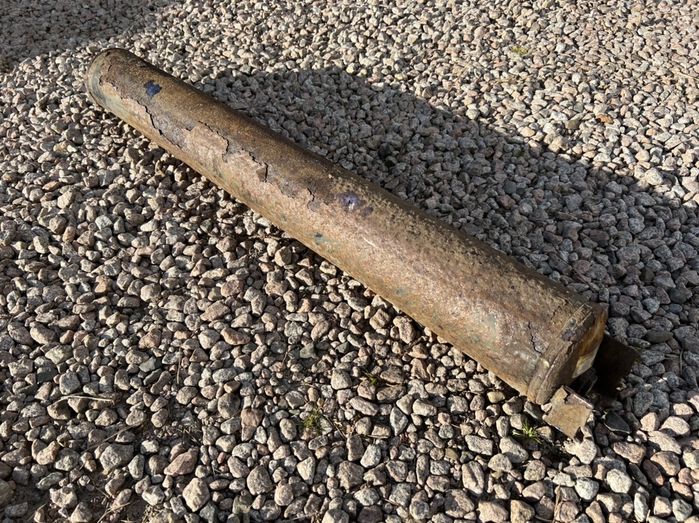
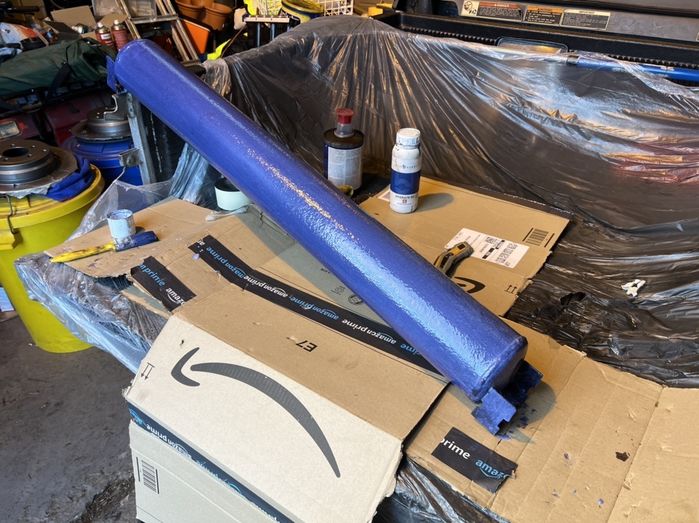
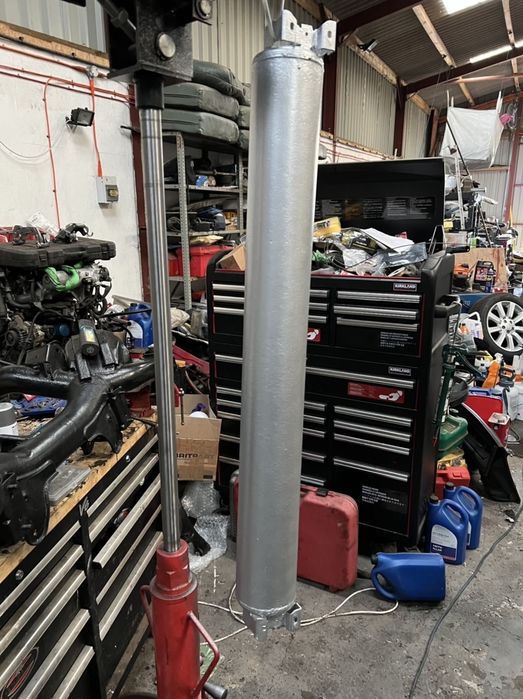
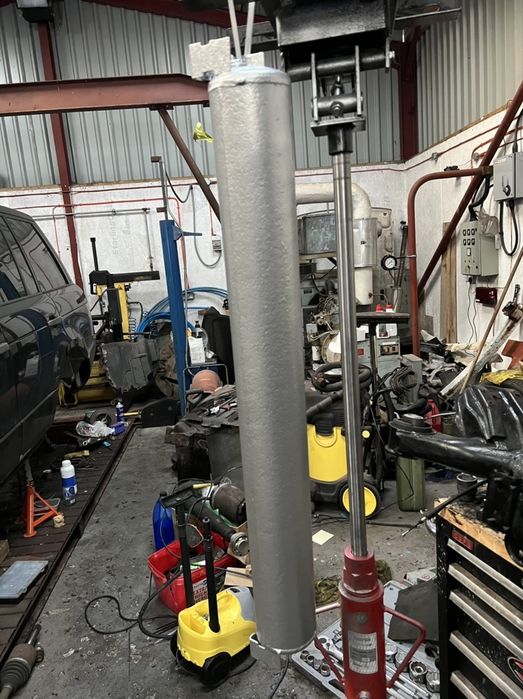
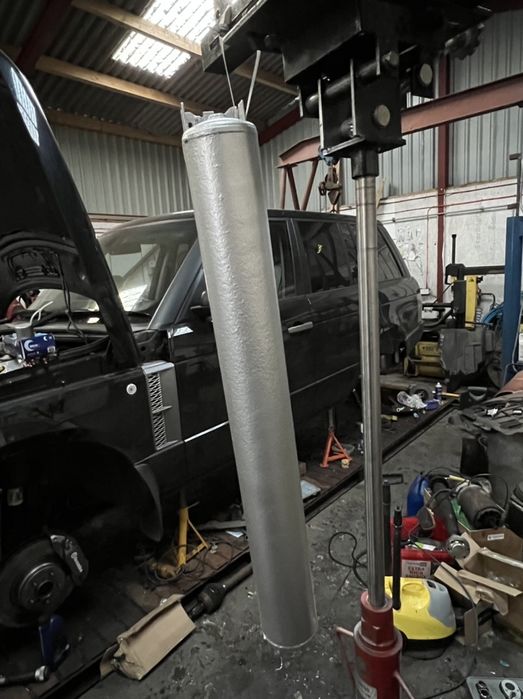
Whilst cleaning up underneath the car I realised how manky and crusty the reservoir for the air suspension was so I removed that, wire brushed it, cleaned it with thinners and gave that a good coating of Hydrate 80 this evening too Smile


After 15 minutes with a wire brush.


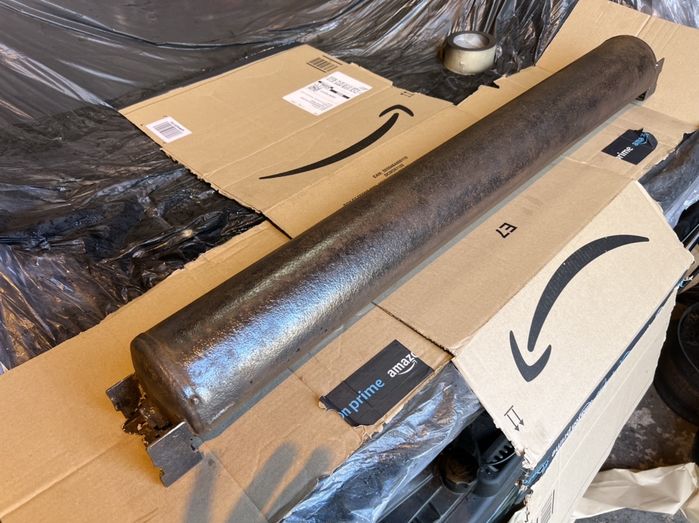
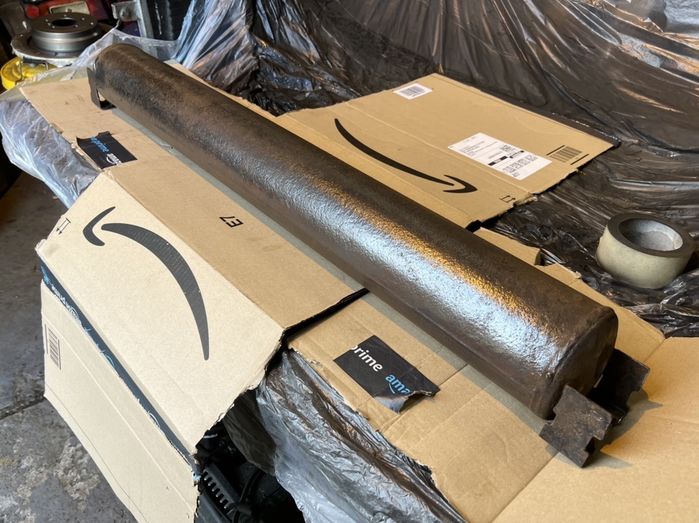
After a good coating of Hydrate 80.


Within 5 minutes of coating it the reservoir had gone black as the Hydrate 80 was reacting with the bare metal so that too will be getting coated with zinc tomorrow.

Whilst the reservoir was off the car I ran a tap down the holes for the side steps too as I’m going to fit the deployable steps when I’m finished all this work too.

David. 2002 4.6 Vogue SE - Alveston Red with Lightstone Leather
2007 Range Rover Supercharged in Java Black with Ivory Leather
2012 Range Rover 5.0 SC Autobiography in Indus Silver with Jet/Ivory Interior
2012 Range Rover 4.4 TDV8 Autobiography in Baltic Blue with Sand Interior

Post #627381 30th Mar 2022 7:42pm
View user's profile Send private message View poster's gallery Reply with quote
dhallworth


Member Since: 10 Oct 2011
Location: Glasgow
Posts: 3059

United Kingdom 2012 Range Rover Autobiography TDV8 Baltic Blue

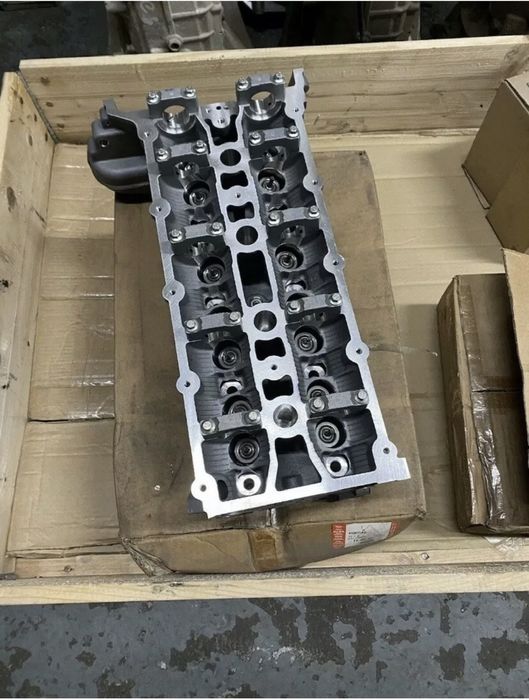
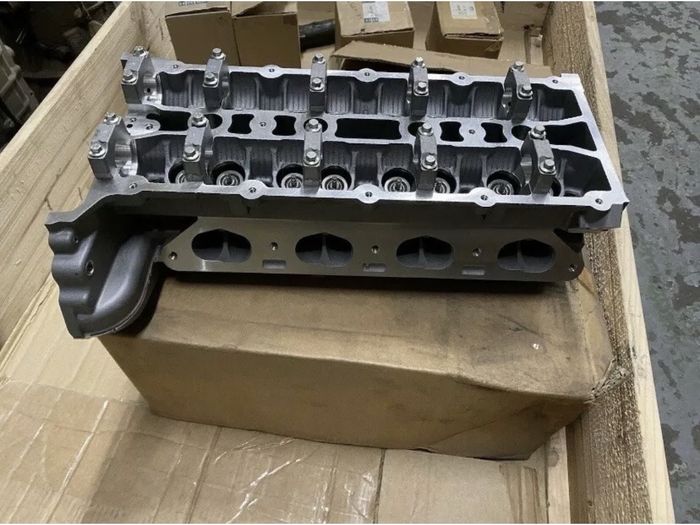
Scored a bargain on eBay for the RR today too. Not sure I need them but decided these were worth having as a just in case Smile

Click image to enlarge


 2002 4.6 Vogue SE - Alveston Red with Lightstone Leather
2007 Range Rover Supercharged in Java Black with Ivory Leather
2012 Range Rover 5.0 SC Autobiography in Indus Silver with Jet/Ivory Interior
2012 Range Rover 4.4 TDV8 Autobiography in Baltic Blue with Sand Interior

Post #627391 30th Mar 2022 8:41pm
View user's profile Send private message View poster's gallery Reply with quote
MR GLOVER


Member Since: 03 Jan 2015
Location: grimsby
Posts: 600

United Kingdom 2005 Range Rover Supercharged 4.2 SC V8 Buckingham Blue

All the work going in to this its going to last for ever Thumbs Up

Post #627394 30th Mar 2022 8:52pm
View user's profile Send private message View poster's gallery Reply with quote
dhallworth


Member Since: 10 Oct 2011
Location: Glasgow
Posts: 3059

United Kingdom 2012 Range Rover Autobiography TDV8 Baltic Blue

Or until I get bored and the new car itch becomes to much again! Laughing

If that happens, someone is going to get a very, very sorted 4.2 SC Smile

To be fair, I reckon I’ll keep this one for a few years now. It makes no sense whatsoever to change it given all the work I’m doing to it.

I’m hoping that it’ll drive like a new one would have done when I’m finished!

David. 2002 4.6 Vogue SE - Alveston Red with Lightstone Leather
2007 Range Rover Supercharged in Java Black with Ivory Leather
2012 Range Rover 5.0 SC Autobiography in Indus Silver with Jet/Ivory Interior
2012 Range Rover 4.4 TDV8 Autobiography in Baltic Blue with Sand Interior

Post #627395 30th Mar 2022 8:58pm
View user's profile Send private message View poster's gallery Reply with quote
Danwilderspin


Member Since: 15 Jun 2016
Location: Cambridgeshire
Posts: 2214

United Kingdom 2007 Range Rover Vogue SE 4.2 SC V8 Zermatt Silver

Bit of a green eyed monster I was watching those and they were indeed a steal! Current stable:
2006 BMW M6
2007 4.2 V8 S/C FF
Gone:
2002 4.4 V8 FF

Post #627396 30th Mar 2022 9:02pm
View user's profile Send private message View poster's gallery Reply with quote
dhallworth


Member Since: 10 Oct 2011
Location: Glasgow
Posts: 3059

United Kingdom 2012 Range Rover Autobiography TDV8 Baltic Blue

I’ve been watching them for months now and finally justified them to myself using man maths today.

They’ll be sat on shelf here until I either know for sure my misfire is cured or until I get bored one Saturday and decide to fit them.

Might start looking for a set of cams so that I can assemble the heads prior to stripping the car down.

How are you getting on with your wiring?

David. 2002 4.6 Vogue SE - Alveston Red with Lightstone Leather
2007 Range Rover Supercharged in Java Black with Ivory Leather
2012 Range Rover 5.0 SC Autobiography in Indus Silver with Jet/Ivory Interior
2012 Range Rover 4.4 TDV8 Autobiography in Baltic Blue with Sand Interior

Post #627397 30th Mar 2022 9:24pm
View user's profile Send private message View poster's gallery Reply with quote
Jayk69


Member Since: 08 Feb 2018
Location: Daventry
Posts: 601

United Kingdom 2012 Range Rover Vogue 4.4 V8 Barolo Black

Top work David love all the work you are doing. Thumbs Up 2012 Vogue 4.4 TDV8 - Current
2014 Navara V6 - Gone
2004 Vogue TD6 - Gone
Grand Cherokee - Gone
Discovery V8 (LPG) - Gone
Discovery TD5 - Gone

Post #627479 31st Mar 2022 6:28pm
View user's profile Send private message View poster's gallery Reply with quote
dhallworth


Member Since: 10 Oct 2011
Location: Glasgow
Posts: 3059

United Kingdom 2012 Range Rover Autobiography TDV8 Baltic Blue

Thanks Smile Thumbs Up

This evening was a nice quick one… just as well as it’s 3 degrees out!

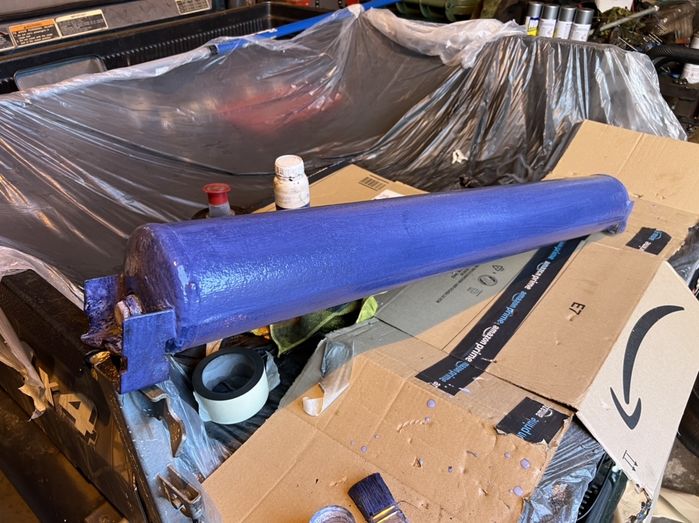
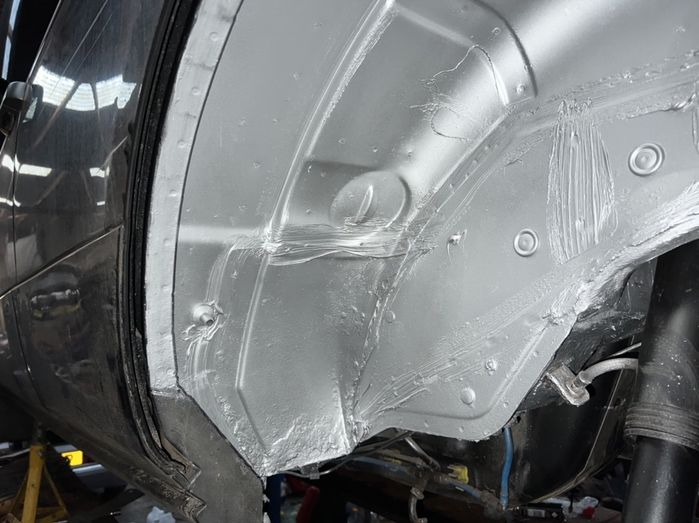
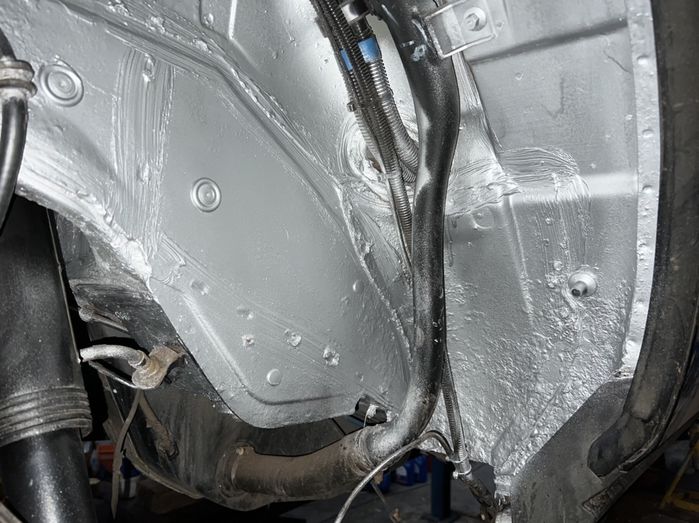
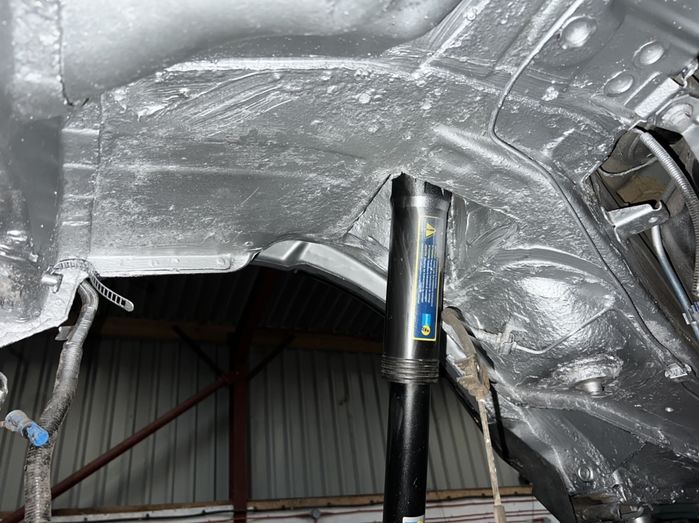
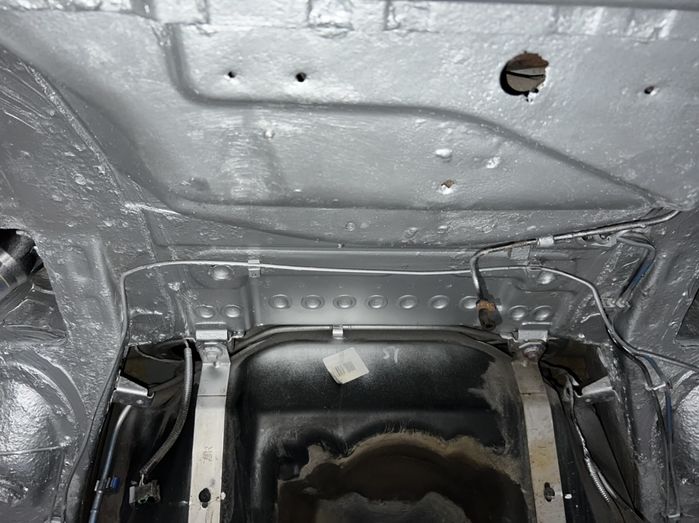
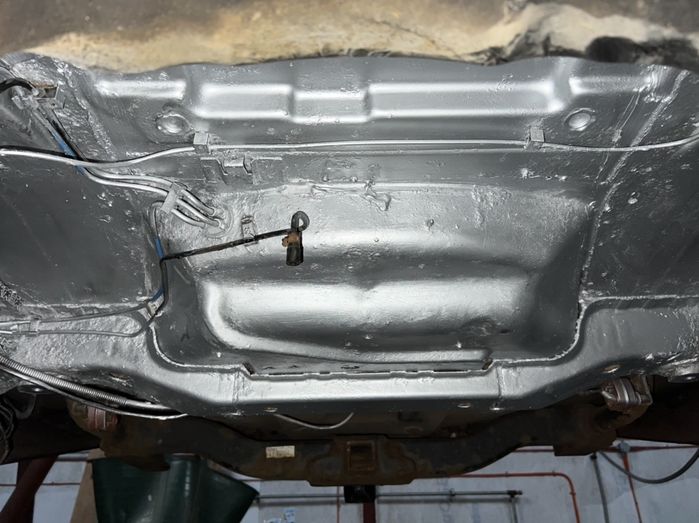
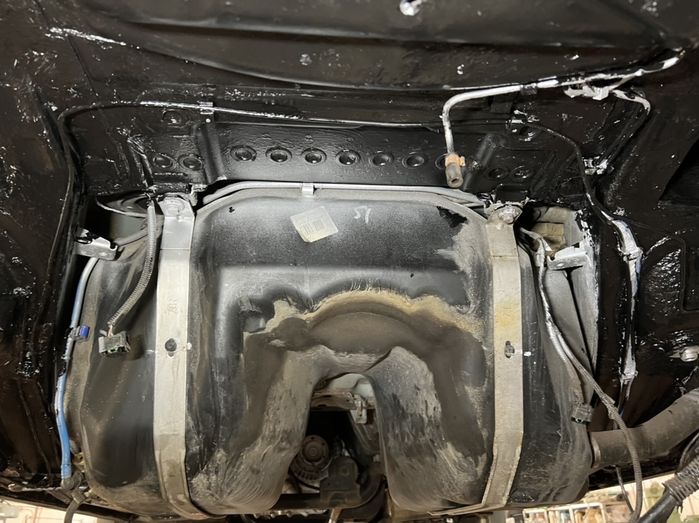
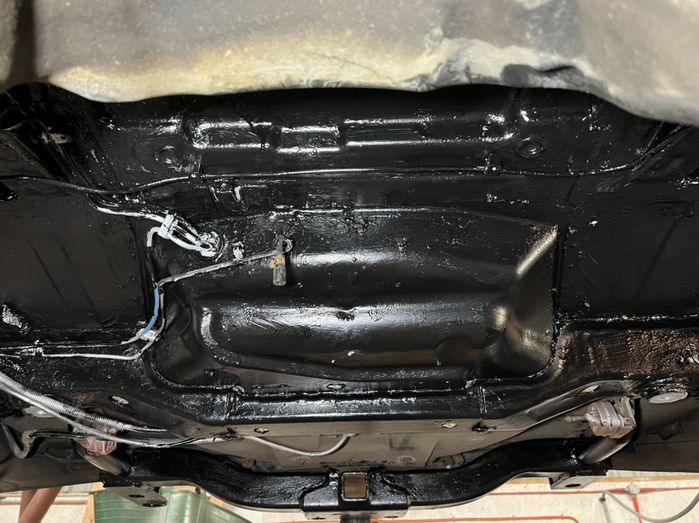
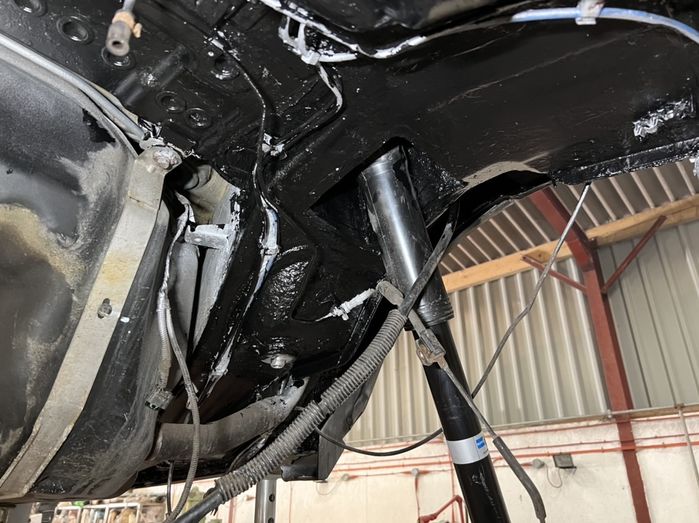
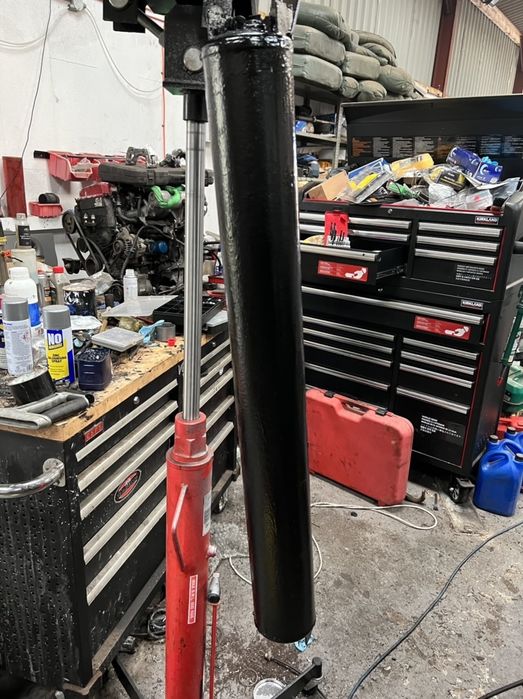
That’s the air receiver, both rear wheel arches, the floor pan above the subframe and the inner cills coated with zinc paint over the Hydrate 80 now.

Starting to take shape and look sorted!

NSR Wheel Arch:


OSR Wheel Arch:


Floor-pan above subframe:


I could probably have been more careful under the car where it was going but you’ll not see it when it’s covered up Smile

Air Receiver:

Click image to enlarge


Click image to enlarge


Click image to enlarge


Click image to enlarge


Tomorrow evening I’m hoping to get everything painted with a 2 part Bilt Hamber Epoxy Mastic. 2002 4.6 Vogue SE - Alveston Red with Lightstone Leather
2007 Range Rover Supercharged in Java Black with Ivory Leather
2012 Range Rover 5.0 SC Autobiography in Indus Silver with Jet/Ivory Interior
2012 Range Rover 4.4 TDV8 Autobiography in Baltic Blue with Sand Interior

Post #627483 31st Mar 2022 6:41pm
View user's profile Send private message View poster's gallery Reply with quote
Dijit


Member Since: 09 Jul 2012
Location: Glasgow
Posts: 160

Scotland 2007 Range Rover Vogue TDV8 Java Black

Cracking job. What a pity LR don't do more to make this unnecessary. It's not a though these are budget cars. To not know the lessons of steel coming into unprotected contact with ally is unforgivable.
I reckon you have the best SC of its age in the country. Just compare the number of hours you've spent on this compared to the number of hours it takes LR to manufacture a new one!!!! Rehab is for quitters!!!

RR 2007 3.6 TDV8 Java Black *
RR 2007 3.6 TDV8 Zermatt silver *
RR 2000 P38 4.6 Met red *
Mercedes 300TE 4-Matic *
Jaguar 420 (1969) *
Nissan 300Z
Citroen XM 2.5TD X 6
Bentley Continental R
Hydrocon Highlander
Hydrocon Hamilton
Hydrocon Huntly
Am told the ones with a * are to be offered for sale! 😳

Departed
LR 1992 110 2.5TD
RR 2000 Holland & Holland 4.6 LPG
RR 4.2 Supercharged with LPG, Vogue SE 2007 Buckingham Blue
RR 2002 4.4 V8 Zambesi Silver

Post #627504 31st Mar 2022 10:48pm
View user's profile Send private message View poster's gallery Reply with quote
dhallworth


Member Since: 10 Oct 2011
Location: Glasgow
Posts: 3059

United Kingdom 2012 Range Rover Autobiography TDV8 Baltic Blue

Last night I decided to clean the rust off the tow bar armature before painting so that I could do it all in one go.

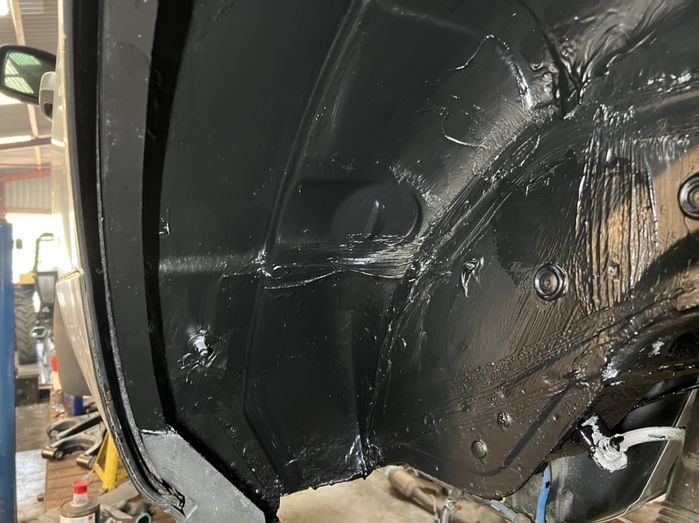
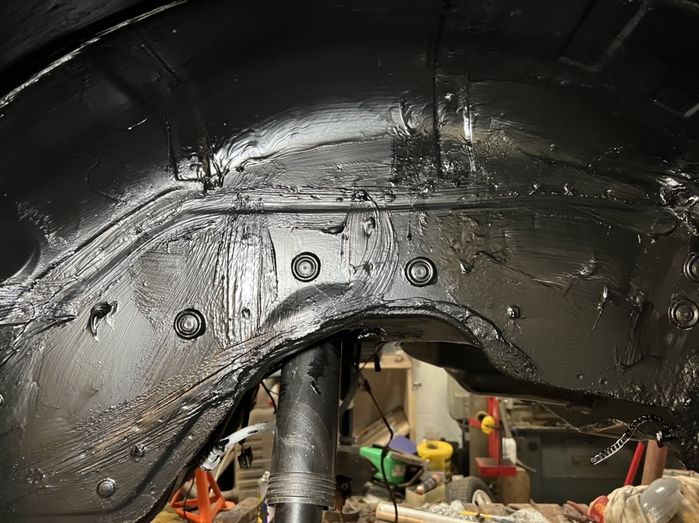
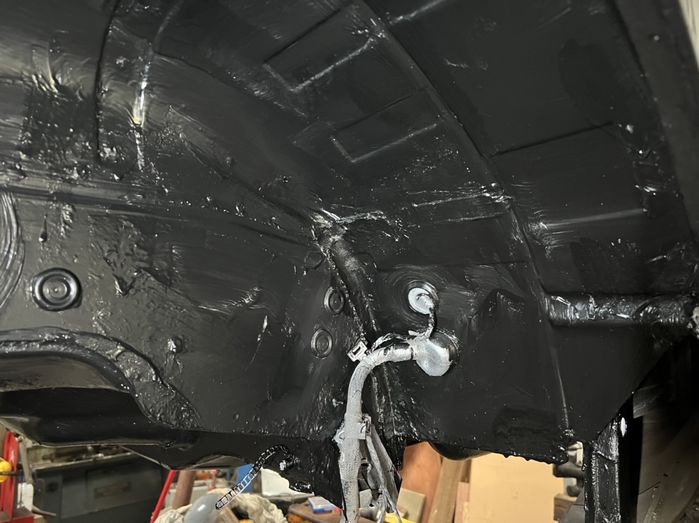
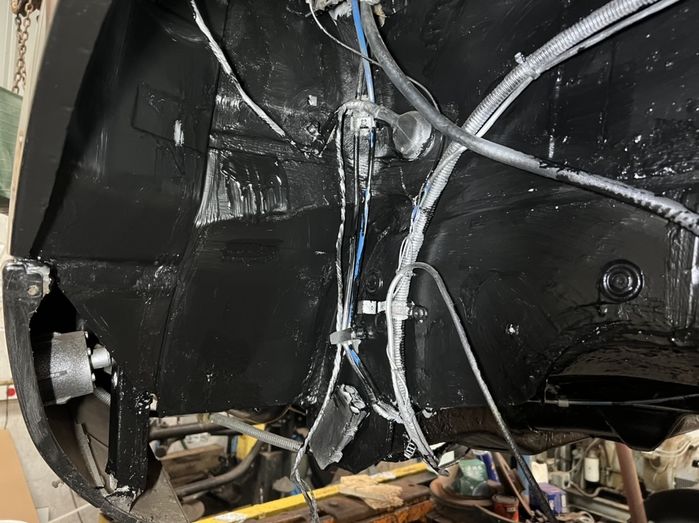
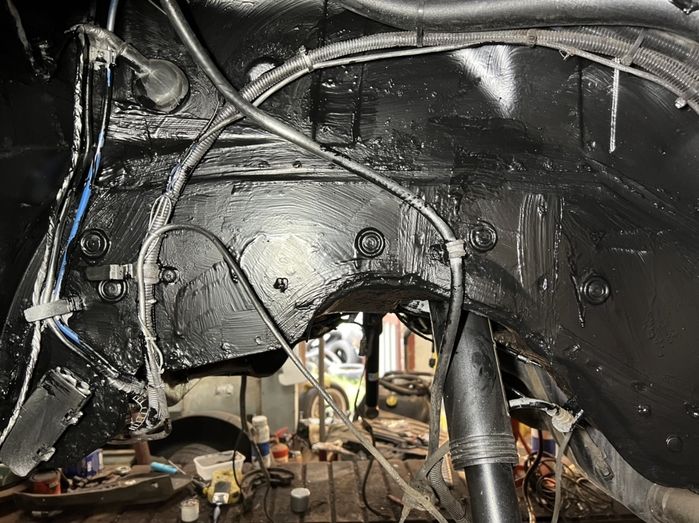
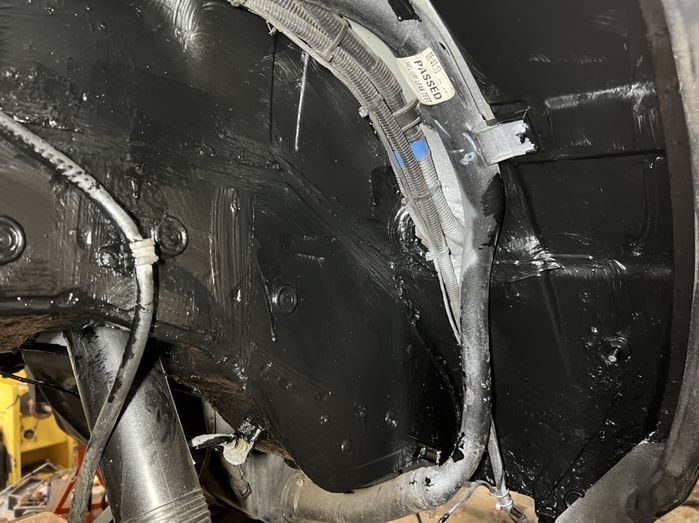
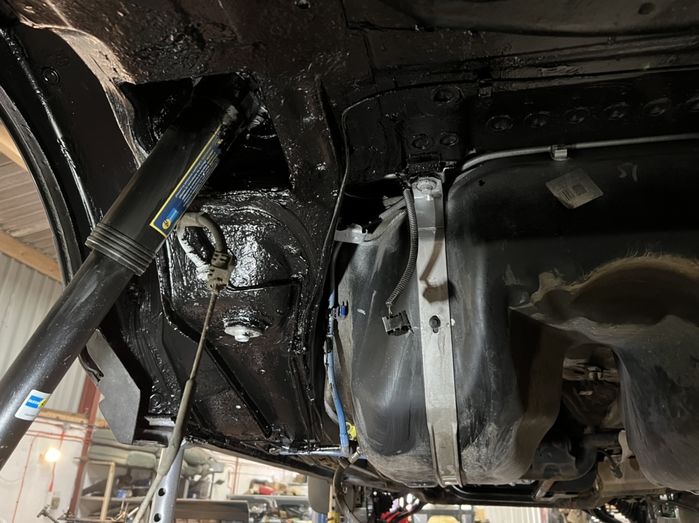
Today, I painted both wheel arches, the floor pan, the cills, the tow bar armature and the air reservoir. Glad I did it all in one go as it used an entire litre of Bilt Hamber 2 pack Epoxy Mastic.

NSR Wheel Arch


OSR Wheel Arch


Floorpan


Air receiver.

Click image to enlarge


Click image to enlarge


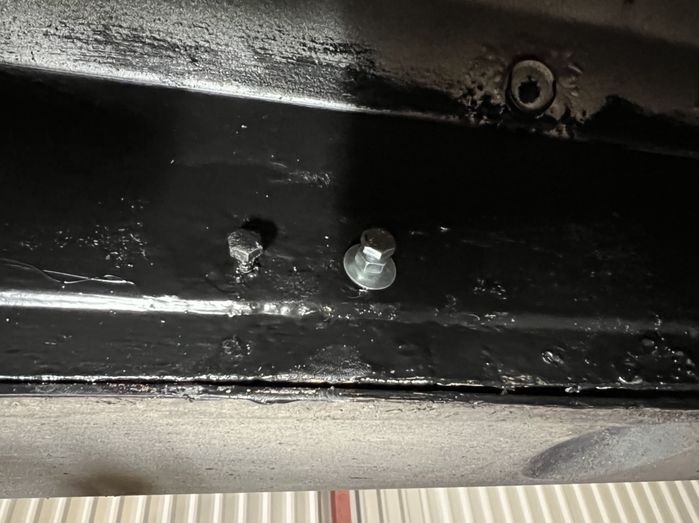
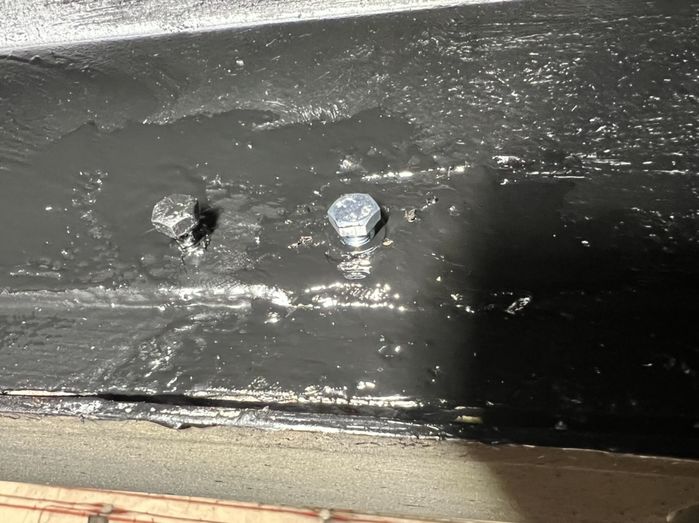
When I got the car it had chrome side tubes on it which I hated so removed. When I removed them one of the captive nuts in the body turned and I ended up having to cut the bolt out.

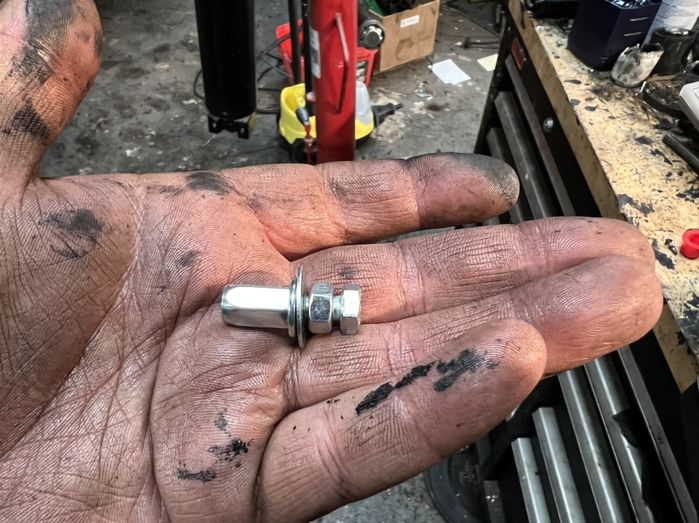
As I’ve got a set of deployable steps to fit I needed to fix it and whilst the air receiver is removed it’s the perfect opportunity. Unfortunately the tool for setting the rivnuts wouldn’t fit so I had to improvise.


Instead of the tool, I used a long M6 bolt with a nut on it and a washer between the nut and the rivnut.


I put a ratchet ring on the nut and held the bolt with a 10mm ring spanner. Tightening the nut with the ratchet ring spanner set the rivnut into the cill and left me with a nice solid fixing for the side steps to be mounted to.


When that was done I removed the nut and the washer and stuck the bolt back in to keep the threads clean and gave that a coat of epoxy too.

Hoping to get the air receiver back on tomorrow now.

David. 2002 4.6 Vogue SE - Alveston Red with Lightstone Leather
2007 Range Rover Supercharged in Java Black with Ivory Leather
2012 Range Rover 5.0 SC Autobiography in Indus Silver with Jet/Ivory Interior
2012 Range Rover 4.4 TDV8 Autobiography in Baltic Blue with Sand Interior

Post #627631 2nd Apr 2022 10:51pm
View user's profile Send private message View poster's gallery Reply with quote
pld118


Member Since: 25 Mar 2013
Location: Bairns
Posts: 4218

Scotland 2014 Range Rover Vogue SDV6 Santorini Black

Some amount of TLC and expertise going into that Thumbs Up

Post #627634 3rd Apr 2022 6:45am
View user's profile Send private message View poster's gallery Reply with quote
Post Reply  Back to top
Page 22 of 58 <123 ... 212223 ... 565758>
All times are GMT

Jump to  
Previous Topic | Next Topic >
Posting Rules
You cannot post new topics in this forum
You cannot reply to topics in this forum
You cannot edit your posts in this forum
You cannot delete your posts in this forum
You cannot vote in polls in this forum


Site Copyright © 2006-2024 Futuranet Ltd & Martin Lewis
fullfatrr.com RSS Feed - All Forums


Switch to Mobile site