 | Home > My Range Rover > My 06 SC rust repairs pt1, 2 and 3 |
 
|
|
|
| bigbo Member Since: 07 Jul 2014 Location: Derbyshire Posts: 606  
|
This follows my posts about my range rover, but I cannot for some reason upload any photographs, so I started a new post.....
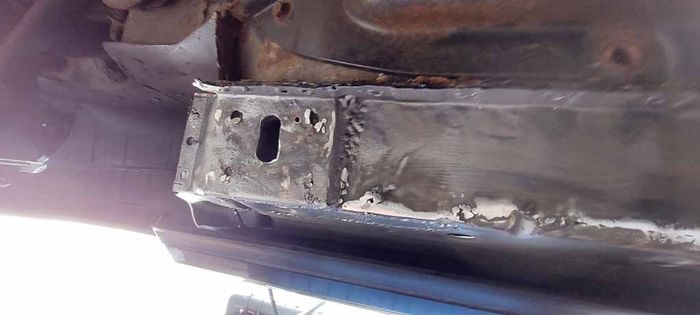
And the inside
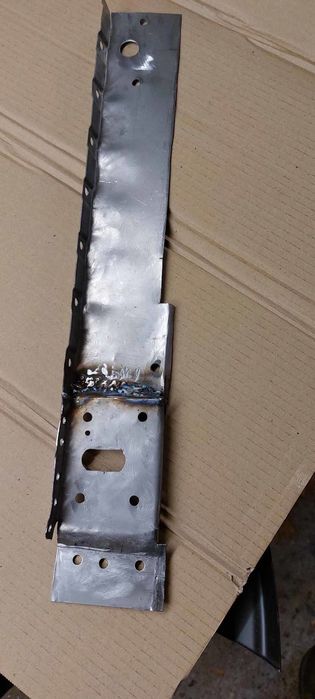
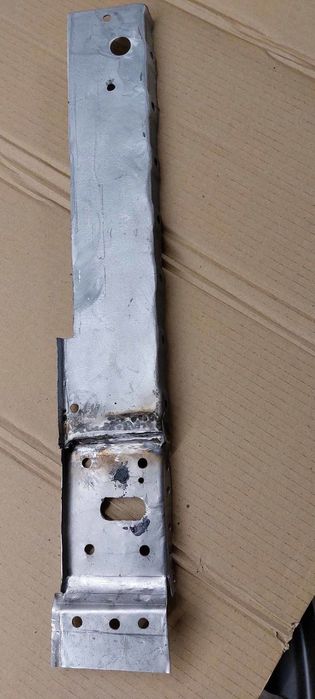
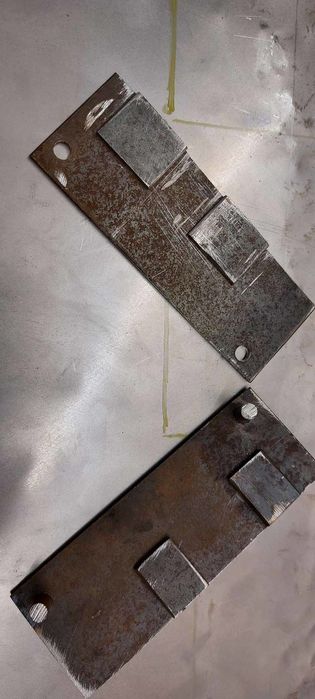
Obviously whilst preparing for welding, needs more fettling. I them made the under cill repair panels. I did this in two parts as the jacking point projects below a straight repair panel. Have a look at this post https://www.fullfatrr.com/forum/topic65295.html 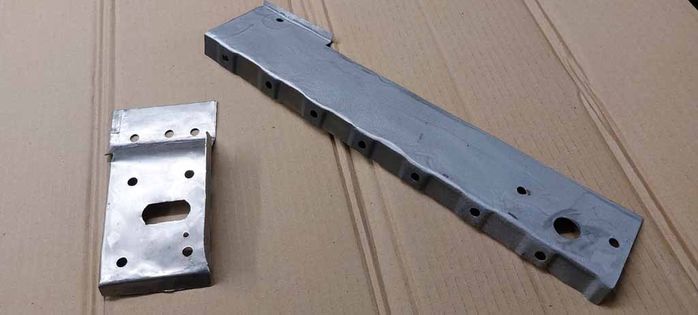
To press the drain channels I made a simple tool to mount in my vice..
Part 2 will show the repairs in place........ Range Rover 4.2 Supercharged 2006 Ford Focus EcoBoost 1.5 2017 MG TF 2003 Previous Cars of note Land Rover Discovery 2 Jaguar Mk2 3.8 - Company car MG Midget 1974 - Concours Last edited by bigbo on 21st Feb 2023 1:46am. Edited 2 times in total |
||||||||||||
|

| bigbo Member Since: 07 Jul 2014 Location: Derbyshire Posts: 606
|
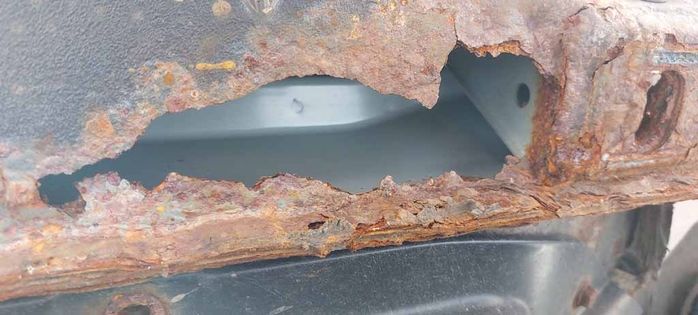
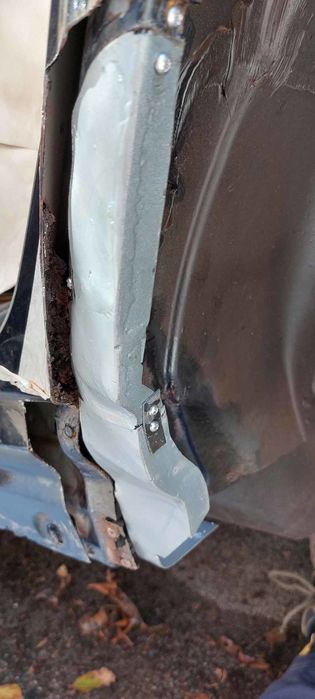
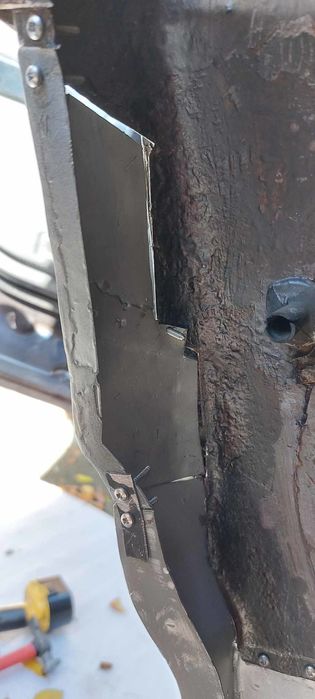
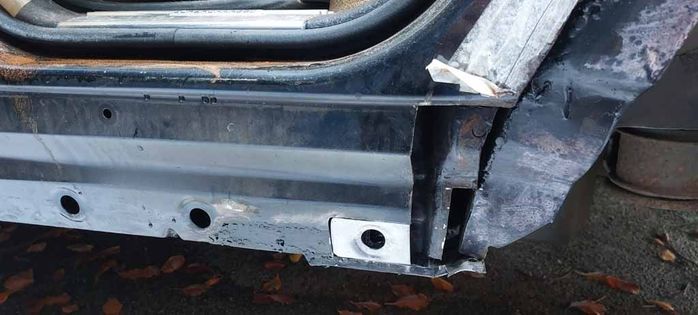
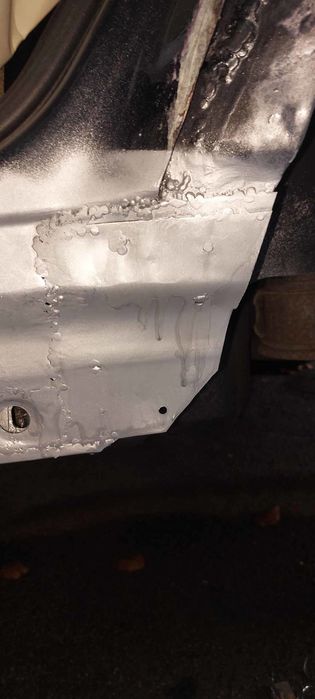
New cavity access point ready to be welded
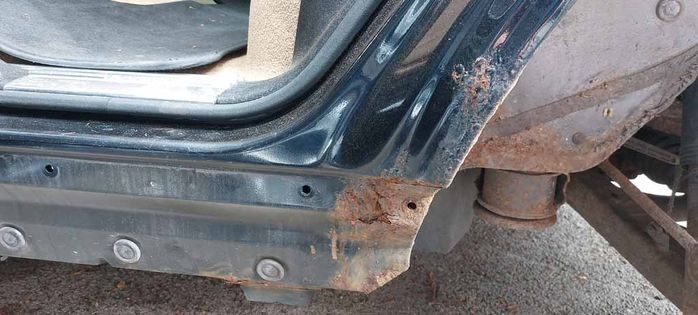
A shot showing the jacking point, I made a mistake here and allowed the panel to part company from the inner jacking point leaving a gap between the two panels.. I will cut, persuade it into place and reweld once I get some better weather
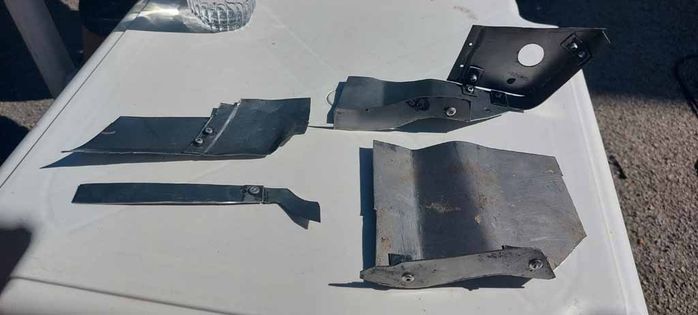
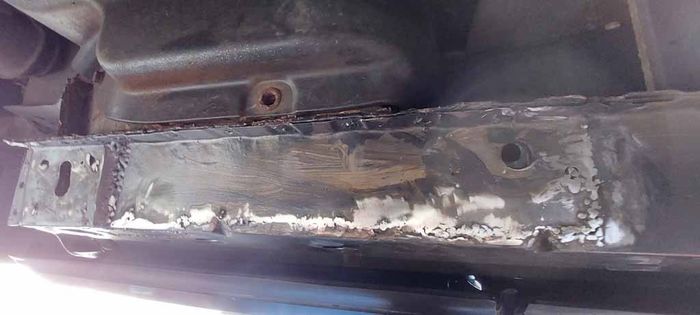
Now the end panel to close the cill
The final part to be fitted is the arch repair panel. Again I am waiting for better weather. Pt 3 to follow David Range Rover 4.2 Supercharged 2006 Ford Focus EcoBoost 1.5 2017 MG TF 2003 Previous Cars of note Land Rover Discovery 2 Jaguar Mk2 3.8 - Company car MG Midget 1974 - Concours |
||||||||
|
| bigbo Member Since: 07 Jul 2014 Location: Derbyshire Posts: 606
|
Finally I have managed to get out onto my car. Its either been a cold, flu or freezing weather that's stopped work. Feels like I have been ill or cold since Christmas.
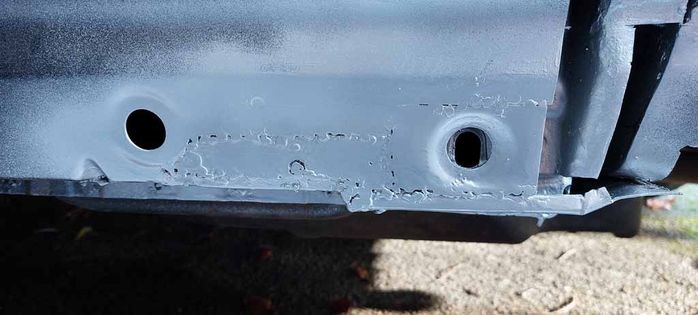
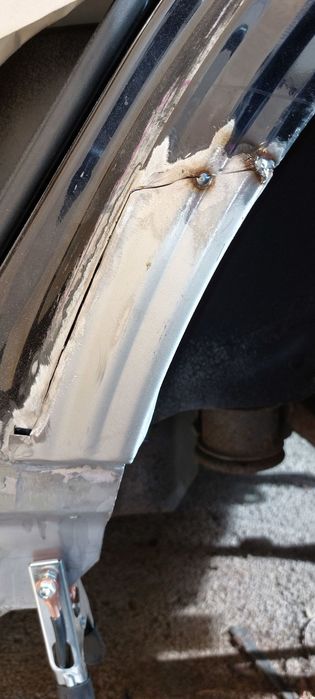
Before fitting I drilled 2 9mm holes in the inner arch for 3 reasons, first I could insert a rod to help manipulate the repair panel into place as I welded. Second I could insert my borescope to check for pin holes after welding and finally to inject cavity wax. I stitch welded slowly to keep the heat down but also to enable me to adjust the fit.
I finished the welding using stiches and then ground back. A couple of additional welds were required to fill in pin holes. Ended up with this.
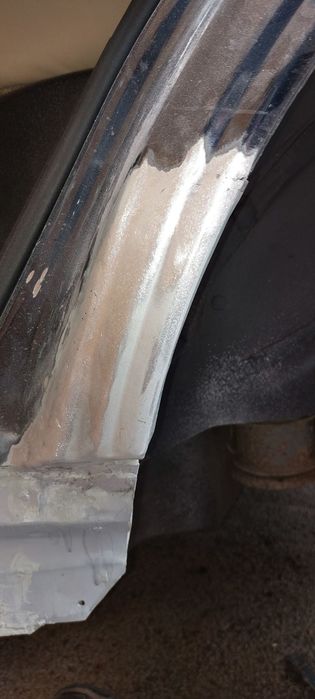
Finally I warmed up an aerosol of high zinc primer and warmed the panel with a hot air gun and sprayed two coats of primer. It will stay in primer until the warmer weather arrives so that I can apply top coats and lacquer. I am really pleased with myself as before I started this I couldn't weld and had never beaten any metal or fabricated any body repair panels. Next job is the rear of the arch and then the offside! David Range Rover 4.2 Supercharged 2006 Ford Focus EcoBoost 1.5 2017 MG TF 2003 Previous Cars of note Land Rover Discovery 2 Jaguar Mk2 3.8 - Company car MG Midget 1974 - Concours |
||||||||
|

| Sandyt Member Since: 07 Nov 2013 Location: Wraysbury Windsor Posts: 2276
|
Well done you its great when you achieve stuff like this |
||
|
| Jayk69 Member Since: 08 Feb 2018 Location: Daventry Posts: 601 
|
nice work well done you!
|
||
|
| oggy Member Since: 09 Sep 2020 Location: padstow cornwall Posts: 395 
|
you have done a good job so far bigbo for someone like me that's welding on a weekly bases looking good . you have done the worst part shaping and welding now just take your time on finishing and grinding the welds and making good with the filler work etc. just make sure that the water outlets on the sill are free and can drain out any water in the future . well done to you |
||
|
| bigbo Member Since: 07 Jul 2014 Location: Derbyshire Posts: 606
|
Thanks all for the comments. Much appreciated.
|
||
|
| oggy Member Since: 09 Sep 2020 Location: padstow cornwall Posts: 395
|
old saying what the eyes can't see the heart can't greave about. i am afraid no good for me could not sleep at night knowing I had a visible patch behind the sill covers. i do mine a bit differently so you would not know that anybody has been there. new vehicle purchase
|
||
|
| bigbo Member Since: 07 Jul 2014 Location: Derbyshire Posts: 606
|
Oggy, yes I understand your position and in many ways I am the same.
|
||
|
| oggy Member Since: 09 Sep 2020 Location: padstow cornwall Posts: 395
|
you are doing a cracking job bigbo that's just me. just say I use a lot of the u-pol raptor coat its a 2k item and covers well and a good solid coating they use it for truck bed coatings but is good for the sills new vehicle purchase
|
||
|
| bigbo Member Since: 07 Jul 2014 Location: Derbyshire Posts: 606
|
Thanks Oggy much appreciated.
|
||
|
| Fatboy Slim Member Since: 21 Aug 2021 Location: Bridgend Posts: 31 
|
Top job that |
||
|

|
|
| All times are GMT + 1 Hour |
< Previous Topic | Next Topic > |
Posting Rules
|
Site Copyright © 2006-2025 Futuranet Ltd & Martin Lewis
![]()
