 | Home > Technical (L322) > How To: Replace Air Conditioning Compressor on 4.4 TDV8 |
 
|
|
|
| garyRR Member Since: 13 Mar 2021 Location: Hampshire Posts: 1481 
|
Haven't seen any guides on here yet so, here's a guide on how to replace the air conditioning compressor on a 4.4 TDV8.
Steps Involved: Step 1: Ramp the vehicle and disconnect battery (10 mins) You'll need to get underneath at points so, this is essential. Step 2: Remove undertrays(10 mins) Remove the tow point cover. Each screw quarter turns anti clockwise then the cover pulls off. Then remove the M10 bolts around the radiator splash shield, remove the back end then wriggle out of place. 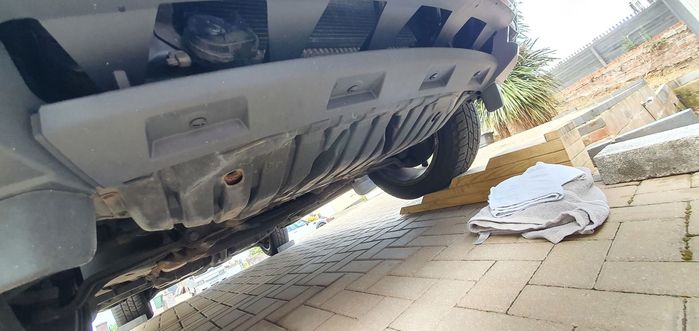
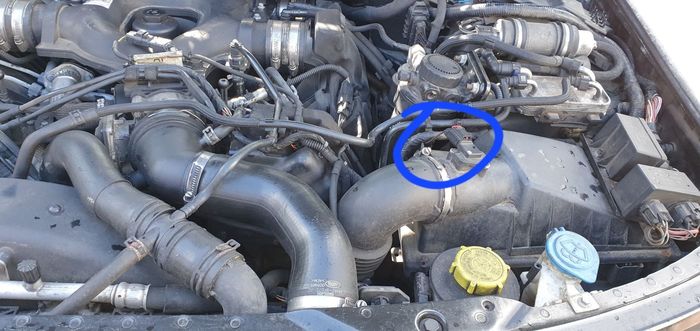
Put the bonnet into service position. Step 3: Remove the left air box and intakes (20 mins) Remove the engine cover. Remove the plug into the MAF sensor.
Remove the left charge air hose. This is M7 nuts or a flat blade screwdriver.
Remove the glow plug assembly. This is an M8 nut and then lift upwards and put out the way.
Undo the jubilee clip to the airbox and push hose slightly out the way.
The airbox assembly is now ready for removing. Start by giving a good pull upward to release the lower clip and then inward (towards the centre of the car) to release the other two. Then pull out. The blue circles show the mounting points. In yellow, note the gaiter ‐ make sure this fits around the box intake properly when you are putting everything back together again later. 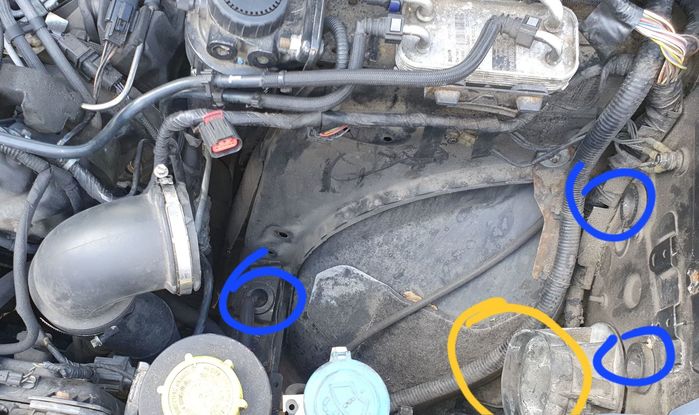
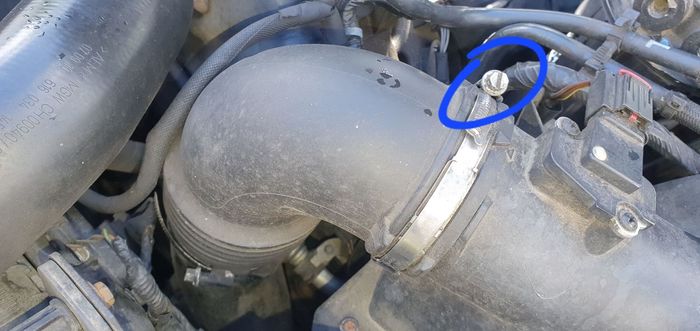
Next, undo the securing bolt for the lower turbo air intake. This is M8.
Next, undo the jubilee clip on the hose attaching to the intake. This is M7. Remove the hose and tuck away somewhere.
Now for the first fun bit. Your flexible extension will come in handy here. Loosen the jubilee clip on the lower bellows of the intake. It is accessed from within the engine bay. It is not overly tight. It's M7. The Jubilee is just there and a flexi extension will access it with ease. Once loose, the bellows will pull off quite easily and remove the section of hose.
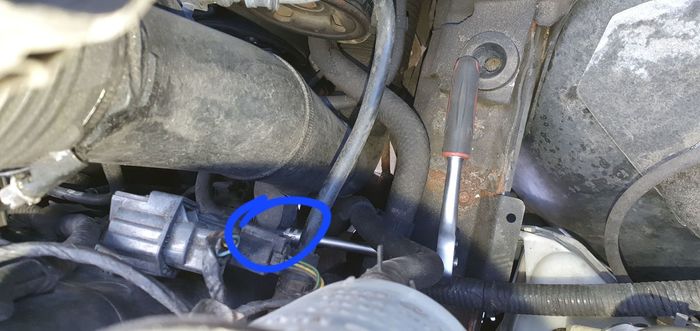
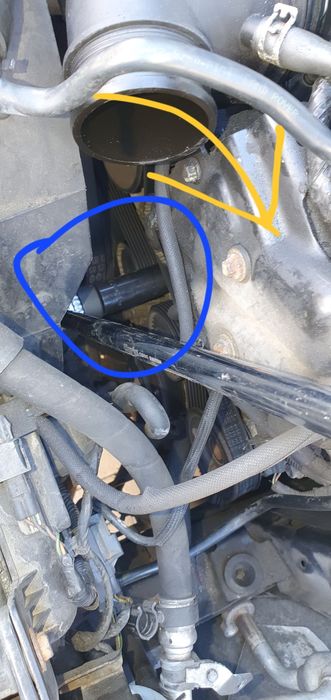
Step 4: Loosen and remove the first air con pipe (15 mins) Remove the M10 bolt on the side of the engine block and unclip the breather. 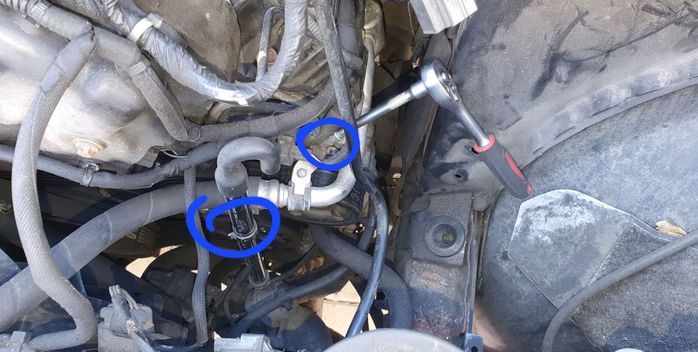
Now remove the two M8 bolts above the radiator.
Unclip the power steering hose (note the position is adjacent to the lower airbox mount).
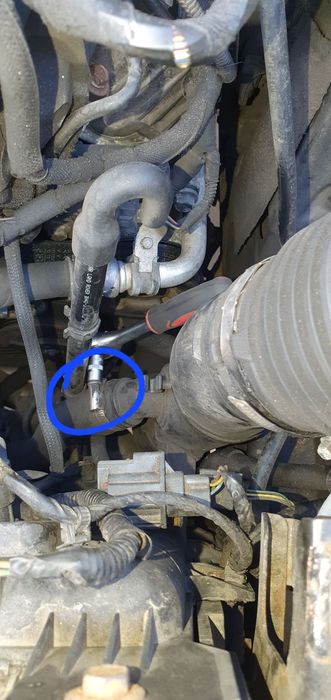
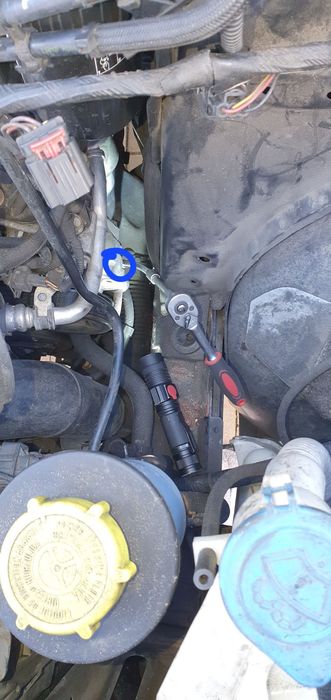
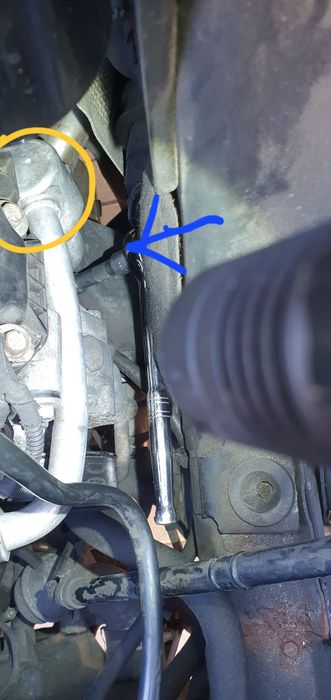
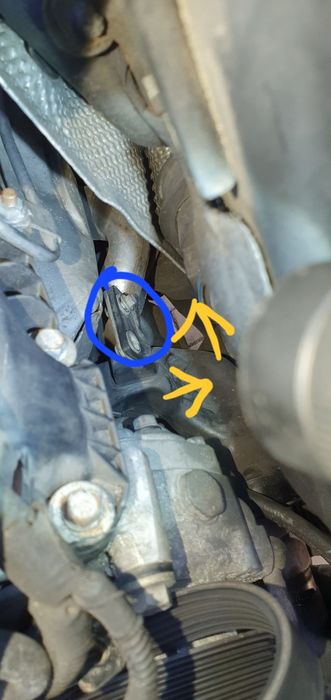
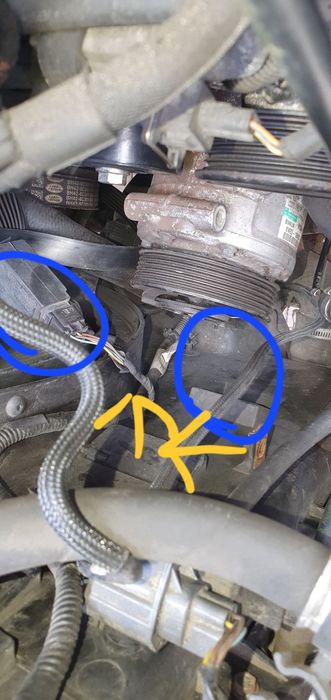
Now, to remove the bolt to the air con compressor. This is the closest pipe to you and makes access to the other pipe much easier once removed. To get your bearings, you are removing this pipe on the old compressor.
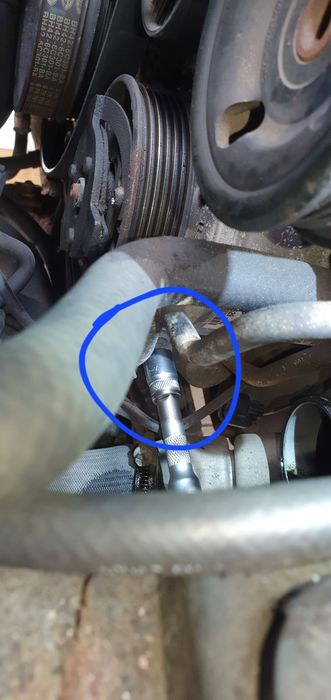
Get the handy flexi extension and a 6 point M13 nut (you may need to start the first 1/8 turn without the flexi to crack the nut [as pictured] then switch to flexi for removal).
Once cracked, switch to the flexi and a long extension to make removal of the nut a doddle.
Once removed, give the pipe a firm pull out the port and you should get the sound of a cork popping. Move it out of the way (i moved mine into the air box space). 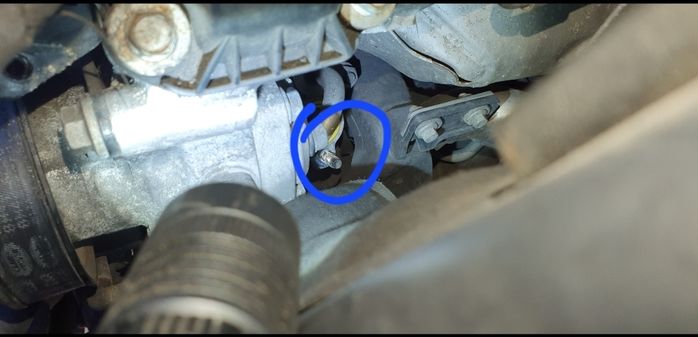
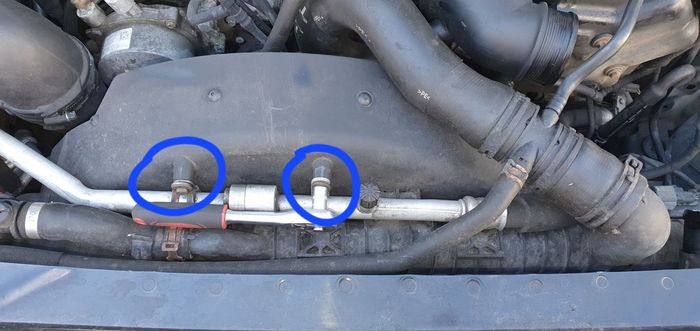
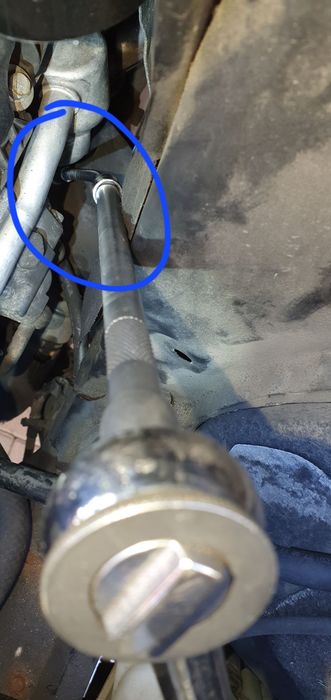
Step 5: Remove the second air con pipe (15 mins) Time to get under the car and look for this nut. It can be seen when viewed from the steering rack end. Loosen the nut but don't remove it. An M10 socket and extension reached it.
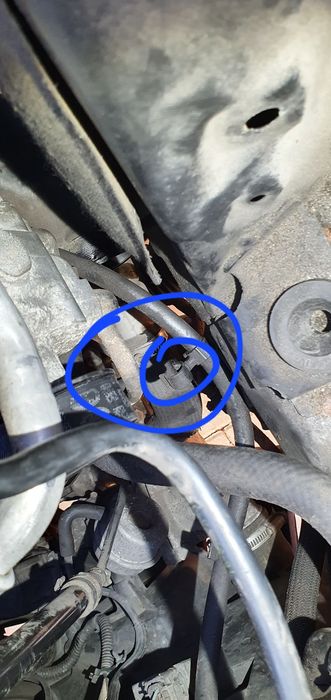
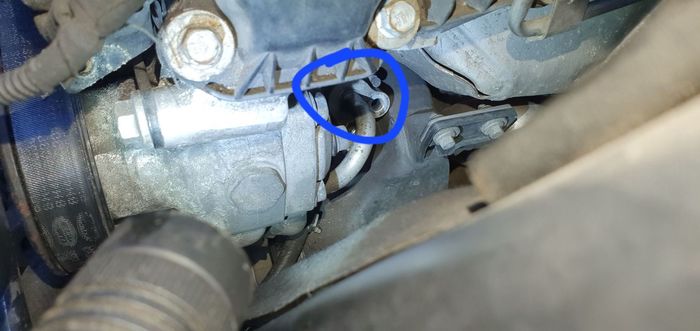
Whilst you're under the car, remove the air con cable securing lug (you are looking at the back of the air con compressor). This can be reached by hand and just pulls out.
Next, same as before and remove the M13 nut.
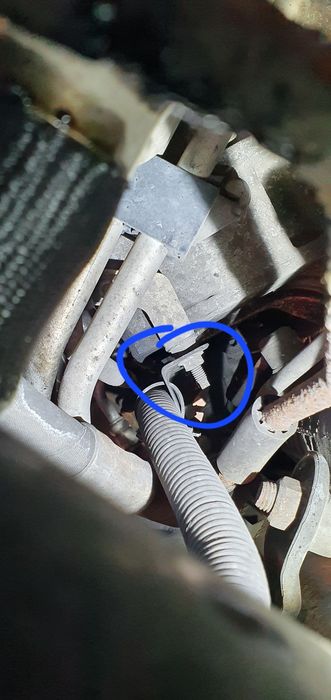
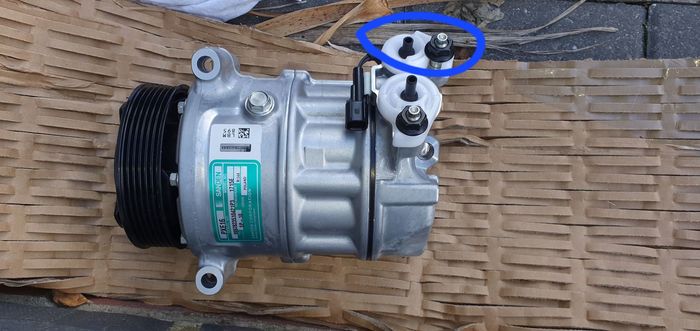
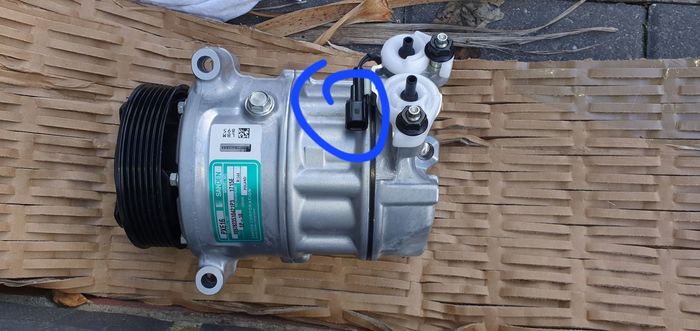
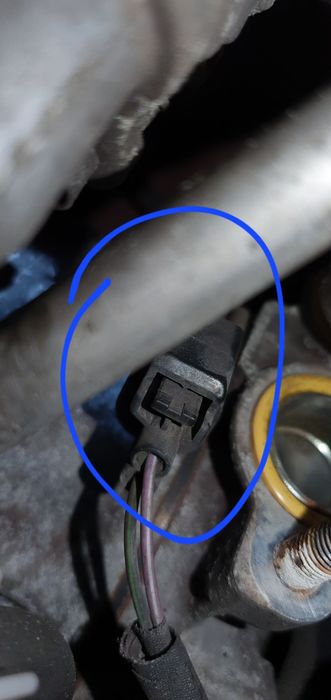
Step 6: Remove the cable (2 mins) As seen on the new compressor, reach in (this step is blind) and disconnect the plug and push out the way.
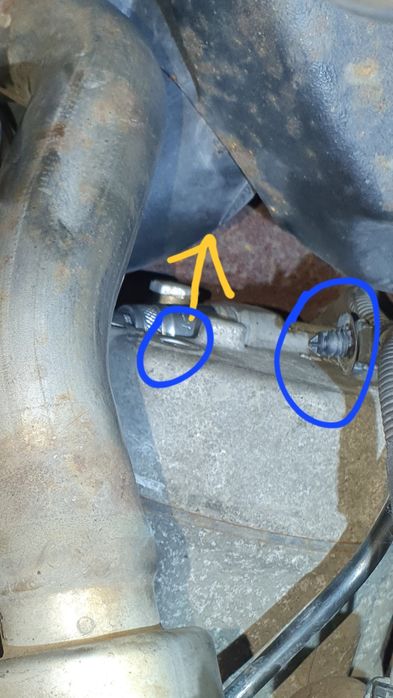
Note removing the cable securer in step 5 Step 7: Loosen the lower turbo intake (10 mins) Remove the two M10 bolts then wriggle the plastic intake out of the way of the rear compressor bolt.
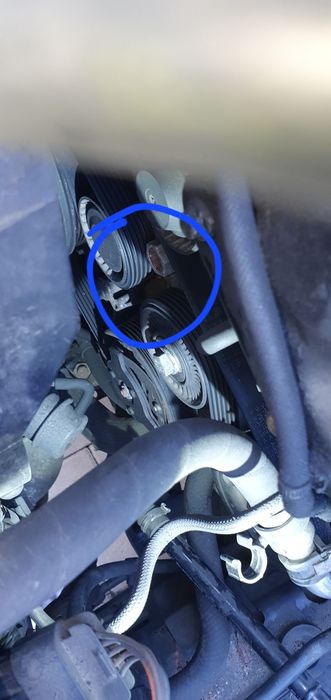
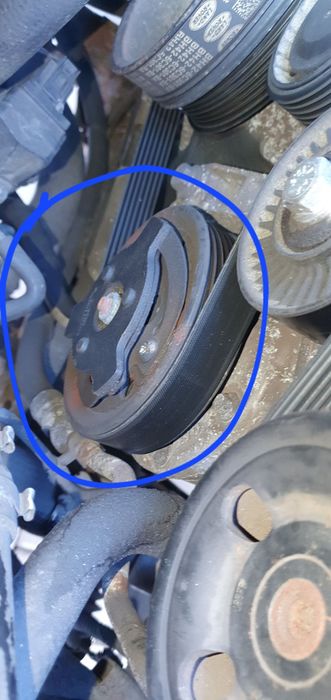
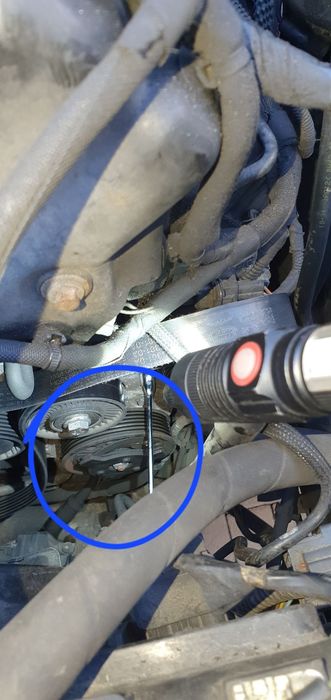
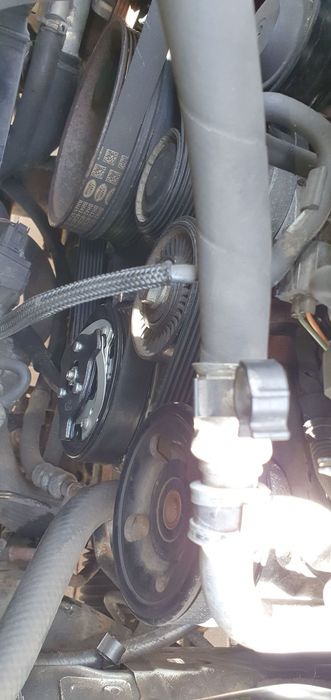
Step 8: Remove the auxiliary belt (10 mins) Don't be put off by this task. It's quite simple. Get your breaker bar and a 22mm socket. A bar of 18" or more will make light work of this task. Here's the tensioner location.
Rotate clockwise until you have enough leverage to get the belt off the air con compressor.
Move the belt to one side out of the way.
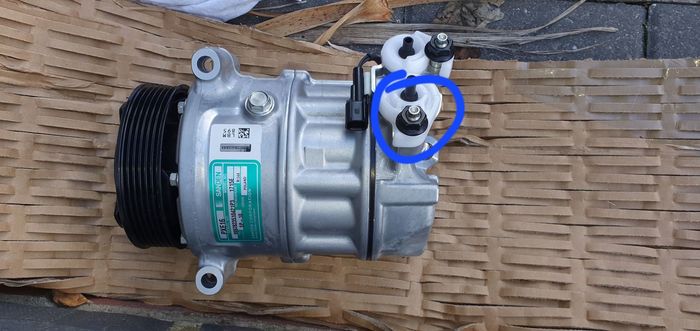
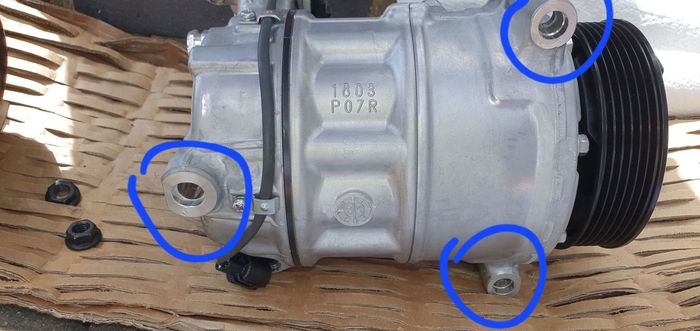
Step 9: Remove the compressor bolts and compressor (1h - 2h) This step contains the two areas on this job where time is lost or gained. Plan a couple of hours for it. I'll highlight the two hardest bits of the job. First job is to remove the compressor bolts. All 3 bolts are M13. The below picture shows their locations on the compressor:
The top bolt is easily visible from the front of the engine. 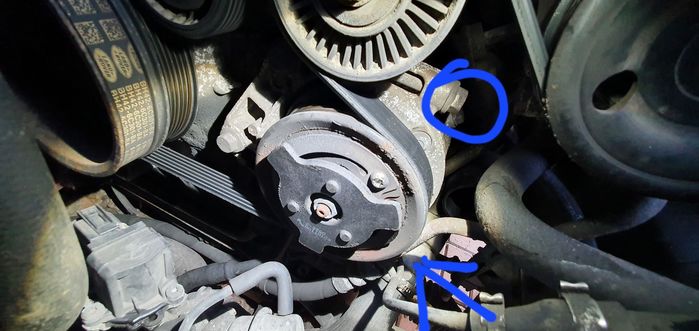
My tool of choice was an M13 ratchet spanner. Nice and easy:
The lower bolt was relatively easy to remove with a ratchet and small extension:
Now for the first of the two **** on this job - the rear compressor bolt. You do this blind - if you can have someone under the car directing, this task would be fairly straightforward. Expect time to be lost on this step. You need to find the notch on the back of the compressor and fit the socket between the gap you created by moving the turbo intake earlier and the back of the compressor.
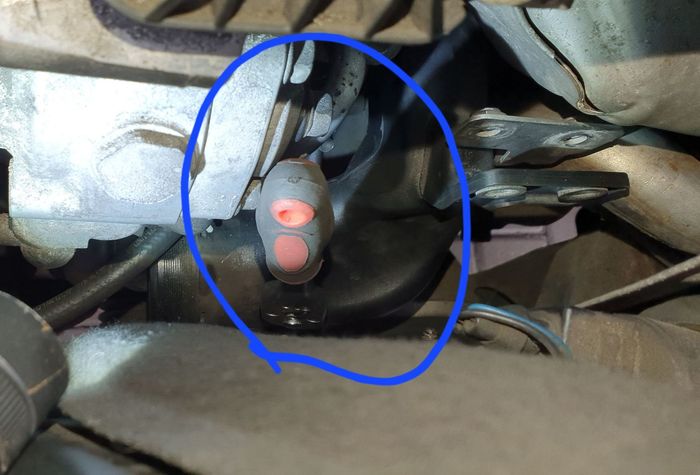
Now, for removing the compressor. As can be seen in the picture below of the back of the new compressor, the back of each bolt chamber has about a 3mm deep notch. On the side of the engine are dowels. These dowels insert into the back of the compressor. For the second and final **** of the job where time can be lost. A compressor which has been in place for 10 years or so is likely to put up a fight! Use the hammer and breaker bar, plus lots of coercion and wiggling and eventually the compressor will come free. Note that to get it off the dowels, it must be wriggled in the direction the bolts come out.
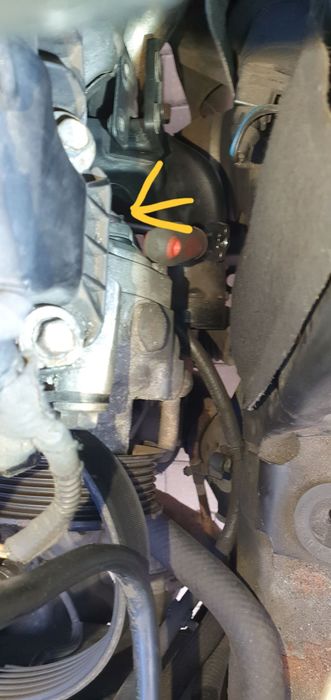
Once free and ready to be removed, move this sensor (on back of radiator) by lifting upwards and outwards.
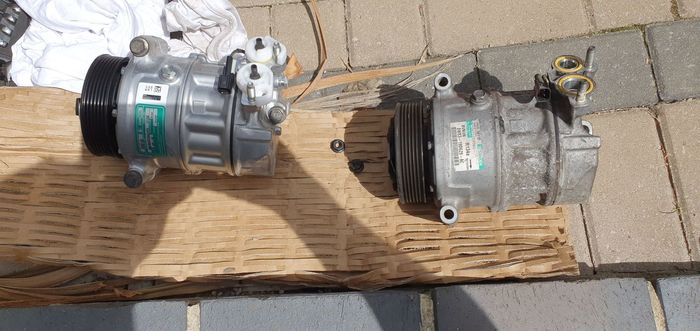
Do the hokey cokey with the compressor and it will come out easily enough. Putting the new one in and sitting it on the dowels is much easier. And hey presto, old compressor next to new compressor!
**TIME FOR LUNCH** Step 10: Lube up! (10 mins) Time for the giggly bit of the job but, i cannot stress how important this is. It will slash your refit time to half the time it took to take everything apart. You'll need the 3 in 1 oil and silicone lube. Silicone lube is great because it's extra slidey and doesn't degrade rubber and plastics. Get the rubber gloves on. First, remove the port dust covers (the white or clear plastic bits) on the new air con unit and give a very light smear of lube then put them back on with the nuts finger tight so, no dirt gets into them whilst youre fitting. Remove once ready to fit the air con pipes. Now turn the unit over and finger the dowel holes with a bit of lube. The new unit will go on so easy.
Now lube up the inside rim of every hose join. Now use the 3 in 1 oil on every bolt you have removed. Step 11: You are now ready to refit! (1 hour 30 minutes) Go and follow all the steps above in reverse. Some notes about refitting. When fitting the air con pipes, they may need a little persuasion. Just keep wiggling and a little pressure and then use the M13 nuts to tighten them to the unit. When fitting the auxiliary belt, ensure it is in the correct orientation and perform a thorough inspection to make sure all toothed sections are aligned correctly (not just the ones you removed). 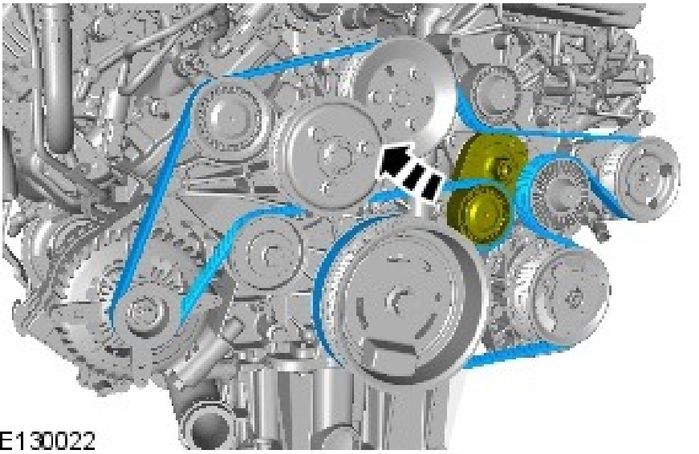
Use the torque wrench where possible but access is so tight, you may need to use best guess in places. The main ones are 25 Nm for the 3x compressor bolts and 18 Nm for the nuts on the air con pipes. Step 12: Pressure test and re-gas (1 hour) You're unlikely to have the kit for this job and it is prohibitively expensive as a one time thing so, likelihood is you'll need to take the car to a garage. Kwikfit and Halfords both do it and tyresonthedrive will also do it as a mobile job at home. All of which you can book online (as I really can't be bothered ringing round and checking availability all the time - garages need to get with the times). I took mine to Kwikfit pre-booked and paid online - it cost £59. They will pressure test the system for a peiod of 20-30 minutes, then run a vacuum pump and fill with R134a refrigerant under vacuum to the correct pressure. They'll then check operation and measure temperature at the vents. i got a nice chilly 6C at idle. There you go! job done! One new shiny compressor fitted.
 2015 Range Rover Autobiography 4.4 SDV8 2015 Range Rover Autobiography 4.4 SDV8Last edited by garyRR on 2nd Jul 2022 12:32pm. Edited 10 times in total |
||||||||||||||||||||||||||||||||||||||||||||||||||||||||||||||||||||||
|


| JayGee Member Since: 27 Jul 2021 Location: London Posts: 3283 
|
Great job!. 2012 TDV8 Vogue (L322) |
||
|
| Tdtj Member Since: 29 Sep 2021 Location: Edinburgh Posts: 196  
|
Great write up |
||
|
| Rackers Member Since: 04 Apr 2022 Location: Portsmouth Posts: 80 
|
Bravo - this will certainly help others wanting to tackle it! |
||
|
| garyRR Member Since: 13 Mar 2021 Location: Hampshire Posts: 1481
|
A hope that others do the same! Makes light work of tough jobs having a modern Haynes manual to follow. The workshop manual is pretty poor at instructions. 2015 Range Rover Autobiography 4.4 SDV8 |
||
|
| Full-fat-Lance Member Since: 06 Feb 2022 Location: Essex Posts: 130
|
A great write-up. Thank you! |
||
|
| bishbosh10 Member Since: 25 Apr 2013 Location: North Somerset Posts: 344
|
As others have said, this is a spectacularly good writeup - thank you.
|
||
|
| dhallworth Member Since: 10 Oct 2011 Location: Glasgow Posts: 3179 
|
That’s an excellent write up |
||
|
| garyRR Member Since: 13 Mar 2021 Location: Hampshire Posts: 1481
|
It's not that bad, as horrible as it looks. Just make sure you've got all the right tools at the ready and allow all day in case you need more time. And if you've got someone else in the house, summon them to be the spotter underneath the car when you remove the rear bolt of the compressor. Most of the challenge is just getting the socket lined up. 2015 Range Rover Autobiography 4.4 SDV8 |
||
|
| Sonearly Member Since: 18 Sep 2020 Location: Northants Posts: 218
|
Just completed the replacement, above instructions invaluable, many thanks.
|
||
|
| garyRR Member Since: 13 Mar 2021 Location: Hampshire Posts: 1481
|
Now go and find a holiday with the money saved! |
||
|
| johnboyairey Member Since: 11 Jan 2013 Location: surrey Posts: 2035
|
I’m fairly sure I need to do this, after watching Sams video, and the tear down of the compressor.
|
||
|
| Sonearly Member Since: 18 Sep 2020 Location: Northants Posts: 218
|
The symptoms on mine was, delayed starting, between 5-10 mins before AC kicked in. Would intermittently shut down for periods of 5 mins to 20 mins. If I went down a couple of gears and held around 3000 revs it would kick in again for various amounts of time. Normally stop in traffic.
|
||
|
| garyRR Member Since: 13 Mar 2021 Location: Hampshire Posts: 1481
|
There's varying symptoms all caused by the PRV. Mine would cool at speed but stop working in traffic.
|
||
|

|
|
| All times are GMT + 1 Hour |
< Previous Topic | Next Topic > |
Posting Rules
|
Site Copyright © 2006-2025 Futuranet Ltd & Martin Lewis
![]()
