 | Home > Maintenance & Mods (L322) > 1/0 Gauge Wire From Battery to Rear on 2011 Range Rover |
 
|
|
|
| Jasdip Member Since: 12 Mar 2012 Location: Canada Posts: 25 
|
Hey Guys, I have a 2011 Range Rover Supercharged and am trying to run a 1/0 gauge power wire from the battery to the rear for a sound system.
|
||
|
| Ansi Member Since: 07 Nov 2014 Location: Muenchwilen TG Posts: 145  
|
On the driver side is room enough even for an entire cable loom. I used the driver side on my 2004 when I changed the system to an Android Head unit. It's a pain in the |
||
|
| GGDR Member Since: 26 Nov 2016 Location: London Posts: 3545  
|
Perhaps amp vs wiring needs a look?
|
||
|
| Jasdip Member Since: 12 Mar 2012 Location: Canada Posts: 25 
|
Did you just upgrade your amp only and keep the original speakers? I watched one of his videos which is the Range Rover Sport L494 Amplifier Upgrade, I’m not sure if that was the one you were referring to.
|
||
|
| Roi354 Member Since: 06 Feb 2020 Location: Essex Posts: 32  
|
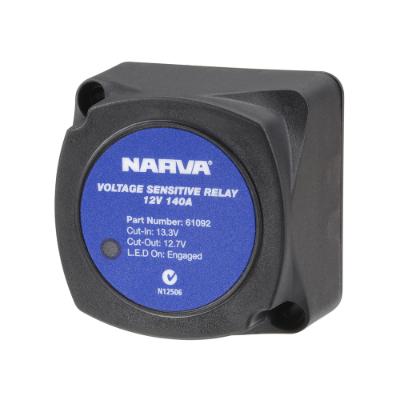
Not only would it be easier to wire but would also protect you better if you fitted a leisure battery in the boot with a split charger.
|
||
|
| Jasdip Member Since: 12 Mar 2012 Location: Canada Posts: 25 
|
I was looking into fitting a second battery into the trunk. I can modify my amp rack in the spare tire wheel well to accommodate the battery and use that same power while I will be running from the main battery to power that battery instead. I even have a battery already that I could use but it doesn’t match the specs of the main battery which was recommended. I currently have a capacitor installed in the back at the amp.
|
||
|
| Ansi Member Since: 07 Nov 2014 Location: Muenchwilen TG Posts: 145  
|
I lifted that cover just a bit and was able to push the harness thru. The middle-pillar section is way more of a hassle. |
||
|
| Jasdip Member Since: 12 Mar 2012 Location: Canada Posts: 25 
|
The middle pillar (B-Pillar) was going to be my next question. Did you have to remove the pillar pieces or were you able to get by just by removing the black piece at the bottom of the pillar? |
||
|
| Ansi Member Since: 07 Nov 2014 Location: Muenchwilen TG Posts: 145  
|
Problem is, you can't remove the black part without partially remove the upper part.
|
||
|
| GGDR Member Since: 26 Nov 2016 Location: London Posts: 3545  
|
Mine has a factory fit 1200w system.
Yes . Cheers, Greg - - - - - - - - - - - - - - - - - - - - - - - - - - - - - - - - - - - - - - - - - - 2011 Vogue SE 4.4 with lots of toys in Stornaway |
||
|
| Jasdip Member Since: 12 Mar 2012 Location: Canada Posts: 25 
|
I ended up getting it done. That was tough!
|
||
|
| wayneg Member Since: 05 Jun 2013 Location: South Fremantle, Australia ( ex London ) Posts: 798  
|
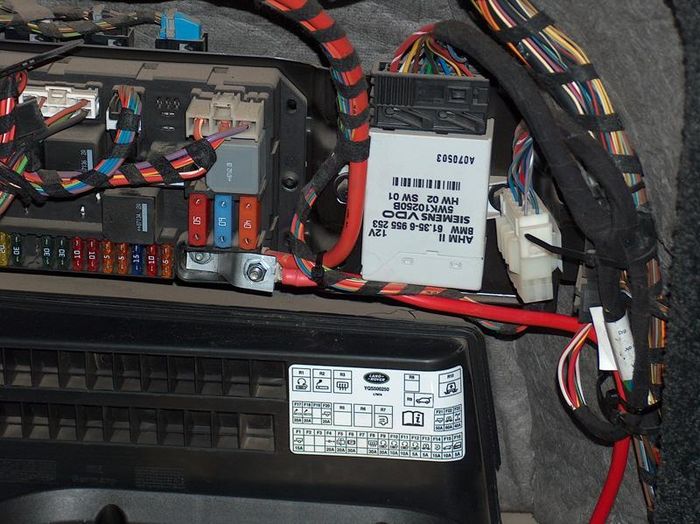
Am I missing something here, there is a thick cable running from the battery direct to the fuse box in the rear RHS, why not take a feed from there? I believe like me all those with a second battery make connections from here.
|
||||
|
| Roi354 Member Since: 06 Feb 2020 Location: Essex Posts: 32  
|
@wayneg is that part of a DT90? I've been toying with the idea of one of those - if it is, can you share your experience with it? |
||
|
| wayneg Member Since: 05 Jun 2013 Location: South Fremantle, Australia ( ex London ) Posts: 798  
|
Roi354, I grabbed that photo from Google images, I believe its one from the Traxide instructions, http://www.traxide.com.au/diy-dual-battery...t90-c.html
|
||
|
 
|
|
| All times are GMT |
< Previous Topic | Next Topic > |
Posting Rules
|
Site Copyright © 2006-2025 Futuranet Ltd & Martin Lewis
![]()


