Advertise on fullfatrr.com »

Home > Maintenance & Mods (L322) > How to replace the Front Grille and Side Vents: With Pics
Post Reply  Down to end
Page 1 of 2 12>
Print this entire topic · 
RRUK
Site Supporter


Member Since: 08 Jun 2007
Location: UK
Posts: 6366

United Kingdom 2019 Range Rover Vogue SE SDV8 Santorini Black
How to replace the Front Grille and Side Vents: With Pics

I just swapped my Grille and Vents for the Supercharged ones, however this process is exactly the same if you wanted to update a 2002 car with OE parts. i.e put a new non SC grille on etc.

Compatibility Note: The OE Supercharger grille does not fit onto early cars from 2002-2005. Please leave your car looking as standard, rather than a fake SC grille which looks dreadful!

Any L322 RR from 2002 up until the 2012MY can have ANY type of side vents fitted.

e.g. A 2002 car can have 2012MY vents and vice versa and anything in-between.

Replacing your grille with another the same shape is the same as below though


To Replace the front Grille: (5 mins tops Thumbs Up )

Open Bonnet
Undo 3 screws holding the top of the grille in place
Pull forward gently, behind the Land Rover oval is the air temp sender, slide this off the grille and pull grille away (see picture below)
Replace new grille in opposite of above

Click image to enlarge


To Replace Side Vents: (30 mins tops)

Open Bonnet
If you have front mudflaps fitted undo the 3 phillips screws visible in the wheel arch (one under the car)
Open the front door and look at the gap between the front panel and the body. You can see a white plastic clip.
Push the clip outwards with a large screwdriver, the lower plastic panel will pop out
Hold the panel now and pull away from car to release the 2nd clip (See pic below)

Click image to enlarge


Undo the 2 x 10mm screwbolts holding the side vent in place (top & bottom) and wiggle it out backwards.

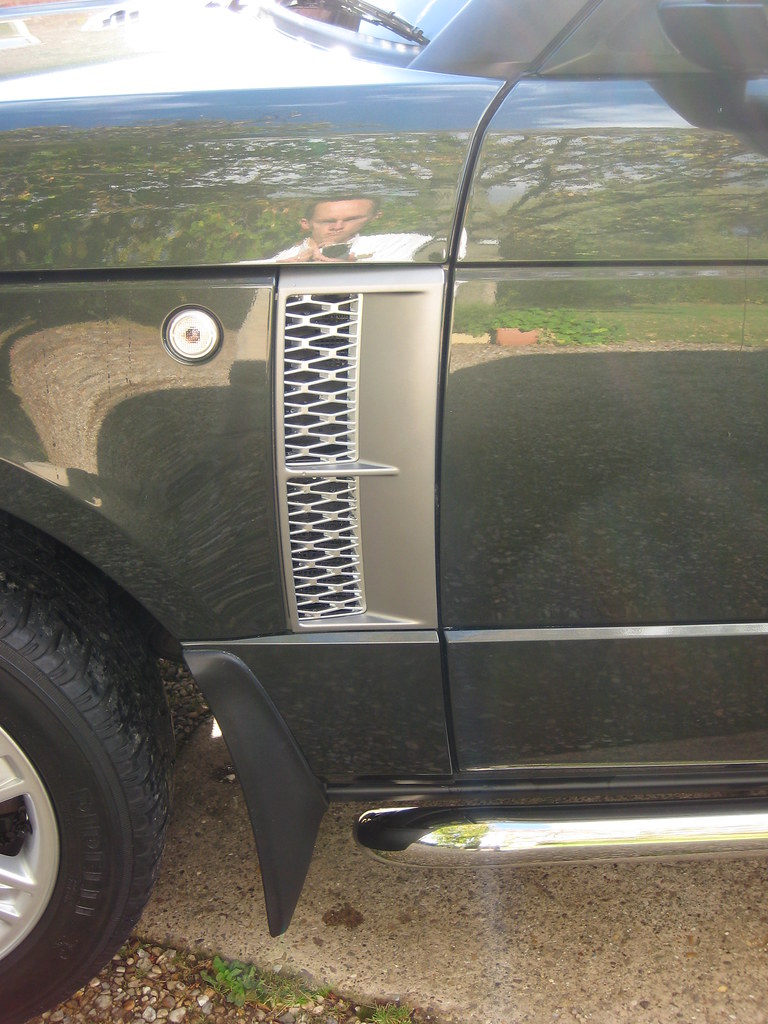
Your car should now look like this:

Click image to enlarge


Fit new side vent in reverse of the above, replacing the 2 screwbolts. Dead easy.
Now it's time to refit the lower plastic panel. Note you will now need an 8mm spanner.
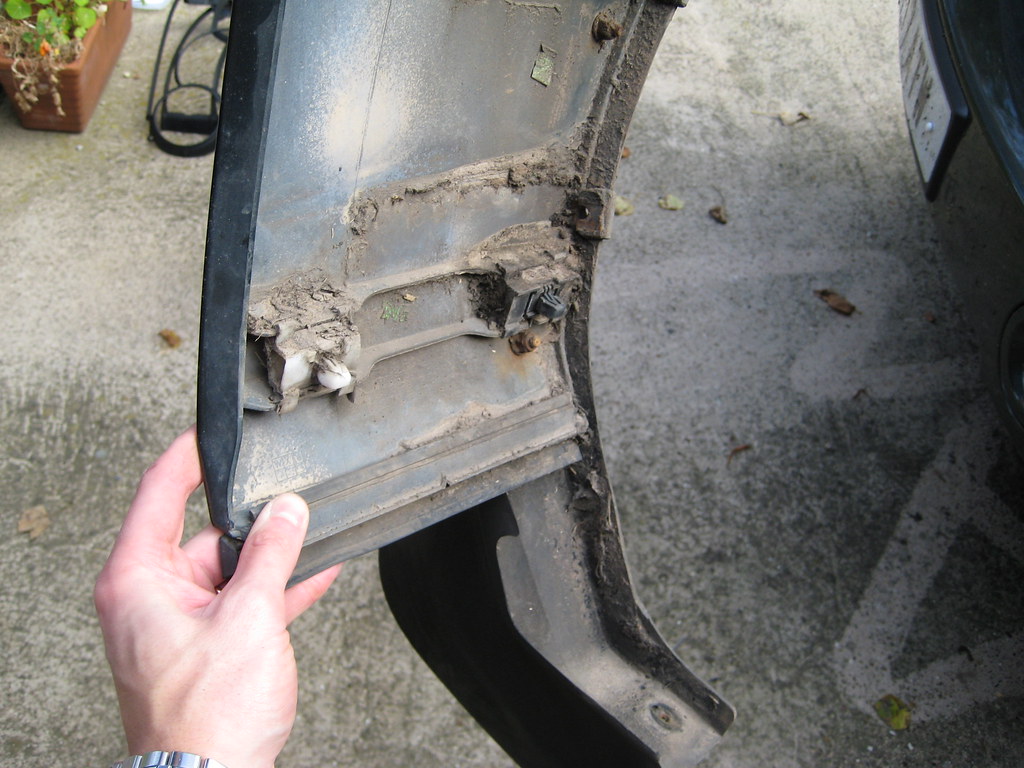
In the top left of the picture below you'll notice one self retaining bolt and washer, this will clamp the body panel in place, You need to loosen this a bit to get the panel back in. WD40 really helps as it will be all rusty.

NOTE: On my 08MY TDV8, the passenger side does not have that retaining nut and instead it is held on/together by the screws that appear to hold the mud flap in place only. Not as secure in my opinion.

Click image to enlarge


Push the panel back in place between the washers, pop the clips into their housings and then tighten the 8mm nut
Replace the 3 screws holding the mudflap.
DONE! Thumbs Up

Click image to enlarge
 Discovery 4 HSE
1998 110 TUM HS FFR Hard Top XD WOLF
1982 Series 3 Hard Top

*Gone:L462 D5 HSE LUX, L663 Defender 110 HSE, Discovery 3 HSE, 2014MY Range Rover Sport 5.0 Supercharged AB Dynamic; L405 Exec Vogue SE 4.4, 5.0 Supercharged Autobiography, Defender TDCi XS CSW, Defender TD5 HT, Vogue SE TDV8, Vogue TD6, RRSport SC 4.2V8, Classic 3.9 Vogue Auto, Land Rover Series 3 SWB

Last edited by RRUK on 14th Feb 2012 5:22pm. Edited 2 times in total

Post #7707 11th Oct 2009 8:27pm
View user's profile Send private message View poster's gallery Reply with quote
RRCanuck


Member Since: 23 Dec 2009
Location: Ontario
Posts: 172

Canada 2010 Range Rover Supercharged Supercharged Santorini Black

RRUK - do you have a before and after (comparison) pic of this mod on this RR? Apologies if its already posted somewhere.

Cheers,

Mike.

Post #12130 1st Feb 2010 1:44am
View user's profile Send private message View poster's gallery Reply with quote
RRUK
Site Supporter


Member Since: 08 Jun 2007
Location: UK
Posts: 6366

United Kingdom 2019 Range Rover Vogue SE SDV8 Santorini Black

RRCanuck, for you, I will make it so! Thumbs Up

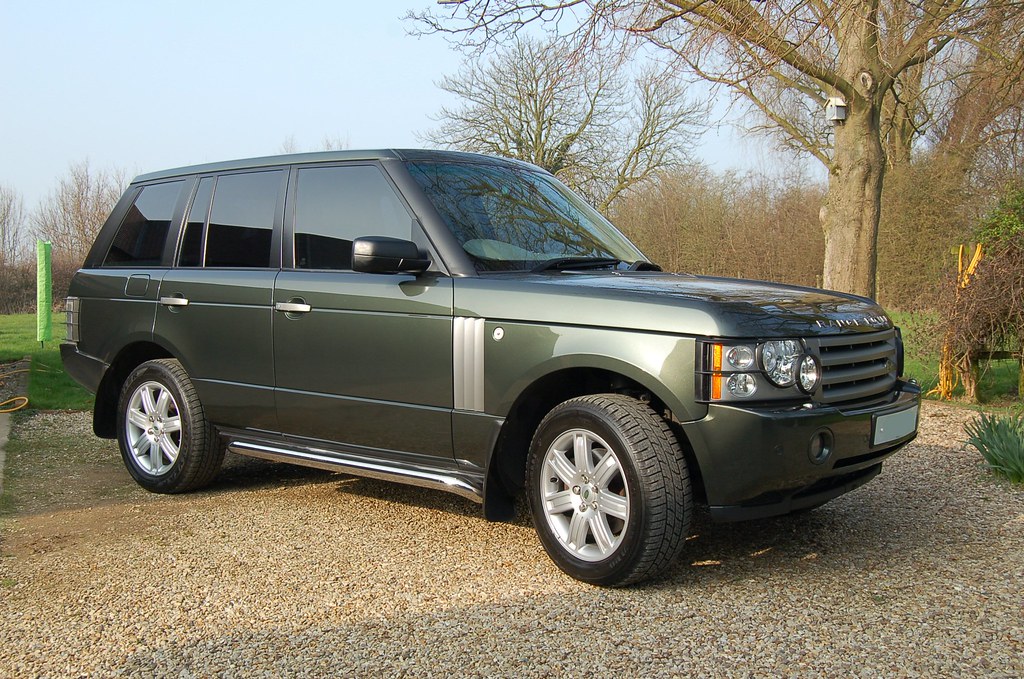
BEFORE


Click image to enlarge


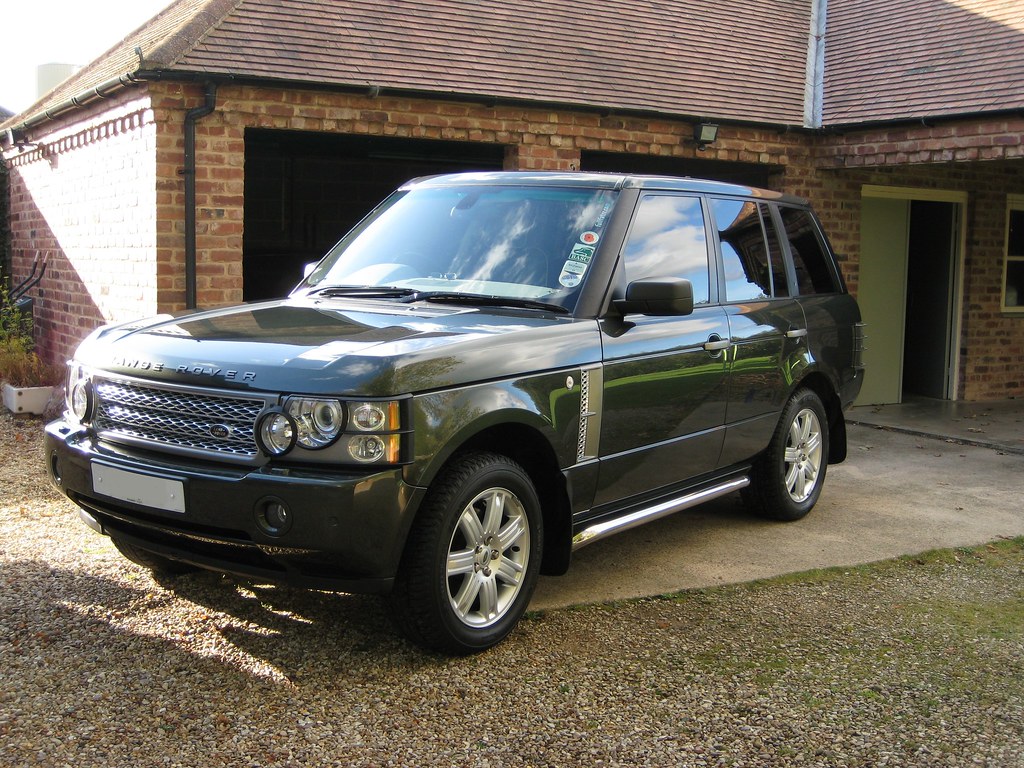
AFTER


Click image to enlarge
 Discovery 4 HSE
1998 110 TUM HS FFR Hard Top XD WOLF
1982 Series 3 Hard Top

*Gone:L462 D5 HSE LUX, L663 Defender 110 HSE, Discovery 3 HSE, 2014MY Range Rover Sport 5.0 Supercharged AB Dynamic; L405 Exec Vogue SE 4.4, 5.0 Supercharged Autobiography, Defender TDCi XS CSW, Defender TD5 HT, Vogue SE TDV8, Vogue TD6, RRSport SC 4.2V8, Classic 3.9 Vogue Auto, Land Rover Series 3 SWB

Post #12169 1st Feb 2010 5:48pm
View user's profile Send private message View poster's gallery Reply with quote
RRCanuck


Member Since: 23 Dec 2009
Location: Ontario
Posts: 172

Canada 2010 Range Rover Supercharged Supercharged Santorini Black

RRUK, Magic Thumbs Up

Too bad you couldn't have held on to that beaut!

Mike.

Post #12208 2nd Feb 2010 4:11am
View user's profile Send private message View poster's gallery Reply with quote
Full fat not diet


Member Since: 16 Nov 2008
Location: Herts
Posts: 1209

England 2004 Range Rover Vogue Td6 Zermatt Silver

Yet again Adam great pics in your thread make it an easy job Thumbs Up

Post #12211 2nd Feb 2010 8:35am
View user's profile Send private message View poster's gallery Reply with quote
MarkT


Member Since: 10 Jul 2010
Location: Bucks
Posts: 20

United Kingdom 2008 Range Rover Vogue TDV8 Java Black

Thanks, perfect explanation that even I could follow Smile Just adorned my MY08 with the 2010 side vents.

Many thanks - Mark

Post #22017 10th Jul 2010 9:33am
View user's profile Send private message View poster's gallery Reply with quote
XXXAngelXXX


Member Since: 25 Mar 2007
Location: Stuttgart
Posts: 4994

Germany 2013 Range Rover Vogue SE 5.0 SC V8 Havana

Adam you took a pic of yourself Smile All my spelling errorz are belong to me!

2023 FFRR L460
2021 AM new Vantage

Post #22024 10th Jul 2010 12:20pm
View user's profile Send private message View poster's gallery Reply with quote
Tim in Scotland


Member Since: 25 Mar 2007
Location: Somewhere between here and there, if not then I'm all at sea or at home in Scotland
Posts: 2181

2010 Range Rover Vogue TDV8 Stornoway Grey

My 2010MY S/C side vents were ordered on Sunday and have just arrived, no instructions included. Googled it and found some very convoluted instructions and then came here and found we have them already Embarassed Thank goodness for RRUK and an iPad, I shouldn't have too many problems fitting them now. 2018 Mini Countryman Cooper S E All4 PHEV in Melting Silver - it’s whisper quiet in EV and polluter modes

Post #30797 5th Oct 2010 3:02pm
View user's profile Send private message View poster's gallery Reply with quote
Full fat not diet


Member Since: 16 Nov 2008
Location: Herts
Posts: 1209

England 2004 Range Rover Vogue Td6 Zermatt Silver

Why not take a few pics and add to to the thread Tim? The revised 2010 version Thumbs Up

Post #30928 6th Oct 2010 9:52am
View user's profile Send private message View poster's gallery Reply with quote
Tim in Scotland


Member Since: 25 Mar 2007
Location: Somewhere between here and there, if not then I'm all at sea or at home in Scotland
Posts: 2181

2010 Range Rover Vogue TDV8 Stornoway Grey

Will do, have already started taking some, I hope too that mine doesn't have all those corrosion spots behind the vents....... 2018 Mini Countryman Cooper S E All4 PHEV in Melting Silver - it’s whisper quiet in EV and polluter modes

Last edited by Tim in Scotland on 6th Oct 2010 1:31pm. Edited 1 time in total

Post #30930 6th Oct 2010 10:10am
View user's profile Send private message View poster's gallery Reply with quote
Vogue


Member Since: 31 Jan 2008
Location: on the hill
Posts: 3742

United Kingdom 

wouldn't harm to paint it with waxoyl or similar - seems like muck gets trapped in there

Post #30959 6th Oct 2010 11:42am
View user's profile Send private message View poster's gallery Reply with quote
Tim in Scotland


Member Since: 25 Mar 2007
Location: Somewhere between here and there, if not then I'm all at sea or at home in Scotland
Posts: 2181

2010 Range Rover Vogue TDV8 Stornoway Grey
Fitting 2010MY S/C side vents to non S/C 2010MY

Basically it's the same as RRUK's pre 2010MY method but a couple of things to watch out for so I'll start from scratch:also my car doesn't have mud flaps so the job is a little easier

1) Tools required - 10mm socket, 10mm open or ring spanner and a flat blade screw driver. Unless you have a very short ratchet for your socket set best not to use the ratchet to avoid paintwork damage on the bonnet edges as the working space is quite small

The socket is useful for running out an in the 2 selftapping screwnuts that hold each vent in place if you have a problem with the spanner in the lower location.

2) Open the car's front door fully and at the same time open the bonnet

3) Looking forwards into the panels of the car at the door hinge/ wing area should look like this, place the flat headed screwdriver into the space between the body coloured braket with the curved edge and the part of the plastic clip to the right of it (on the outer wing side) and GENTLY use the screwdriver to lever the clip out.


4)Close the door slightly and on the outside gently ease the lower plastic trim panel away from the body BUT don't take it off as it isn't easy to relocate it properly when you want to re-secure the panel

The bit that is difficult to get back into place is this bit in the wheel arch liner


5) There are two selftapping screwnuts that hold the vent in place - one on the top of the vent and one at the bottom in the 100mm square cut-out below the vent. The screwnut on the top to undo is the one in the middle of this photo, no need to touch any others

The lower one is located in the cut-out shown in this picture


6) Undo both the screw-nuts with the 10mm spanner or socket and set to one side, then gently ease the vent slightly out and to the rear of the car, you may find it easier to close the door to do this. Take care not to force the vent as it is slotted into 3 slots with springy plastic prongs moulded onto the vent body - below are the old new and old vents side by side, the S/C vent is on the left and its' back id very different to the non-S/C vent but you can see the three location prongs


7) Take the new vent and locate it in the slot in the wing gently but firmly locate the three prongs in their slots and gently work the vent into place and then click it home. Replace the top and bottom screwnuts and tighten them to just beyond finger tight

Click image to enlarge


8)Relocate the lower body plastic trim panel and press it firmly home, ensuring both the plastic clips have fully clicked home

Cool Finished job
Click image to enlarge


Just a note - I found that the screwnuts on the passenger side of the car were so tightly done up (the drivers side needed hardly any help from the spanner to get started ) that I needed the 10mm socket but found that the space is not very big and putting the ratchet onto the socket could easily touch both the door and bonnet edges as it is operated, damaging paintwork. A longer 10mm spanner than I have would help nicely! 2018 Mini Countryman Cooper S E All4 PHEV in Melting Silver - it’s whisper quiet in EV and polluter modes

Post #31041 6th Oct 2010 4:09pm
View user's profile Send private message View poster's gallery Reply with quote
Gazellio @ Prestige Cars


Member Since: 22 Jan 2010
Location: Chilterns, UK
Posts: 11309

United Kingdom 2010 Range Rover SE Td6 Zermatt Silver

Worth noting that when changing SIDE VENTS it is not necessary to completely remove the bottom plastic panel. If you pull from the door side and release the clips you can then just swing it out leaving the wheel arch side still attached and there is plenty of access for your 10mm spanner. When changed you just clip the door side back in top and bottom. MUCH easier than trying to loosen the screw or force it back in....

I changed to an S/C grill and 2010 vents in under 20 minutes today it being the 8th time I have done it!

Post #51420 22nd Feb 2011 7:58pm
View user's profile Send private message View poster's gallery Reply with quote
pretlove


Member Since: 10 Feb 2011
Location: Bas vegas
Posts: 1865

United Kingdom 2003 Range Rover HSE 4.4 V8 Zambezi Silver

just wanted to say thanks guys did mine today and found it was very easy only differance was my mud flaps had 4 screws and none of which was underneath.......once again thanks guys Thumbs Up "RANGEISM WILL NOT BE TOLERATED"
www.futuresecurityservices.co.uk
Pretlove says , '' I want my car back Sad "

Post #52358 1st Mar 2011 7:32pm
View user's profile Send private message View poster's gallery Reply with quote
rich_959


Member Since: 13 May 2011
Location: East Yorkshire
Posts: 64

United Kingdom 2007 Range Rover Vogue TDV8 Stornoway Grey

Hi chaps,

I'm picking up on a bit of an old thread here, but the RR I've just bought has the supercharged grille/vents, and the grille has a black Landrover badge. Has anyone on here been as sad as me and wanted to change the rear badge to a black one? And if so, is it just stuck on, or does it have any prongs through the boot? Also, is this a part I can by from the main dealer? Seen some on ebay but not sure if they're proper ones.

Cheers!

Rich.

Post #65357 23rd May 2011 10:38am
View user's profile Send private message View poster's gallery Reply with quote
Post Reply  Back to top
Page 1 of 2 12>
All times are GMT

Jump to  
Previous Topic | Next Topic >
Posting Rules
You cannot post new topics in this forum
You cannot reply to topics in this forum
You cannot edit your posts in this forum
You cannot delete your posts in this forum
You cannot vote in polls in this forum


Site Copyright © 2006-2024 Futuranet Ltd & Martin Lewis
fullfatrr.com RSS Feed - All Forums


Switch to Mobile site