Advertise on fullfatrr.com »

Home > In Car Electronics (L322) > Reverse camera repair / upgrade
Post Reply  Down to end
Page 2 of 7 <1234567>
Print this entire topic · 
forever


Member Since: 06 Oct 2015
Location: Oxted
Posts: 319

United Kingdom 

btw, does anyone know if you can a cable that plugs directly into the signalin brass housing and then has a RCA plug attached? would save messing with the soldering iron

Post #408153 7th Oct 2016 4:09pm
View user's profile Send private message View poster's gallery Reply with quote
Kinch


Member Since: 08 Aug 2016
Location: Idaho
Posts: 45

United States 2006 Range Rover HSE 4.4 V8 Buckingham Blue

Okay, I'm indicating with the wire cutters, which location do I want to cut? Right behind the camera, or just before the yellow and red connectuons?


Post #408208 7th Oct 2016 8:17pm
View user's profile Send private message View poster's gallery Reply with quote
Angus_bull


Member Since: 17 Apr 2015
Location: Fauldhouse
Posts: 7

United Kingdom 2006 Range Rover Vogue SE 4.4 V8 Java Black

Don't cut any wires off the camera especially close to the camera as there is a small power convertor inside the large moulded plastic half way along the cable. I did this with my first camera and wrecked it.

I'm not sure how much your new camera will strip down but I don't think that one will work. As part of the camera pack, you should have received a power cable and a yellow phono cable, these need to be attached to the original camera lead to act as a harness. It can all be plugged in as one then. If you let me know what the colour of the four original wires are then I can tell you what needs to be connected (if I can remember)


Here is the camera that I bought, I then unscrewed the front part and was left with this


I trimmed the front part and screwed it back on then put it in the housing


For the loom I connected the power and signal cables together and added heat shrink to tidy it up


Lastly, excuse any spelling mistakes as I'm typing this on a tablet

Post #408897 11th Oct 2016 9:38pm
View user's profile Send private message View poster's gallery Reply with quote
Angus_bull


Member Since: 17 Apr 2015
Location: Fauldhouse
Posts: 7

United Kingdom 2006 Range Rover Vogue SE 4.4 V8 Java Black

One more think, you will need to dig out all the old resin from the rear of your old camera casing and drill it large enough (12mm if I recall) for the plugs and large moulded section to pass through. These will also go through the spoiler fine if you remove the riveted holder then refit.

If this all goes successfully, then it is a good idea to seal the camera housing up properly with silicone as I ended up with a bit of water in mine after a few week which resulted in a blurry picture. Again make sure the camera works fine before doing this as it will be a pain to dig all the silicone back out if you don't like it.

Have a good search through the forum as there are a few posts on this and a good one in the wiki.

Post #408899 11th Oct 2016 9:45pm
View user's profile Send private message View poster's gallery Reply with quote
Kinch


Member Since: 08 Aug 2016
Location: Idaho
Posts: 45

United States 2006 Range Rover HSE 4.4 V8 Buckingham Blue

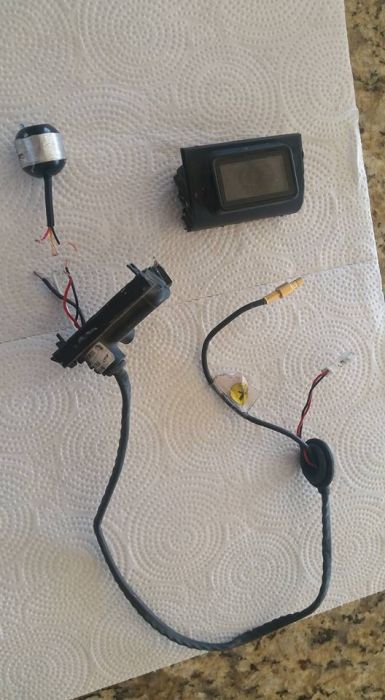
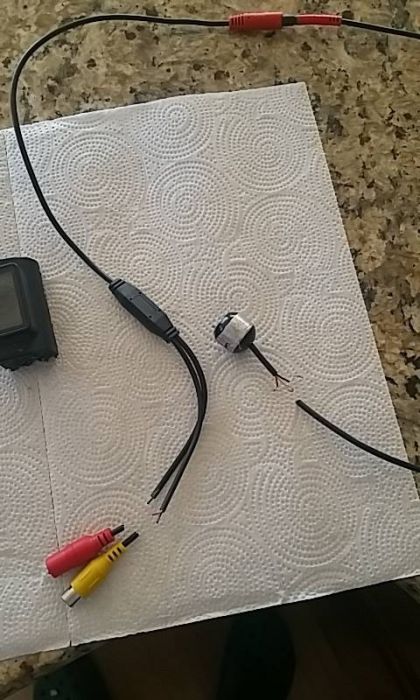
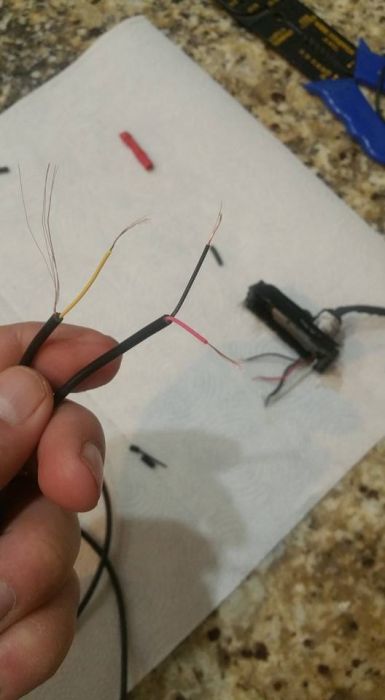
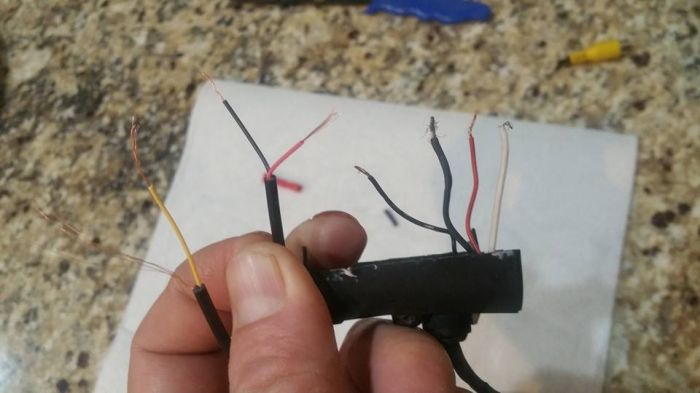
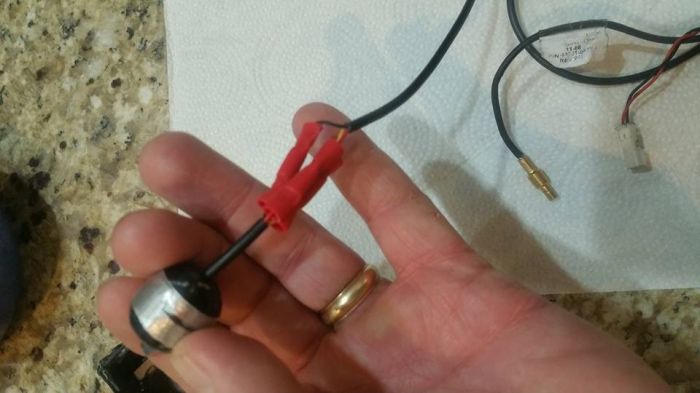
Angus thanks for the post. Before you made it, I did the job wrong and ruined my camera. I'm trying to wire it back to see if it will at least work. I'm going to post some photos to show you what I did.

Post #409013 12th Oct 2016 12:53pm
View user's profile Send private message View poster's gallery Reply with quote
forever


Member Since: 06 Oct 2015
Location: Oxted
Posts: 319

United Kingdom 

Good luck with that, i did the same first time as i did not think the plugs would fit through the hole in the spoiler, tried to wire it back but gave up, they only cost around £8.00, so i would buy another..

Post #409015 12th Oct 2016 12:57pm
View user's profile Send private message View poster's gallery Reply with quote
Kinch


Member Since: 08 Aug 2016
Location: Idaho
Posts: 45

United States 2006 Range Rover HSE 4.4 V8 Buckingham Blue


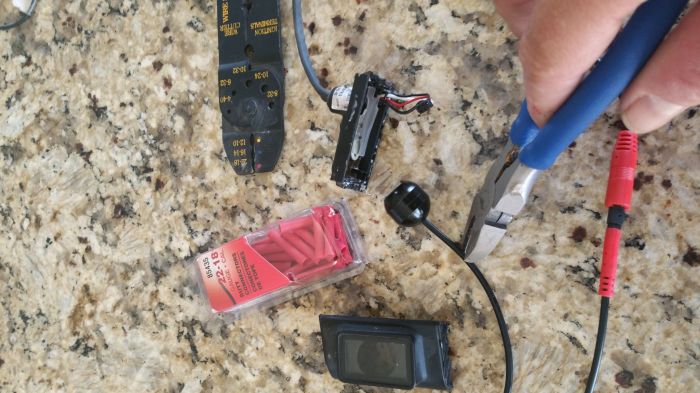
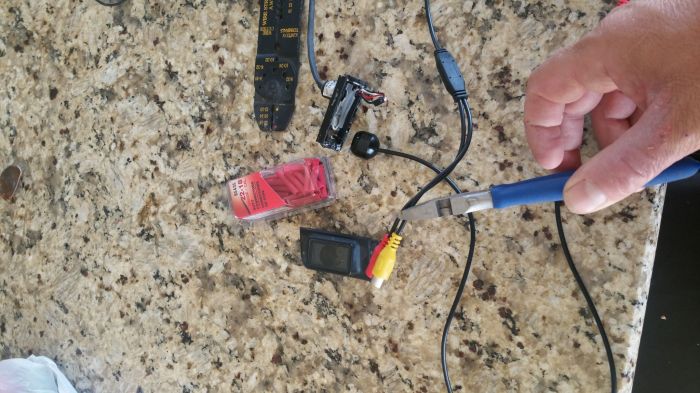
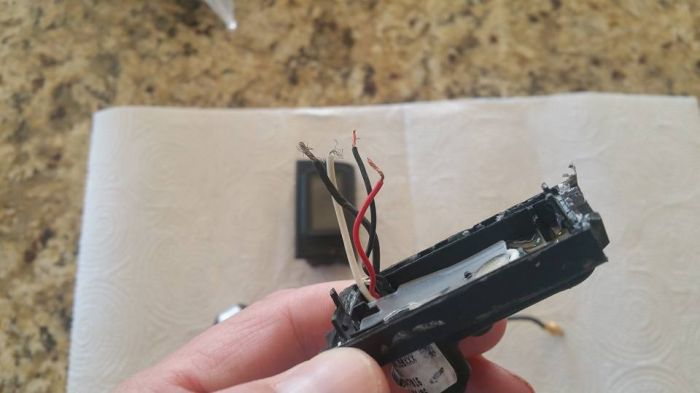
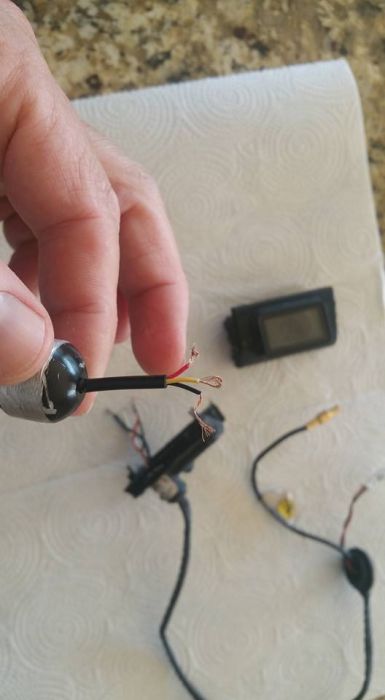
Okay Angus, so here are pictures of how I did it the wrong way lol. I also took a dremel to the camera and made it smaller in diameter so it would fit in the original housing. Anyway check it out.
Click image to enlarge


Click image to enlarge


Click image to enlarge


Click image to enlarge


Post #409041 12th Oct 2016 4:44pm
View user's profile Send private message View poster's gallery Reply with quote
forever


Member Since: 06 Oct 2015
Location: Oxted
Posts: 319

United Kingdom 

I am still struggling with getting a connect via the yellow rca cable, i have cut it and it give a black and red wire, on my test bench both need to be connected to get an image on a tv, but the rangerover loom only has the coaxial type connection how do you connect that in ? Or can you buy and adaptor to plug from the yellow rca cable into the brass coaxial type?

Post #409283 14th Oct 2016 11:41am
View user's profile Send private message View poster's gallery Reply with quote
stucart


Member Since: 03 Jul 2016
Location: Staffordshire
Posts: 84

United Kingdom 2007 Range Rover Supercharged 4.2 SC V8 Java Black

Mine has got the black screen of death also after some intermittent working, notice there is condensation in the housing so ive ordered one off Ebay to try this fix also, any more info about soldering the new camera leads to the original camera leads would be useful, as I understand going from the new camera to the coax type connection looks tricky??

Post #409943 20th Oct 2016 11:48am
View user's profile Send private message View poster's gallery Reply with quote
themule


Member Since: 03 May 2016
Location: Yorkshire
Posts: 126

United Kingdom 2007 Range Rover Vogue TDV8 Zambezi Silver

My new camera has now arrived, it's a different design to these though (it has 6 LEDs for night time reversing) and I have taken it apart with the idea of just replacing the circuit board / lens. It has 3 wires coming out, +ve, ground and video. There are 4 wires into the old camera, 2 power, the others presumably being video and the shielding for the coax - not sure how to 3 into 4 goes .
Maybe I will get the round camera and do what Nick did.

Post #410051 20th Oct 2016 8:59pm
View user's profile Send private message View poster's gallery Reply with quote
themule


Member Since: 03 May 2016
Location: Yorkshire
Posts: 126

United Kingdom 2007 Range Rover Vogue TDV8 Zambezi Silver

I am missing something here. The cameras have 3 wires, 2 power and the composite signal. I don't see how the single composite signal wire connects to the SMB (coax) cable that has two connections.

Post #410195 21st Oct 2016 7:26pm
View user's profile Send private message View poster's gallery Reply with quote
stan
Site Moderator


Member Since: 13 Jul 2010
Location: a moderate moderated moderator moderating moderately in moderation
Posts: 35262

United Kingdom 

the earth on the power doubles up as the shielding on the coax..[if that makes sense] ... - .- -.


Y. O. L. O.
.

Post #410202 21st Oct 2016 8:10pm
View user's profile Send private message View poster's gallery Reply with quote
themule


Member Since: 03 May 2016
Location: Yorkshire
Posts: 126

United Kingdom 2007 Range Rover Vogue TDV8 Zambezi Silver

Thanks Stan. So The black earth wire splits, 1 bit for the shielding and 1 for the power earth? That would explain the moulded part on the new cable, which I cut off.

Post #410214 21st Oct 2016 8:53pm
View user's profile Send private message View poster's gallery Reply with quote
stan
Site Moderator


Member Since: 13 Jul 2010
Location: a moderate moderated moderator moderating moderately in moderation
Posts: 35262

United Kingdom 

thats what i've found when doing my home cctv .. ... - .- -.


Y. O. L. O.
.

Post #410215 21st Oct 2016 8:55pm
View user's profile Send private message View poster's gallery Reply with quote
n1cktdv8


Member Since: 19 Aug 2013
Location: Cheshire
Posts: 1754

2008 Range Rover Vogue TDV8 Stornoway Grey

themule wrote:
My new camera has now arrived, it's a different design to these though (it has 6 LEDs for night time reversing) and I have taken it apart with the idea of just replacing the circuit board / lens. It has 3 wires coming out, +ve, ground and video. There are 4 wires into the old camera, 2 power, the others presumably being video and the shielding for the coax - not sure how to 3 into 4 goes .
Maybe I will get the round camera and do what Nick did.


I did only a minor trim on the bezel at the focal end of the unit. It then went into the existing housing with no fuss and after it was aligned and shimmed, I back filled it with silicone and allowed it to set.

There is no direct plug and play, I soldered the neg to the shield and it's working just fine. I used heat shrink and insulation tape to ensure it is protected.

A bit gung ho for some of you more refined but I needed the camera! Is this where I put the car details and a bit about myself ?........

Post #410217 21st Oct 2016 9:06pm
View user's profile Send private message View poster's gallery Reply with quote
Post Reply  Back to top
Page 2 of 7 <1234567>
All times are GMT

Jump to  
Previous Topic | Next Topic >
Posting Rules
You cannot post new topics in this forum
You cannot reply to topics in this forum
You cannot edit your posts in this forum
You cannot delete your posts in this forum
You cannot vote in polls in this forum


Site Copyright © 2006-2024 Futuranet Ltd & Martin Lewis
fullfatrr.com RSS Feed - All Forums


Switch to Mobile site