 | Home > My Range Rover > Project Fatty off roader....PICTURES NOW BACK |
 
|
|
|
| bova Member Since: 29 Aug 2015 Location: Dubai Posts: 6  
|
Fantastic thread, I found it today and have read it all.
|
||
|
| Haylands Member Since: 04 Mar 2014 Location: East Yorkshire Posts: 8546  
|
Glad you enjoyed it, should be doing some more this coming week so watch this space.... |
||
|
| bova Member Since: 29 Aug 2015 Location: Dubai Posts: 6
|
I'll be waiting, I'm reading your other threads right now.
|
||||
|
| Haylands Member Since: 04 Mar 2014 Location: East Yorkshire Posts: 8546
|
They do seem to suffer from rubber bits perishing in the hotter climates... good luck with it... Pete
|
||
|
| Haylands Member Since: 04 Mar 2014 Location: East Yorkshire Posts: 8546
|
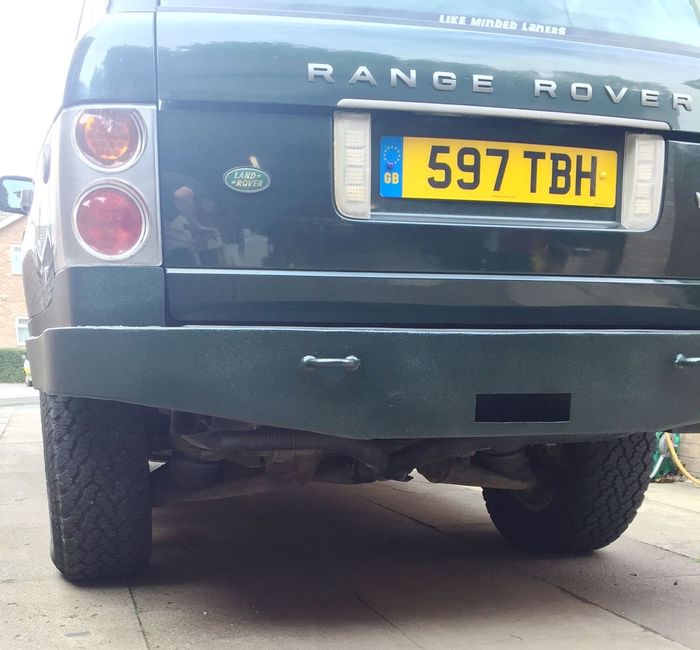
Hi,
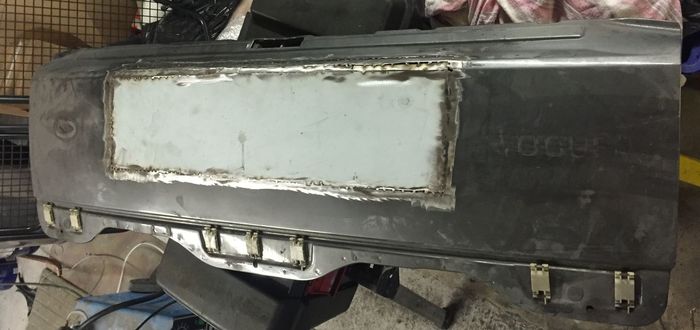
Ground it all down
Then just a bit of filler work, got it to the primer stage and then dropped it off at the painters... came back looking very nice... 
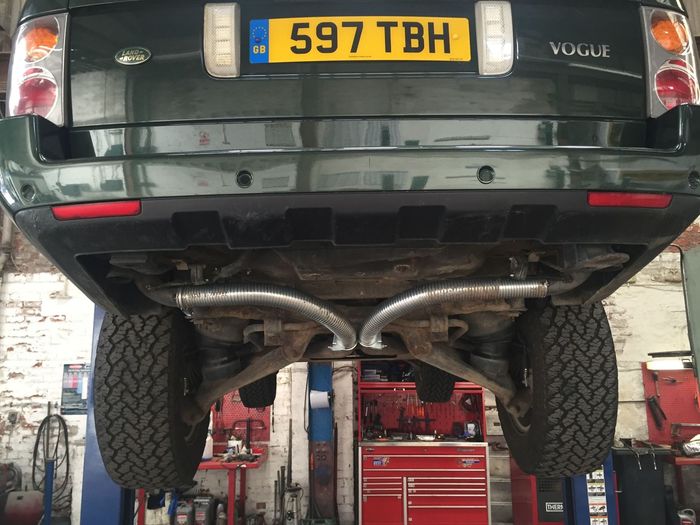
Next job was to remove he back box from the exhaust, mines been hit several times and wasn't far off falling off anyway and I wanted to see 1. how loud it was and 2 how high I could get the new bumper ... well the answer to 1. is VERY LOUD, it makes small children cry and sets off car alarms... it really is too loud to live with so I will be putting in a couple of smaller rear boxes when the bumper is finally in place and I know how much room there is... I just cut the tailpipes off the rear box and joined them to the pipes with some 60mm ID flexi exhaust pipe, welded on some brackets and used the rear pair of exhaust mounts.. then sprayed it all black after this picture....
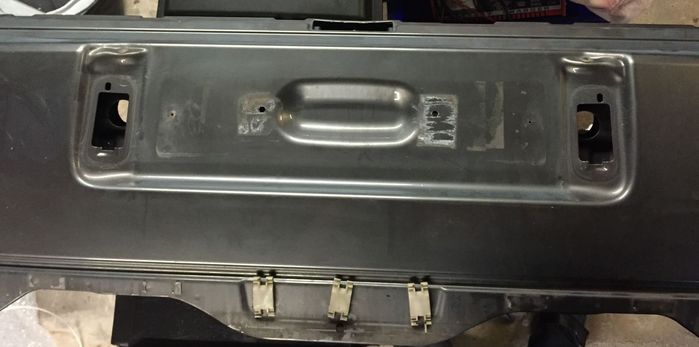
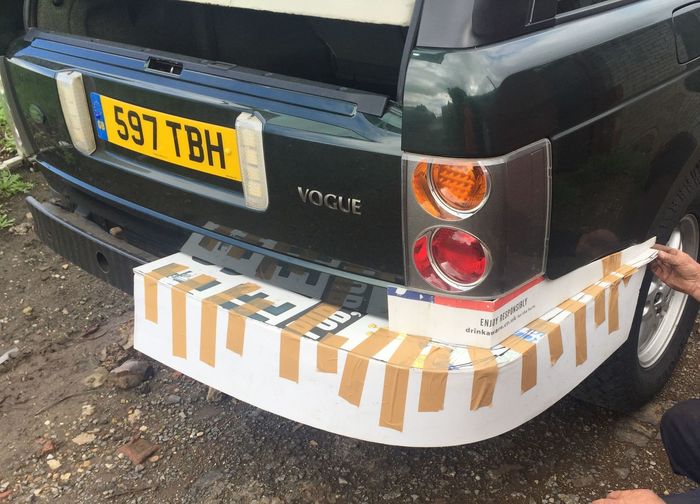
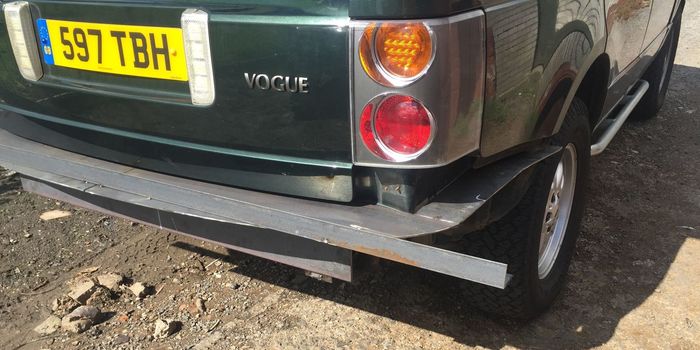
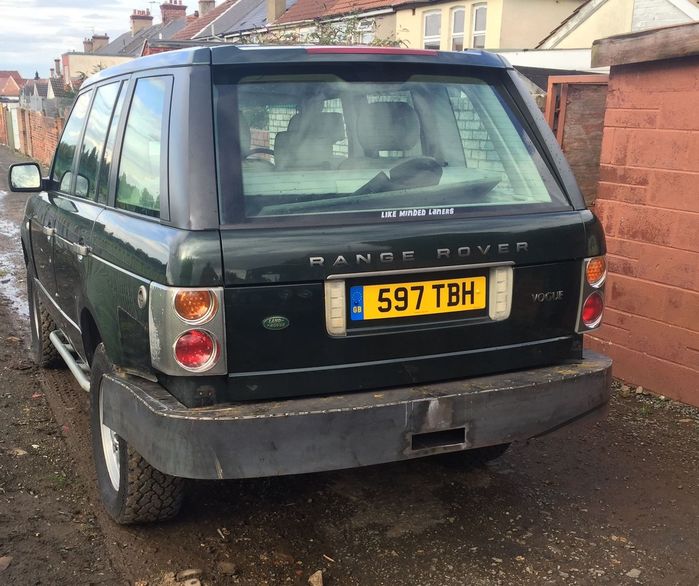
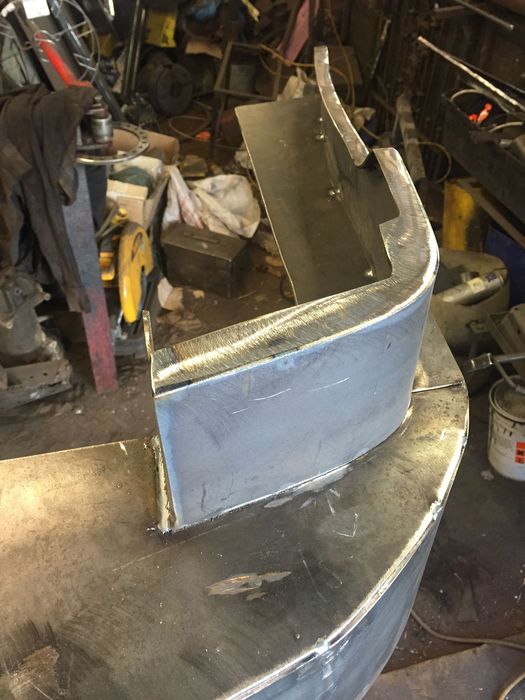
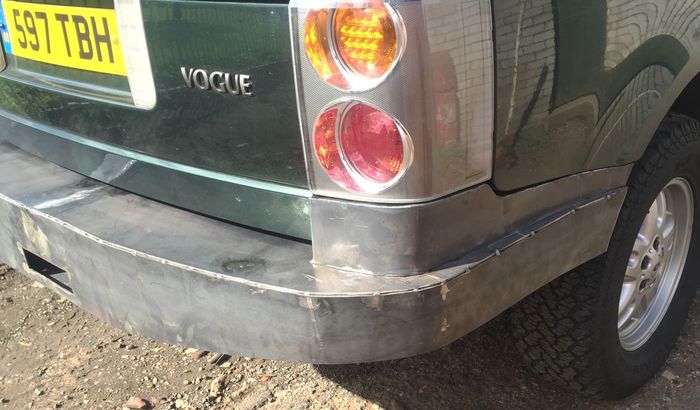
Then onto the bumper, started yesterday and took off the old one, out with the corrugated plastic and knock up a template... radius was done by hand, wanted the bumper to stick out a bit further than the original to help protect the rear wings..
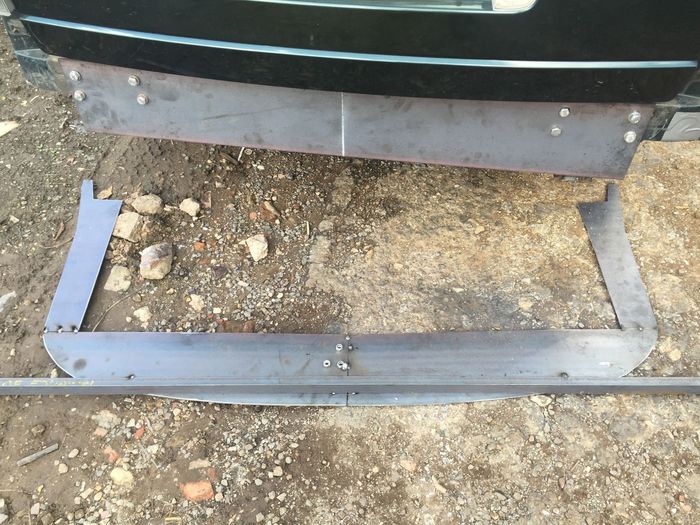
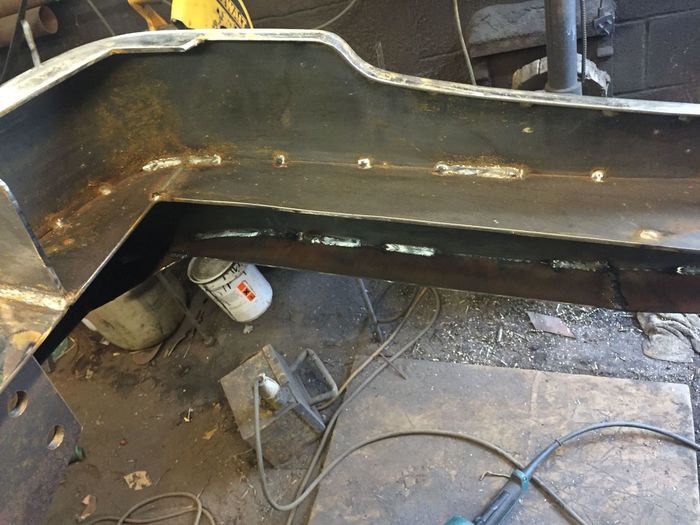
Drilled out a piece of 8mm x 200mm plate for a rear support for the bumper, this will give a massive amount of strength to the rear of the FF and the bumper... 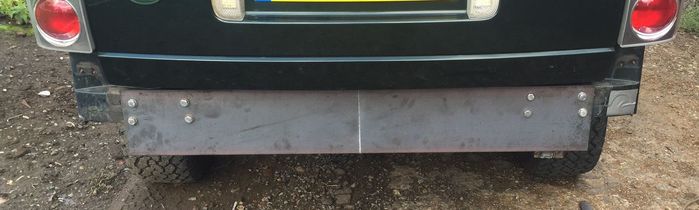
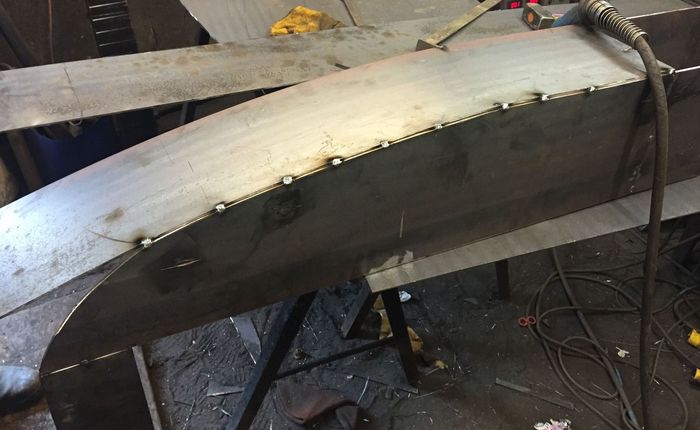
Cut the bumper top from the template, did two so the sides were the same shape, then the sides as well, tack it all up and used the piece of angle to ensure it is flat...
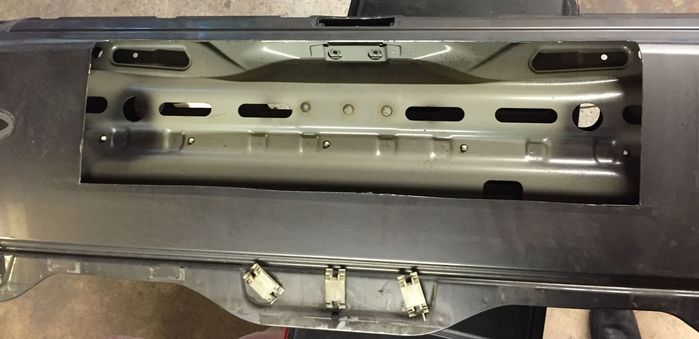
Offer it up into place and do a bit of head scratching and lots of measuring....
Top and front made out of 4mm plate, next job to bend the front piece around the top, tacking it as you go, takes a fare bit of effort to bend it around the corner.... we cut it a few feet longer than needed to get a good pull around the bend..
Put a few good tacks either side to give it some strength...
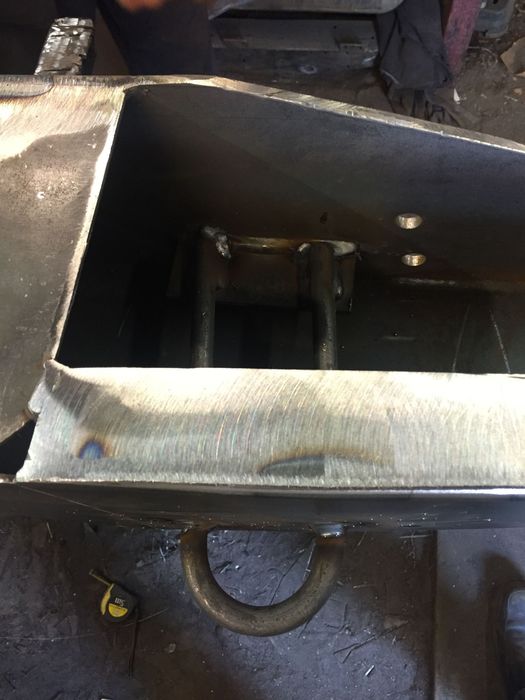
Welded a Winch plate into the bottom and cut a hole for the fare lead, a hole will be cut in the top for the Winch to go in... Offered it back to the car and checked the fit, do have to say it looks like a dodgem car!!!!
Fit was very good though 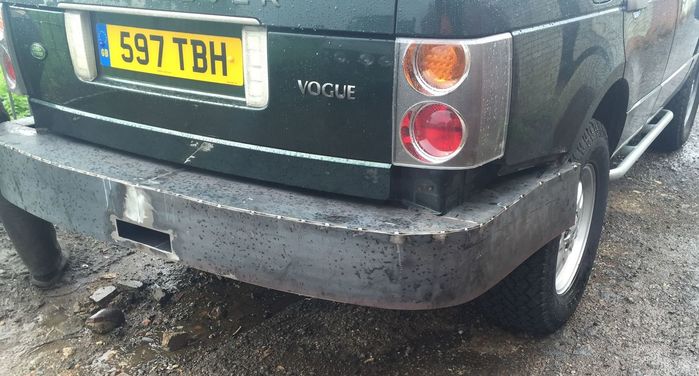
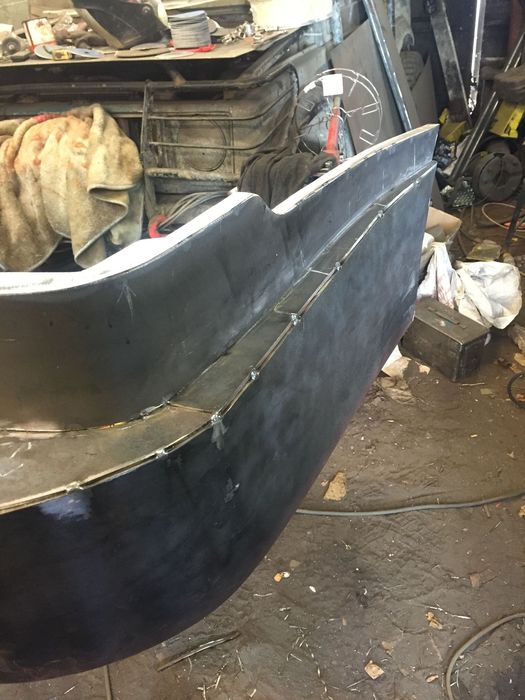
Then dropped a line from the rear wing and light onto the top of the bumper for the fill in...
Cut the fill in, again out of 4mm plate and contoured it to fit the gap...
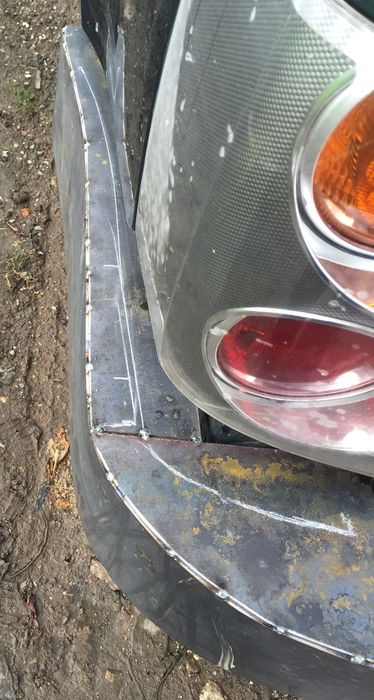
Both sides done, drivers side needs trimming back a bit, also working out the bottom profile of the bumper to give better clearance and some aesthetics...
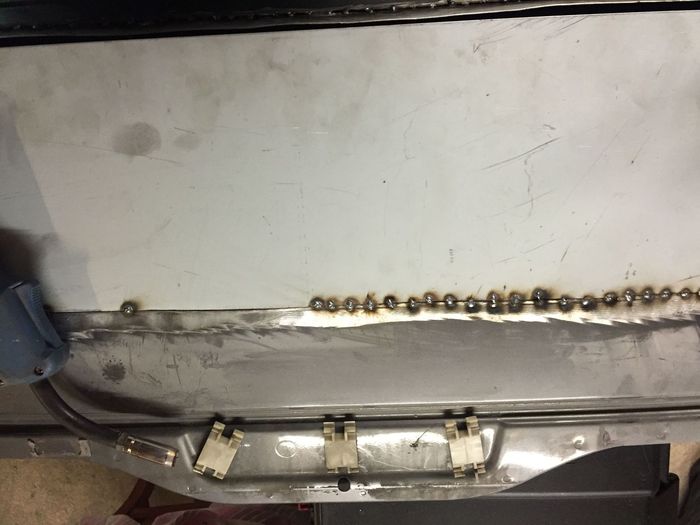
Tack a return on the top edge..
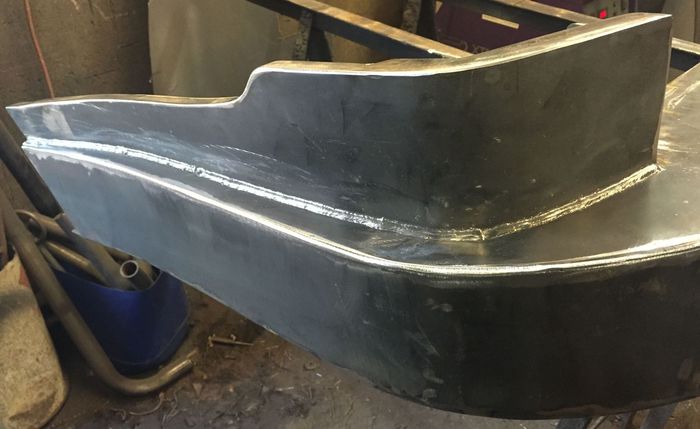
Then weld it up and grind it off smooth....
Checked it one last time and it is looking good, fit's very nicely and I think will look great when painted..
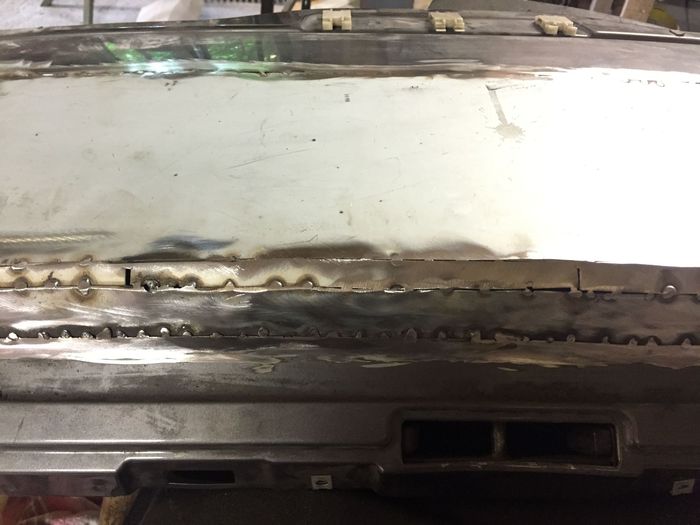
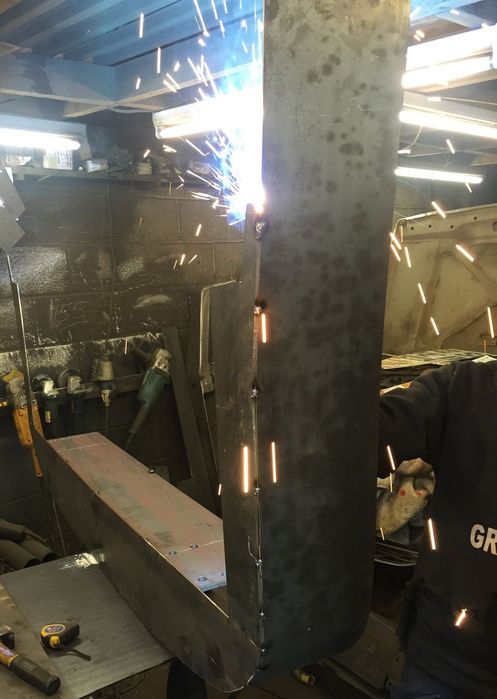
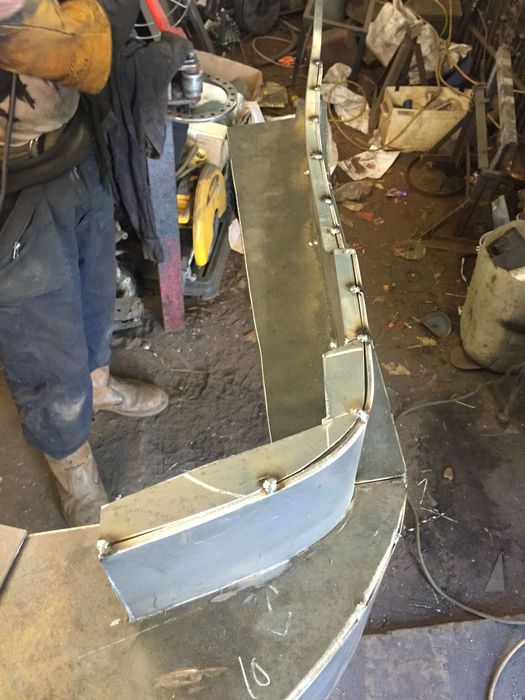
Then started welding all the seams, put a return on the bottom edge for strength and added some webs inside for more strength..
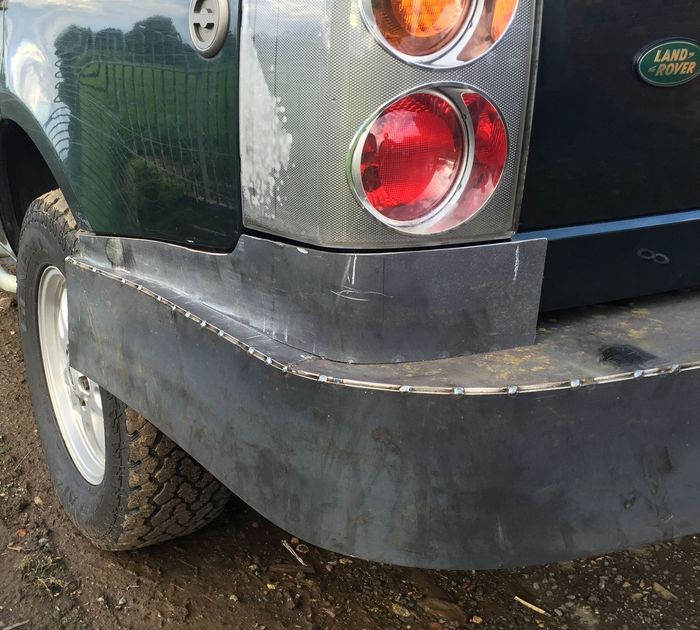
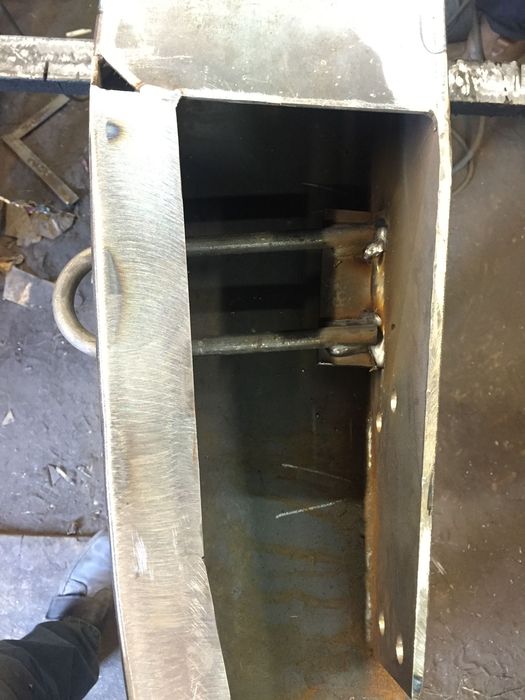
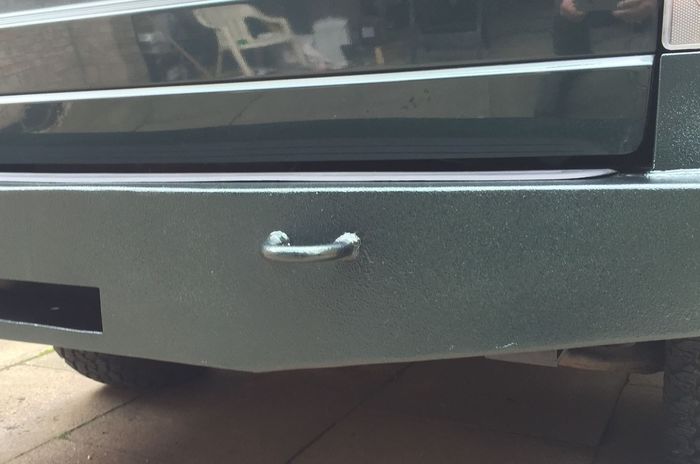
The reason the bit below the rear light is pulled back in and not sticking out like the original bumper is so the spare wheel carrier has room to mount out the way of the tailgate and make the rear lights visible... Last few bits of welding finished, bent up some recovery points out of 18mm bar, cut holes in the front face of the bumper, welded them through and onto a piece of 8mm plate welded to the rear 8mm plate (should be able to pull just about anything with them
Then welded in some strengthening webs with 6mm plate...
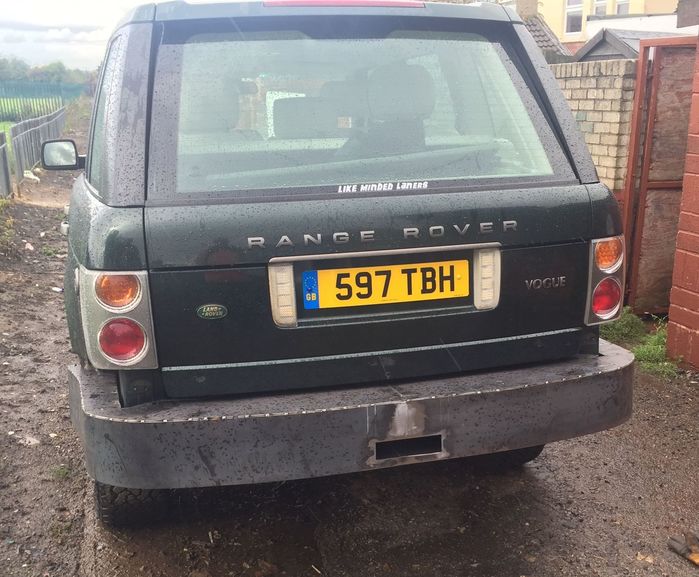
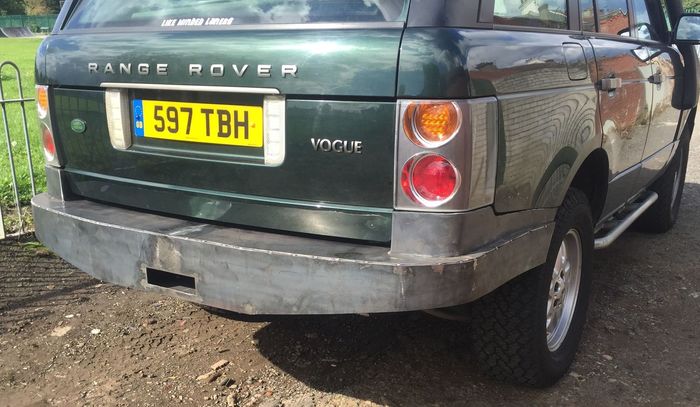
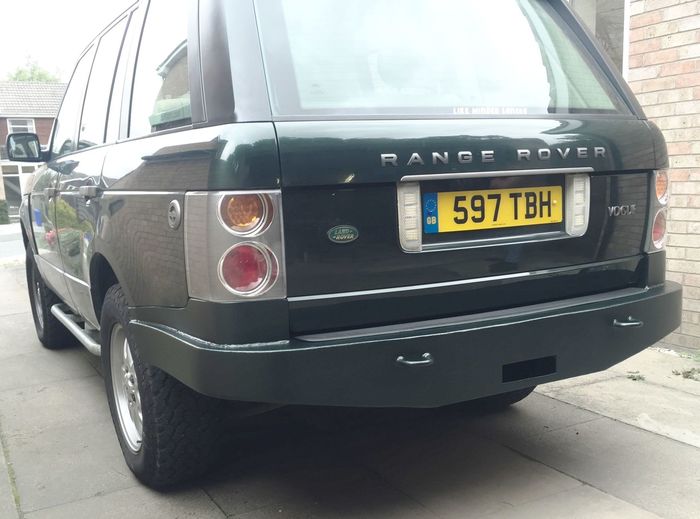
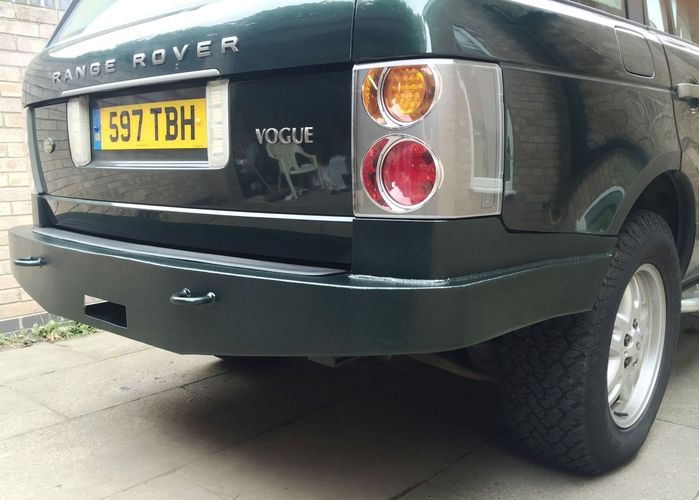
Stonechipped it then topcoated in body colour, needs a better bit of adjustment but it's a bit hard on your own, going to have to come off again to fit the winch so will sort it then..
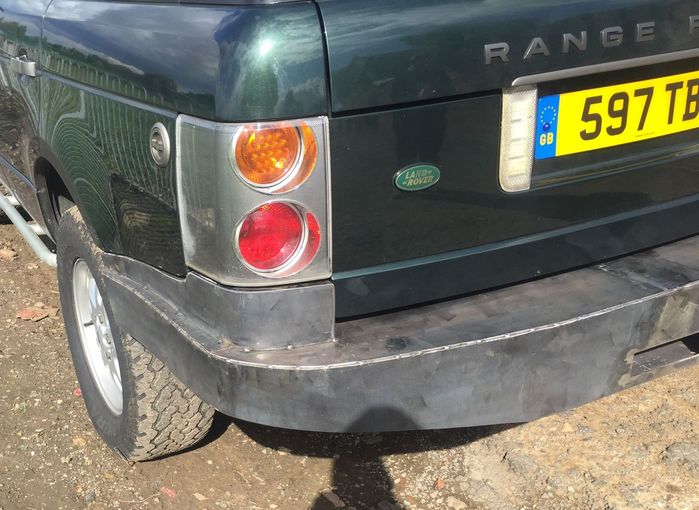
This is one of the things I was after, far more room here to get the rear wheel off an obstacle...
Well pleased with the result, strong as an Ox and not that bad looking... __________________________________________________ 2014 L405 Autobiography SDV8 4.4 Loire Blue Ebony interior 2012 L322 Autobiography 5.0 Supercharged Ipanema Sand Sold 2011 L322 Vogue SE 4.4 TDV8 Baltic Blue. Sold 2002 L322 Vogue 4.4 V8 Epson Green (Fatty Offroader) Sold -Click for Project Fatty off roader- Last edited by Haylands on 4th Jun 2022 3:04pm. Edited 3 times in total |
||||||||||||||||||||||||||||||||||||||||||||||||||||||||||||
|


| johnboyairey Member Since: 11 Jan 2013 Location: surrey Posts: 2035  
|
all ready for a good night of RAM-RAIDING then.....
|
||
|
| mzplcg Member Since: 26 May 2010 Location: Warwickshire. England. The Commonwealth. Posts: 4029 
|
Perfect Pete. Now, how much to make me one of those? |
||
|
| Haylands Member Since: 04 Mar 2014 Location: East Yorkshire Posts: 8546
|
Thanks chaps, exhaust will be done again, this was just a quick cheap bodge to get rid of the rear box... Pete
|
||
|
| Cam-Tech-Craig Member Since: 04 Aug 2011 Location: Gloucestershire Posts: 16339
|
Just realised Pete... What about the PDC? You not putting them back in for norman road use? |
||
|
| Haylands Member Since: 04 Mar 2014 Location: East Yorkshire Posts: 8546
|
Going to have a play with the PDC when the spare wheel carrier is done, it may pick it up so may not bother.... Pete
|
||
|
| Cam-Tech-Craig Member Since: 04 Aug 2011 Location: Gloucestershire Posts: 16339
|
|
||
|
| Cam-Tech-Craig Member Since: 04 Aug 2011 Location: Gloucestershire Posts: 16339
|
Just a thought... You maybe able to use the inserts from your old rest bumper pete? |
||
|
| mjdronfield Member Since: 04 Nov 2011 Location: Derbyshire Posts: 7912 
|
Do you need the rear red reflectors back on it to comply with some regulation or other ?
|
||
|
| Haylands Member Since: 04 Mar 2014 Location: East Yorkshire Posts: 8546
|
Yes Mark, I'm looking into that.... Pete
|
||
|

|
|
| All times are GMT + 1 Hour |
< Previous Topic | Next Topic > |
Posting Rules
|
Site Copyright © 2006-2025 Futuranet Ltd & Martin Lewis
![]()
