|
The upper tail gate wouldn’t lock. Vehicle is NOT secure. Could be expensive to replace.
But maybe it’s just something simple . . . (famous last words  ) )
So, open tail gate. Just 2 screws securing inner lower cover and about 10 press clips aligning it. Undo screws, jiggle cover and 4 clips release while the brittle plastic mounts for the remaining 6 break off. Cover is now hanging by the wires from the curtesy lamps at each end.
#30 torqs driver releases the latch adaptor plate complete with latch, almost. Undo electrical connector on left side and unclip manual release from inner cover (right side) before threading through window frame, then remove the complete unit.
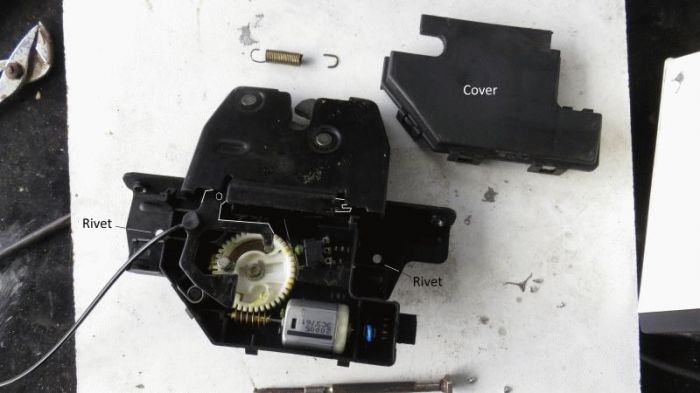
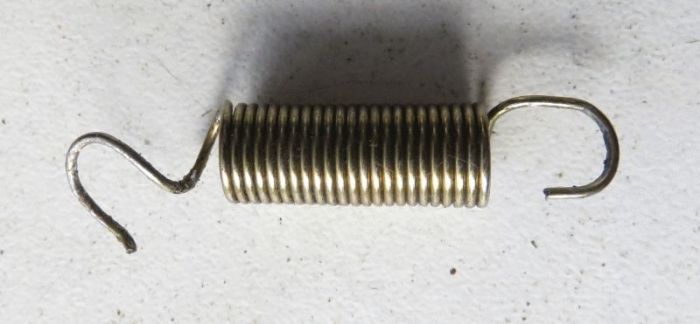
Although the mechanism is in a plastic box that is closed with just 4 clips there is a steel plate (anti repair barrier?) over the top of the box held on with 2 flush rivets. to remove this plate first centre punch the rivets at each end, then drill out the rivets (3mm, 4mm then 4.5mm). Off with the cover plate, prise open the 4 clips, take off the plastic lid and out falls a broken spring.
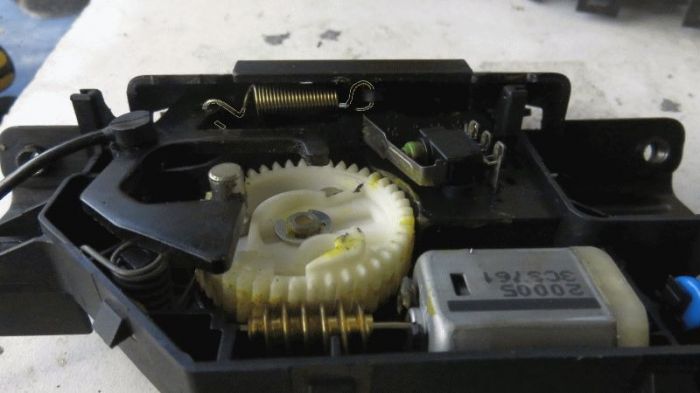
A quick double bend with 2 small pairs of multi grips and the spring is repaired.
And refitted.
A quick test, a little Vaseline added, the plastic lid replaced and … what to do about the top plate? The spacing set by the rivets is 22mm (7/8”) and the rivet holes are 4.5mm diameter. I tried just using an 18mm spacer nut, but the top plate pressed the plastic lid down to jam the lock, so it needs to be the proper 22mm.
Looking through my nut and bolt collection I find in addition to the spacer nuts 18mm (3/4”) long there are some 4mm ordinary nuts, bolts and washers. So here’s the final plan –
bolt-|- lock plate-|-nut 3mm-|-spacer nut 18mm-|-washer 1mm-|-top plate-|-bolt
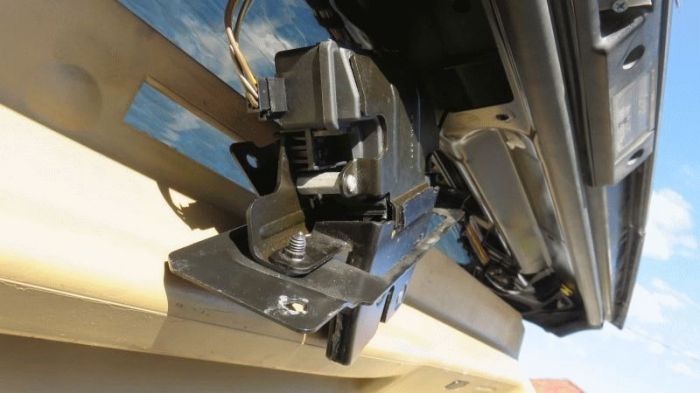
You can see one of the 18mm rivet replacements in the picture below. This was too tight, so 4mm more was added and that worked.
Putting it back was easy, the manual release was simple to thread back into place and except for a large electrical cable at the bottom, right of the tail gate interfering with refitting the inner cover it was done in no time. Surprisingly the remaining 4 clips and the 2 screws were enough to secure it. 
Note - the lock can remain on its adaptor plate throughout this fix, just undo the 4 outer screws holding the adaptor to the tail gate, leaving the 3 inner ones secured.
|


![]()


