| High Level Brake Light Embrittlement of Plastic | |
L322 High Level Brake Light Embrittlement of Plastic
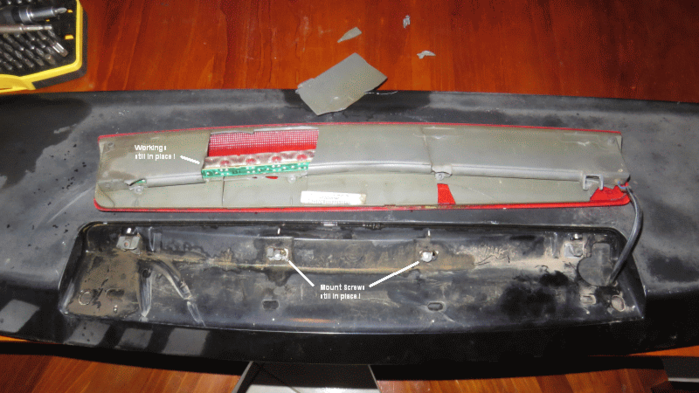
2003 model, so plastic has had 17 years exposure. 2 weeks ago (7-Feb 2020) while on a motorway at 110kph the entire light module 'let go', flew out to the length of its cable and swung back to hit the rear window with a very load smack. So I stopped to see what I had hit. Nothing, just the Brake Light hanging from its cable. When I touched it pieces cracked off with just light finger pressure; not just on the exposed, top but also the bottom and sides. The plastic was extremely brittle.
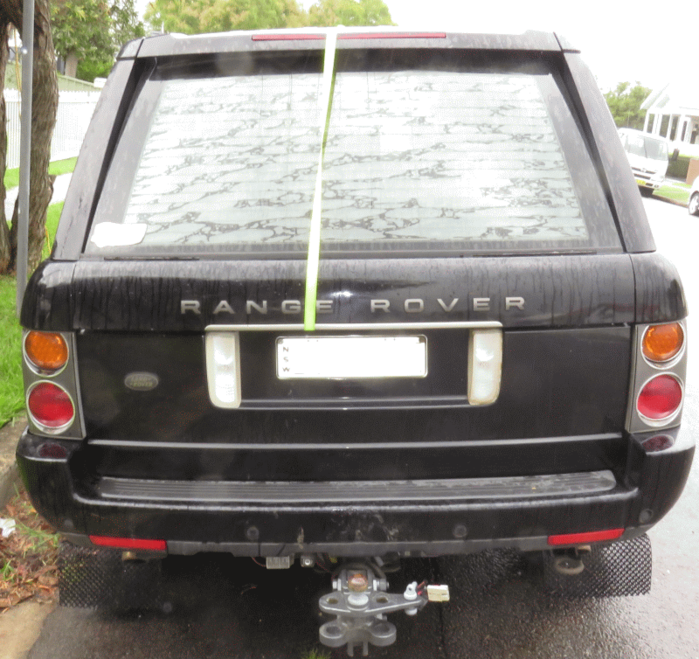
On examination all 4 retaining clips and all 4 screw mounts had snapped. The attached cable ran to a gromet with the plug & socket joint concealed somewhere within the door lining, so I put the Brake Light roughly back into place using a ratchet strap around the whole door to temporarily hold it in there as I was still 20km from home (and of course it was raining).
Once home I took the upper door lining off, separated the plug & socket, undid the 3 off M10 bolts that lock the Wing in place, pulled the wing backward off its rubber guides and pulled the gromet off the door. 5 minutes total. Luckily the 4 self tapping screws that hold the Brake Light were all still in place holding their snapped-off mountings, so these were removed too (torx 15 heads). It was obvious that a replacement was required, so off to ebay. An aftermarket smoked grey replacement for AU$80 (40 UK Pounds) with delivery in 4 to 8 weeks was much cheaper than original equipment.
What to do during the wait; leave the light off or find an alternate fixing method? The line of LEDs, the line of fresnel lenses and the rearward piece of translucent red plastic were all still in place so some generous application of epoxy and extension of the screw mounts right through the top surface allowed temporary fixing with some longish M3 bolts and large washers. The wing was then returned to the door top.

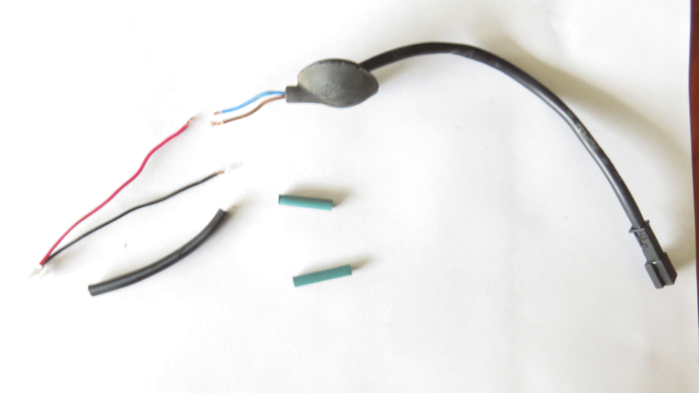
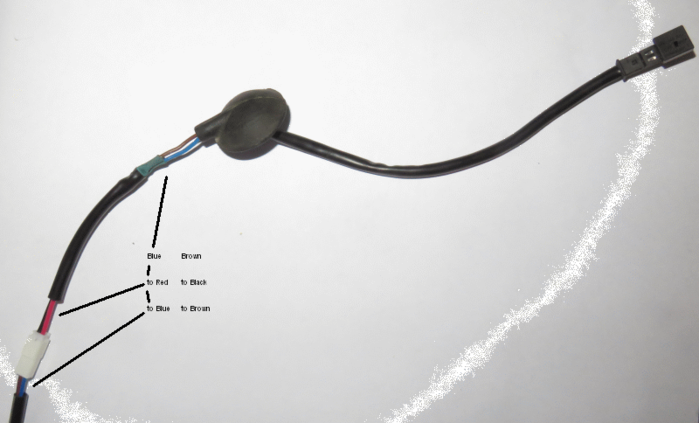
The new light actually arrived on 21-Feb, just 2 weeks. The new wiring cable was teminated with a 2mm JST plug which would not mate with the 2.5mm polarized socket on the door. But there was a short adaptor cable accompanying it with a 6mm wide plug on the end. Bonus - a cut & splice will put the JST plug on the wing side of the gromet and the original polarized plug on the door side. Some heat shrink insulation and tape wrapping will provide adequate protection. I suspect the wide plug would be a direct fit for models after 2006, does anyone know for sure?
So to work. Remove the Wing and Brake Light from the car again. Remove the Brake Light from the Wing. Snip the old cable ~50mm from the gromet on the Brake Light side of the gromet. Snip the adaptor cable ~75mm from the unwanted plug. Strip the ends just 6mm. Slide a section of protection tube over the wires from the JST plug leaving ~25mm uncovered. Slide short pieces of heat shrink over the salvaged cable sticking out of the gromet. Solder, cool, flattern with pliers, slide heat shrink into place and shrink. Slide protective tube over joints.


Re-assembly is easy. Poke the cable through the wing. Put the Brake Light in place and attempt to push the clips into place. This won't work; the guide pins hold the Brake Light housing in the 'already clipped in' position and the clips in line with their holes hold the guide pins to one side of their holes ! Don't panic, this is by design. Simply put the mounting screws in place and as they are tightened they pull everything into the correct places accompanied by a few 'clicks'.

Fit the gromet (cable openning facing forward) and connect the Brake Light via the JST plug & socket. Slide the Wing into place and fix lightly with M3 bolts. Align the wing with the rear door pillars and roof then tighten the bolts. Connect the polarized plug & socket. Refit the upper door lining. All done.

This actually turned out to be a simple, cheap and easy replacement. And the smoked grey is a really cool upgrade.
bye. 2003 TD6, EGR delete, vortex crankcase breather update, performance chip, UHF 2 way, Android head unit, crash camera on dash, always-on rear view camera to mirror screen, LED DRL`s, Electric trailer brake controller. FSR replaced. Pulling 3T caravan all about Australia
Last edited by bgennette on 23rd Feb 2020 8:10am. Edited 1 time in total
|


![]()


