Advertise on fullfatrr.com »

Home > Maintenance & Mods (L322) > How To: Change Transfer Box Case Fluid
Post Reply  Down to end
Page 1 of 1
Print this entire topic · 
garyRR


Member Since: 13 Mar 2021
Location: Hampshire
Posts: 1468

United Kingdom 
How To: Change Transfer Box Case Fluid

I have written a step by step guide how to change the transfer box fluid, with pictures.


Difficulty: Easy

Time: 45 minutes


Tools Required:

2 litres of TF0753 / IYK500010 Transfer Case Fluid https://www.smithandallan.com/product/smit...fluid-4187
2x IYF500030 - M16 drain/fill washer (recommended but not essential, unless your existing ones are worn/damaged)

Small ratchet
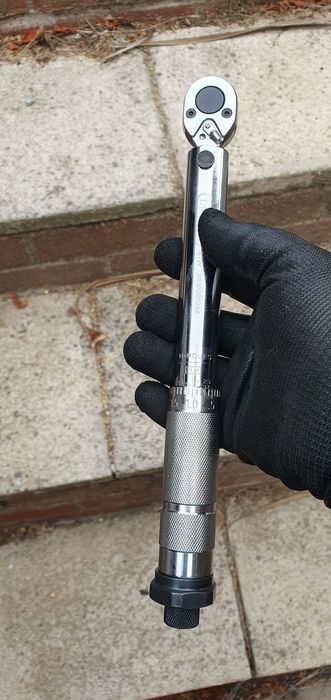
Small Torque wrench (capable of <30Nm)
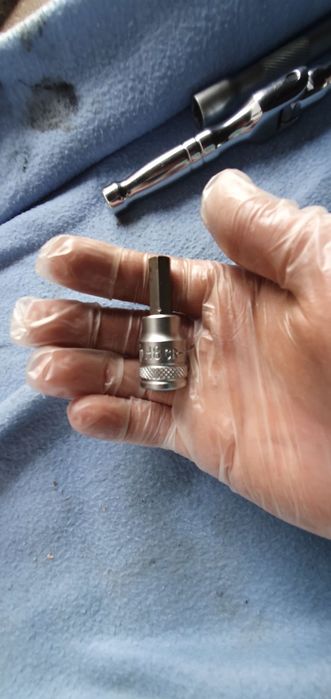
H8 Allen Bit for fill and drain plugs (may differ for M18 thread boxes, so have a set ready)

Click image to enlarge


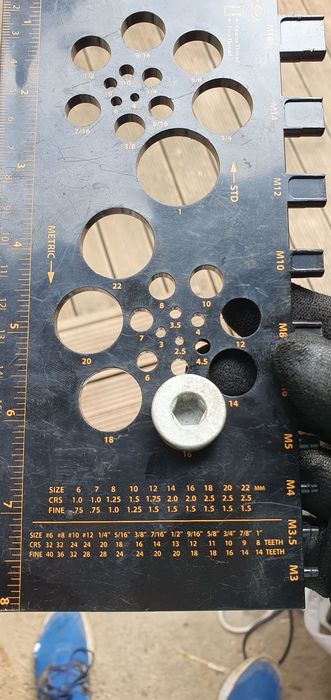
Thread gauge (such as the one below - https://www.screwfix.com/p/turbogold-plastic-screw-gauge/7337j) or ruler

Click image to enlarge


Pair of palm gloves (wear https://www.toolstation.com/palm-gloves/p64335 these, they'll save your hands)
Latex gloves
Eye protection

Brake cleaner
Wire brush
Wire Wool
Oil Drain pan
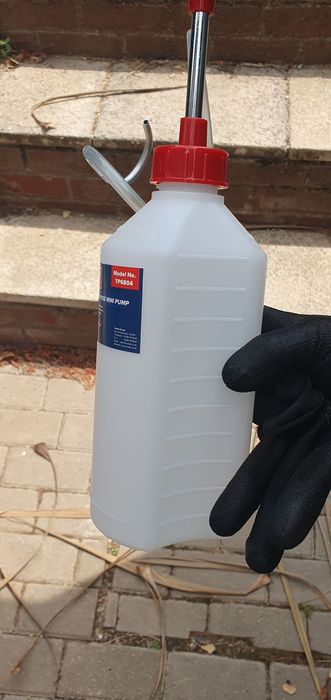
Mini oil fill pump https://www.sealey.co.uk/product/563720353...-mini-pump
Degreaser/White spirit

Click image to enlarge


Steps Involved:


Step 1: Raise and secure the vehicle (15 mins)

Ramp the vehicle, put in off-road height, and place axle stands beneath the front and rear subframes on the left side of the vehicle (the transfer box is centre-left).


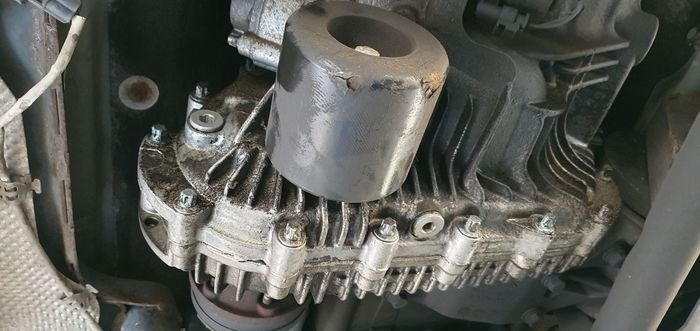
Step 2: Clean around the fill and drain plugs (2 mins)

You don't want any rust or dirt making its way inside your transfer box, so clean the surfaces around them with the wire brush and wire wool. This will also aid releasing the plugs.

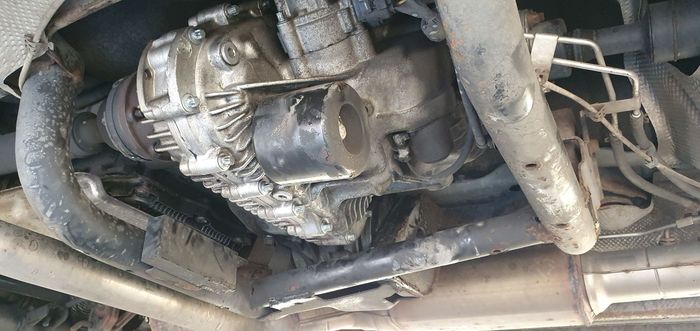
You can clearly see the drain plug on the bottom of the transfer box, and the fill plug on the side.


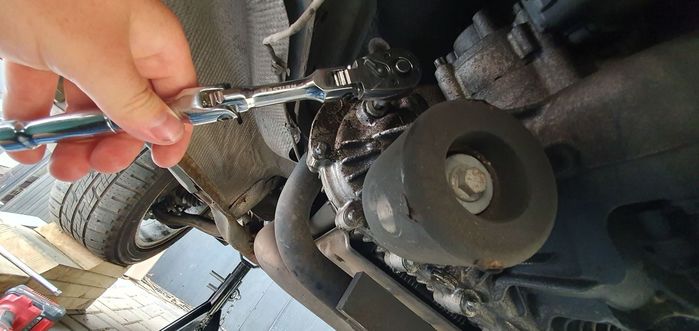
Step 3: Loosen the fill and drain plugs (5 mins)

The transfer box plugs are easily accessible. The drain plug is on the bottom of the transfer box. The fill plug is on the side of the transfer box.

First loosen the FILL plug. If you cannot remove the fill plug, you won't be able to fill the transfer box with new oil and should therefore stop and book the car into a garage.

Unlike the differentials, the transfer case is stainless steel, so your fill and drain plugs should crack free relatively easily, and with no more than a small ratchet.

Use the small ratchet and H8 bit to first TIGHTEN the bolt by 1/32, then loosen by 1/16. The bolt should crack free (the slight tighten first helps aid releasing the threads).


Once the plug can be loosened by hand, stop.

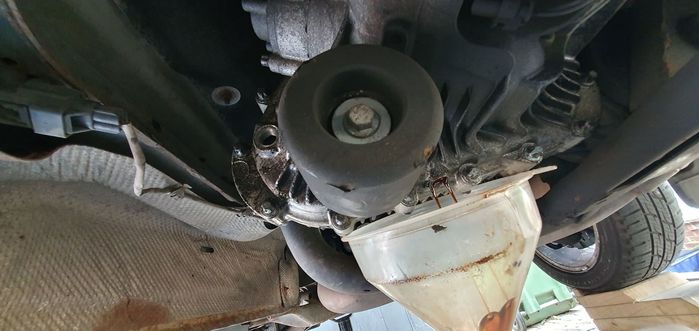
Now it's time to loosen the drain plug. Have an oil pan underneath in case of any escaping fluid. Use the small ratchet and H8 bit to first TIGHTEN the bolt by 1/32, then loosen by 1/16. Once loosened, position the relevant drain pan or funnel underneath.


Step 4: Drain the transfer box (5 mins)

Now put on a plastic glove and gently unscrew the drain plug to drain the oil.

Click image to enlarge


Now remove the fill plug.


My waste oil was a similar colour and smell to the new oil going in, despite not having been changed in my ownership.


Step 5: Clean up the drain and fill plugs and measure (5 mins)

The plugs will have old oil on. Give the plugs a good degrease in some brake cleaner.

Be sure to collect and clean the metal washer. If it is not on your bolt, check it's not stuck to the transfer case.

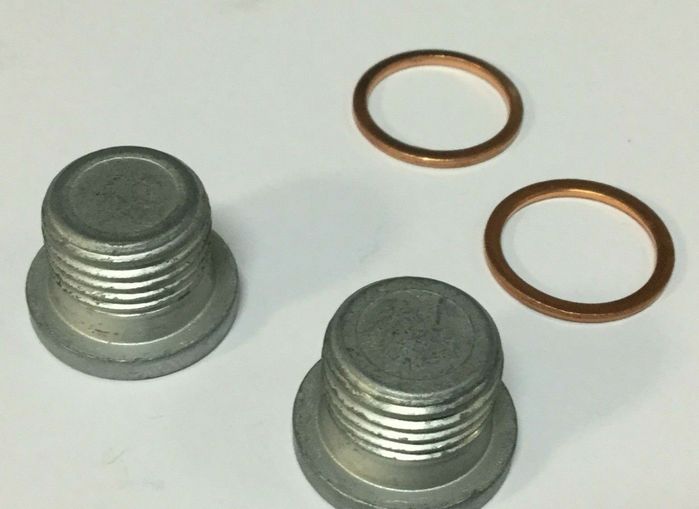
There are different specifications of transfer case bolts and torques for petrols and diesels and model year, namely an M16 or an M18 bolt (your vehicle will have a matching pair). Most vehicles have the M16 plugs. You will need to know which one you have for later, and also if you need a new washer due to damage/it being missing. The below image shows the bolts and what the washers look like.


You can see in my gauge that my transfer box has the M16 type bolt. If you do not have a gauge, you can use a ruler to measure the diameter of your plugs.

Click image to enlarge


If you require replacement parts:
IYF500030 - M16 drain/fill washer
IYB500020 - M16 drain/fill plug


Step 6: Re-fit the Drain plug (2 mins)

The plugs are stainless and unlikely to seize (unlike the diff plugs), so using anti-seize is entirely optional. Good practice would be to lightly coat the threads and washers in some new transfer case fluid to help ensure a good seal.

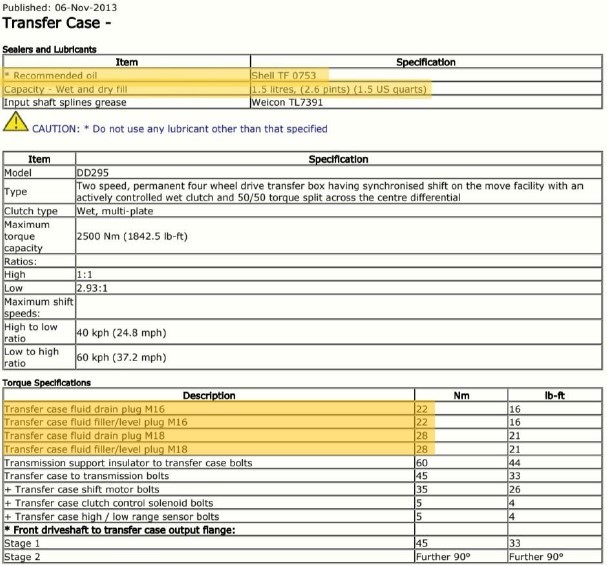
Screw in the drain plug as far as you can by hand. Use the torque wrench with the H8 bit to tighten the drain plug to the following specifications (and as in the specifications chart above):

M16 plug: 22Nm
M18 plug: 28Nm

Click image to enlarge


Step 7: Fill the transfer box (10 mins)

Use the correct fluid and quantity.

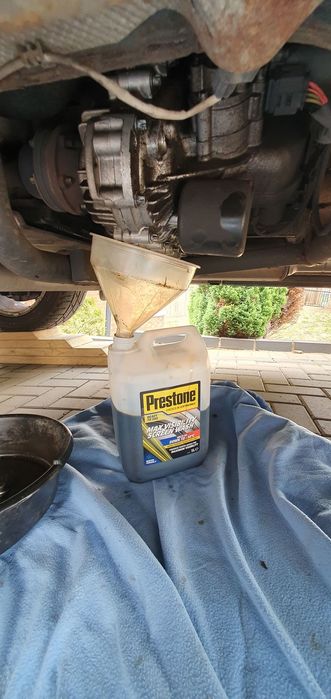
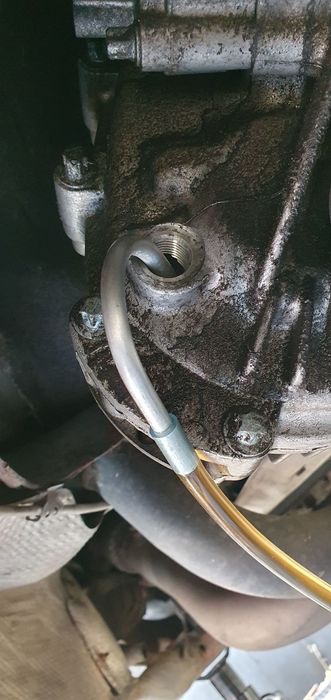
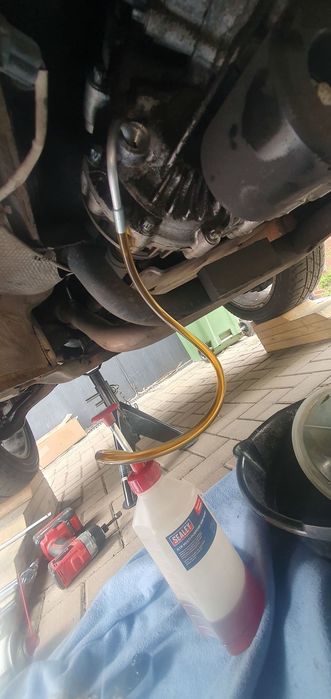
Hook the fill hose from your fill bottle into the fill hole and pump in 1.5L of TF 0753 fluid. This will take a number of pumps, so switch arms once tired. I recommend filling 1.6L in the pump, as some oil will remain in the bottom of the pump and in the hose.

Click image to enlarge


Click image to enlarge


Warning! Do NOT fill the transfer box until you begin getting drips from the fill hole. This is not the correct method and will result in your transfer box being over-filled. The workshop manual states to be level with the bottom of the fill hole. Filling with the specified quantity of 1.5L should achieve this, as stated in the specifications.


Step 8: Re-fit the fill plug (2 mins)

Screw in the fill plug as far as you can by hand. Use the torque wrench with the H8 bit to tighten the drain plug to the following specifications (and as in the specifications chart above):

M16 plug: 22Nm
M18 plug: 28Nm


Step 9: Clean Up (5 mins)

Now clean around the fill plugs with some cloth or paper towel, and douse the transfer box with brake fluid to remove any residue. Wipe any remaining residue from the bottom of the transfer box

You are done!

It's also time to clean up the mini oil fill pump. Pour some degreaser or white spirit inside the pump and pump through the fluid, plus give the unit a shake (whilst blocking the breather hole) to give it a good clean. Now leave the top off and allow to dry. Blow through the pick-up point of the pump to flush through any remaining fluid.

You will notice my transfer box has a smear of old oil from a previous leak which hadn't been cleaned up (i inspected and couldn't find any source of a leak), so i also mixed up some degreaser and gave the transfer box a good clean. This took me an additional 10 minutes:

 2015 Range Rover Autobiography 4.4 SDV8

Last edited by garyRR on 27th Feb 2024 5:59am. Edited 3 times in total

Post #667838 29th Jun 2023 9:02am
View user's profile Send private message View poster's gallery Reply with quote
chdavis


Member Since: 28 Nov 2021
Location: Washington DC
Posts: 44

2012 Range Rover Autobiography 5.0 SC V8 Galway Green

Very helpful. I’ve done this before and envy that pump bottle. I was using a fluid pump but just an intake hose into the fluid. Laughing 2012 Range Rover HSE | 2011 Range Rover Autobiography | 2010 Range Rover Sport Supercharged
2020 Tesla Model 3 Performance, 2013 Mercedes-Benz G550, 2008 Ferrari F430, 2007 Volkswagen Touareg V10 TDI

Post #667890 29th Jun 2023 7:42pm
View user's profile Send private message View poster's gallery Reply with quote
stan
Site Moderator


Member Since: 13 Jul 2010
Location: a moderate moderated moderator moderating moderately in moderation
Posts: 35329

United Kingdom 

thanks again Gary , in wiki.. ... - .- -.


Y. O. L. O.
.

Post #667939 30th Jun 2023 8:46am
View user's profile Send private message View poster's gallery Reply with quote
KILOCHARLIE


Member Since: 18 Jan 2024
Location: Wales
Posts: 9

United Kingdom 

This is a great write up so thanks for taking the time. One question though, apparently I am supposed to reset adaptations after the doing the change?

I have an Autel ap200 which I’m unsure can do this but either way is it advised? I have no problems with transfer box judder.

I know the same was originally advised after doing a gearbox oil change too but this led to more problems than not and now the recommended advice for that is to not reset anything. Would this apply to the transfer box too please?

Post #703262 28th Oct 2024 9:33am
View user's profile Send private message View poster's gallery Reply with quote
PeteT80


Member Since: 25 Jan 2020
Location: Preston
Posts: 209

United Kingdom 2011 Range Rover Vogue TDV8 Santorini Black

You don’t need to reset anything with the transfer box, just change the oil and that’s it.

Post #703267 28th Oct 2024 10:15am
View user's profile Send private message View poster's gallery Reply with quote
garyRR


Member Since: 13 Mar 2021
Location: Hampshire
Posts: 1468

United Kingdom 

This guide is also the same for the L405. I just did mine this weekend.

Fill capacity is 1.5L.

The workshop manual for the L405 states 30Nm for the drain and fill plugs on the transfer box and diffs, but this is way way too tight. Stick to the old L322 torques. 2015 Range Rover Autobiography 4.4 SDV8

Post #703282 28th Oct 2024 1:15pm
View user's profile Send private message View poster's gallery Reply with quote
gt40


Member Since: 29 Jan 2013
Location: Cape Town
Posts: 31

South Africa 2011 Range Rover Vogue SE TDV8 Zambezi Silver
Re: How To: Change Transfer Box Case Fluid

garyRR wrote:

Warning! Do NOT fill the transfer box until you begin getting drips from the fill hole. This is not the correct method and will result in your transfer box being over-filled. The workshop manual states to be level with the bottom of the fill hole. Filling with the specified quantity of 1.5L should achieve this, as stated in the specifications.


The correct quantity of oil in the transfer box is something that has been discussed a few times and there are different opinions. The manual does not state that a specific quantity of oil must be used. It does give the capacity of 1.5 litres for reference but the fill procedure clearly states to fill with oil until it is level with bottom of the fill/level plug.

In comparison, the front and rear differential give a clear warning in the workshop manual that the oil must not be filled to the level of the filler plug as shown below which is a copy and paste from the manual.

CAUTION: Do not fill the differential with lubricant up to the filler plug. The filler plug is only used to fill the differential with lubricant, not to act as a level indicator.
• NOTE: The only way to check the fluid level in the differential is to drain all the fluid out and refill with the correct quantity, shown in the specification section.


The transfer box drain fill procedure does not state this which in my mind means you do not fill with a specific quantity but rather to the bottom of the fill/level plug.

Furthermore the the plug on the front and rear differentials is called the "fill plug" and on the transfer box it is called the "fill/level plug".

I admit that the difference in quantity between adding "1.5 litres" vs "fill to the bottom of the level/fill plug" will be very small and will make zero difference to the operation and longevity of the transfer box so its really just semantics but the procedure in the manual is very clear.

Post #703340 29th Oct 2024 12:59am
View user's profile Send private message View poster's gallery Post Reply
Post Reply  Back to top
Page 1 of 1
All times are GMT

Jump to  
Previous Topic | Next Topic >
Posting Rules
You cannot post new topics in this forum
You cannot reply to topics in this forum
You cannot edit your posts in this forum
You cannot delete your posts in this forum
You cannot vote in polls in this forum


Site Copyright © 2006-2024 Futuranet Ltd & Martin Lewis
fullfatrr.com RSS Feed - All Forums


Switch to Mobile site