Advertise on fullfatrr.com »

Home > Maintenance & Mods (L405) > Vacuum Pump Replacement 5.0 SCV8
Post Reply  Down to end
Page 1 of 1
Print this entire topic · 
Bora20


Member Since: 03 Mar 2021
Location: Kamloops, BC
Posts: 236

Canada 2013 Range Rover 5.0 SC V8 Santorini Black
Vacuum Pump Replacement 5.0 SCV8

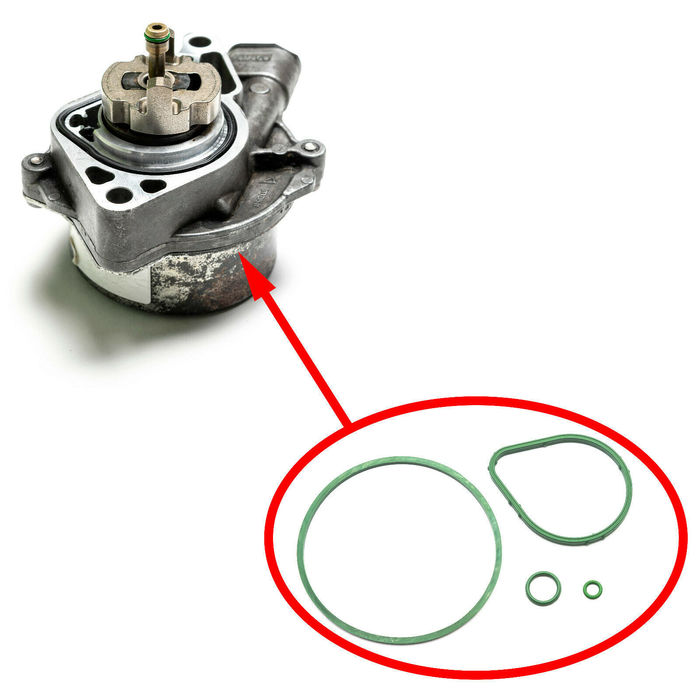
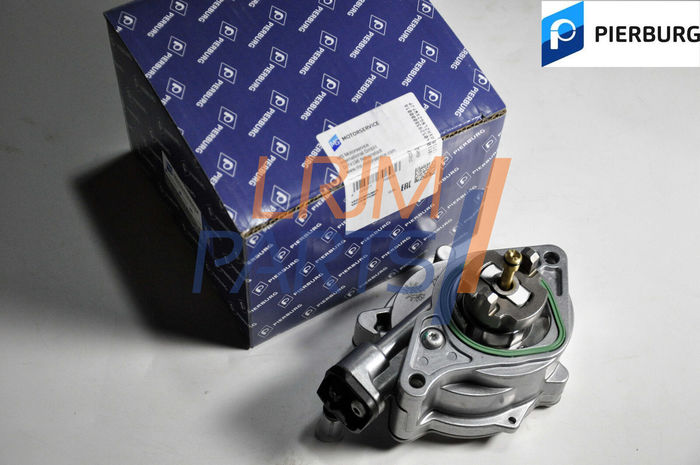
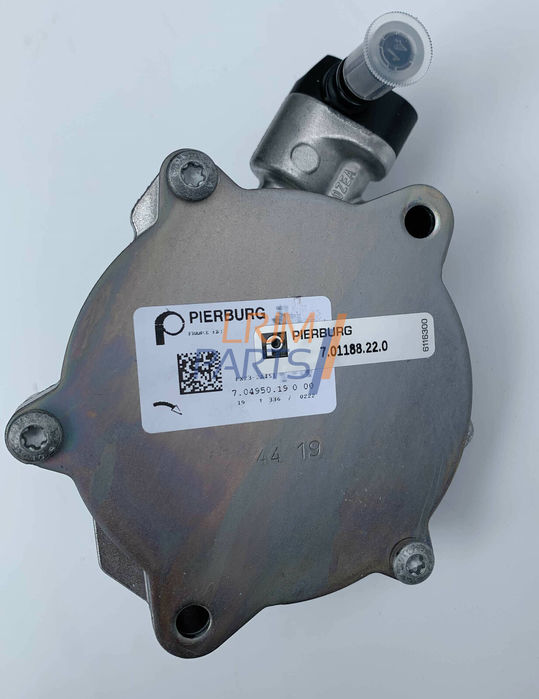
Has anyone replaced the vacuum pump on their 5.0 SCV8? Mine is leaking from the cover and between the engine and the pump. I have ordered a rebuild kit. I also ordered a new PIERBURG unit in case of the original unit breaks during removal. The seller is providing the longer OEM mounting bolts required for the new unit. Pierburg is the OEM JLR manufacturer. Replacement seems easy enough after reviewing the service manual.

I was hoping to complete the replacement by placing the RR on auto ramps with a 6-8" lift and raising the suspension. The service manual says to drain the engine oil first. I would prefer not to. Any insight if this is possible?

I found a video on Youtube, but that person completed the replacement with their LR4 on flat ground with no incline. They state they lost about 3 litres. I guess I could drain the engine oil and put it back in when done.


Click image to enlarge


Click image to enlarge
 Dan. 🇨🇦 2013 L405 5.0 SCV8

Post #614519 2nd Dec 2021 10:05pm
View user's profile Send private message View poster's gallery Reply with quote
Haylands


Member Since: 04 Mar 2014
Location: East Yorkshire
Posts: 8246

England 2014 Range Rover Autobiography SDV8 Loire Blue

Hi, Sorry, can't help with your query but can you tell me where the pump is located, I have a leak at the front of the engine that is dropping oil on the passenger side (RHD) steering rack gaiter and wondered if this could be the culprit... Cheers Pete
__________________________________________________
2014 L405 Autobiography SDV8 4.4 Loire Blue Ebony interior
2011 L322 Vogue SE 4.4 TDV8 Baltic Blue. Parchment over Navy Interior. Sold
2012 L322 Autobiography 5.0 Supercharged Ipanema Sand, Jet Interior. Sold
2002 L322 Vogue 4.4 V8 Epson Green, Ivory over Aspen Interior (Fatty Offroader) Sold
-Click for Project Fatty off roader-

Post #614563 3rd Dec 2021 10:41am
View user's profile Send private message View poster's gallery Reply with quote
Bora20


Member Since: 03 Mar 2021
Location: Kamloops, BC
Posts: 236

Canada 2013 Range Rover 5.0 SC V8 Santorini Black

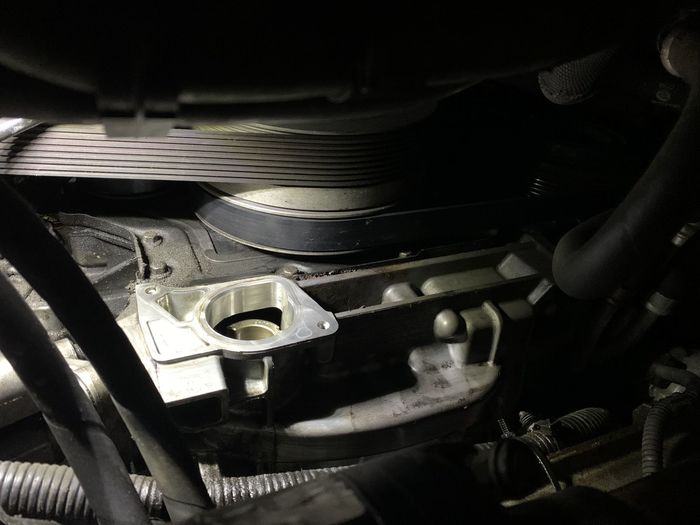
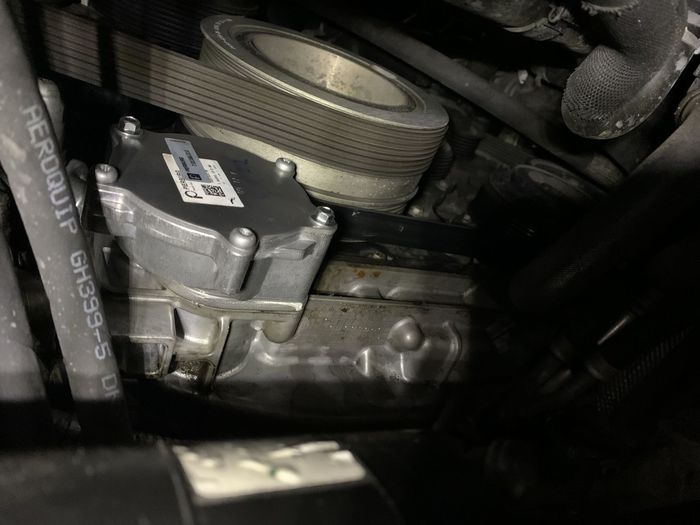
The vacuum pump is on the bottom right hand side of the engine. The part has been updated and looks different from the original. Dan. 🇨🇦 2013 L405 5.0 SCV8

Post #614610 3rd Dec 2021 3:51pm
View user's profile Send private message View poster's gallery Reply with quote
Haylands


Member Since: 04 Mar 2014
Location: East Yorkshire
Posts: 8246

England 2014 Range Rover Autobiography SDV8 Loire Blue

Thumbs Up Pete
__________________________________________________
2014 L405 Autobiography SDV8 4.4 Loire Blue Ebony interior
2011 L322 Vogue SE 4.4 TDV8 Baltic Blue. Parchment over Navy Interior. Sold
2012 L322 Autobiography 5.0 Supercharged Ipanema Sand, Jet Interior. Sold
2002 L322 Vogue 4.4 V8 Epson Green, Ivory over Aspen Interior (Fatty Offroader) Sold
-Click for Project Fatty off roader-

Post #614614 3rd Dec 2021 4:17pm
View user's profile Send private message View poster's gallery Reply with quote
Bora20


Member Since: 03 Mar 2021
Location: Kamloops, BC
Posts: 236

Canada 2013 Range Rover 5.0 SC V8 Santorini Black

I replaced this last night. I also bought a rebuild kit, but chose to replace with the updated unit. The old unit was leaking at the mating surface to the engine and the unit housing cover.

1. Place vehicle on level ground and extend to off-road height. I fit under the truck.
2. Place floor jack tight under frame rails and lower suspension to force truck into super extended height mode. Open hood and remove engine cover.
3. Remove front bumper lower cover using flat blade screwdriver.
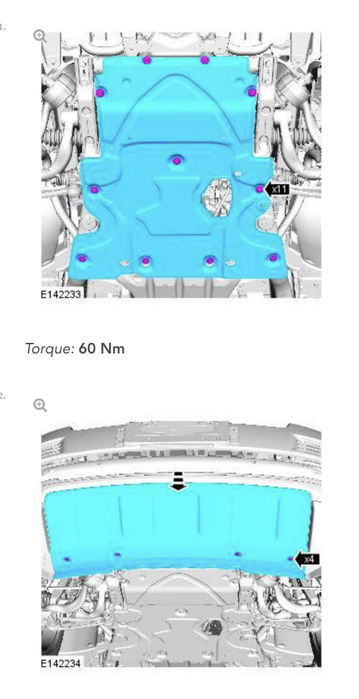
4. Remove skid plate using 15mm socket.
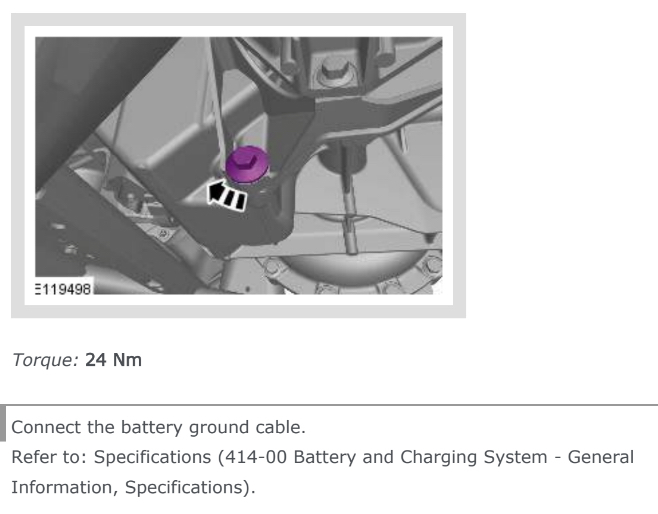
5. Place oil catch pan and remove engine oil drain plug using 13mm socket. Allow to drain until no more comes out. Remove oil cap.
6. Reinstall drain plug and torque to 24nm.
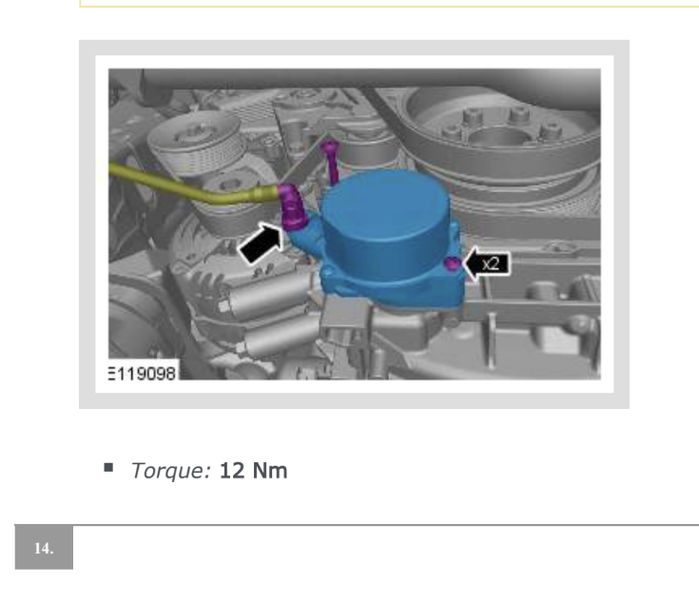
7. Locate brake vacuum pump. Remove vacuum hose by pushing in red clip with finger and pulling off housing. Remove two mounting bolts using T30 torx socket. Remove unit.
8. Clean engine mating surface. I used brake cleaner sprayed on a rag.
9. Install new unit using longer bolts and 8mm socket. Torque to 12nm.
10. Install vacuum line.
11. Refill engine oil allowing to settle for 10 minutes. Install filler cap and engine cover.
12. Start engine and check for leaks. Turn off truck.
13. Install skid plate torquing 11 bolts to 60nm.
14. Install front bumper under cover using flat blade screw driver.
15. Start truck. Remove floor jack. Lower to normal height.
16. Drink second beer knowing that you saved $600+ over dealer doing this.


Click image to enlarge


 Dan. 🇨🇦 2013 L405 5.0 SCV8

Post #619966 14th Jan 2022 3:46pm
View user's profile Send private message View poster's gallery Post Reply
Post Reply  Back to top
Page 1 of 1
All times are GMT

Jump to  
Previous Topic | Next Topic >
Posting Rules
You cannot post new topics in this forum
You cannot reply to topics in this forum
You cannot edit your posts in this forum
You cannot delete your posts in this forum
You cannot vote in polls in this forum


Site Copyright © 2006-2024 Futuranet Ltd & Martin Lewis
fullfatrr.com RSS Feed - All Forums


Switch to Mobile site