| A More Modern 'How To Fit a Dash Camera' to the L322 - Wiki? | |
There is an article in the Wiki but it's a bit old now and this is a more detailed guide.
Here is a neat install of a GPS dash cam (just your typical £30 Amazon camera).
The job takes approximately 1 hour from start to finish and is easy for novices. You will need:
- Camera and hardwire kit
- Plastic trim removal tools
- Long flat blade screwdriver
- Cloth (for wrapping around the screwdriver)
- Screwdriver with Torx bits
- 10mm spanner
- Electrical tape and 1x crimp/heatshrink spade connector (if not with hardwire Kit)
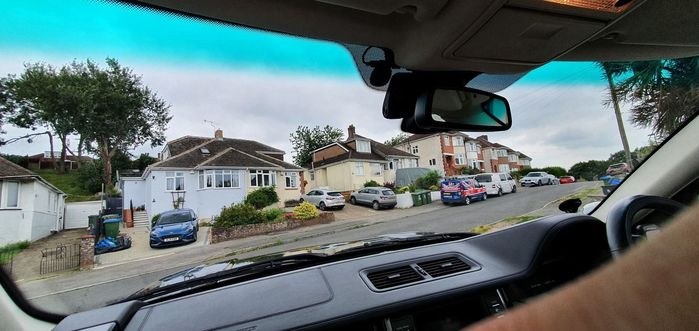
Step 1: Disconnect the battery. You will be working by an airbag. (5 mins)
Step 2: Drop the glove box by opening it then, pushing the tab on the right hand side. Remove the panel to the fuse box (1 min)
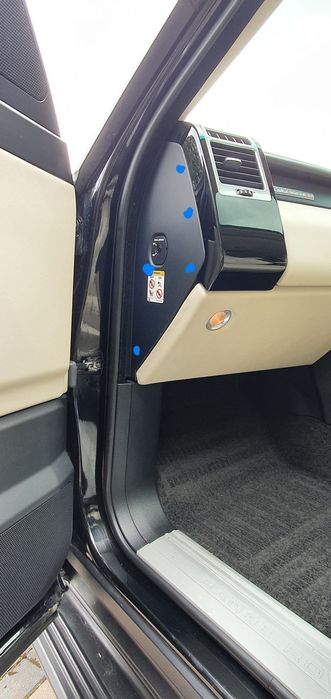
Step 3: Remove the side trim panel with the airbag switch. (5 mins)
Do this by using some trim tool pieces to begin prying it off. It uses door panel clips and is very fragile. Take your time and use your hand to push against the pull of the screwdriver to spread the load. Use the long bladed screwdriver in each of the clip locations (I have coloured the approximate locations).
 | | Click image to enlarge |
WARNING: DO NOT PUT THE SCREWDRIVER IN AT RANDOM. THIS PANEL IS WRAPPED AND ANY BENDING CAN DAMAGE THE WRAP - EXAMPLE BELOW
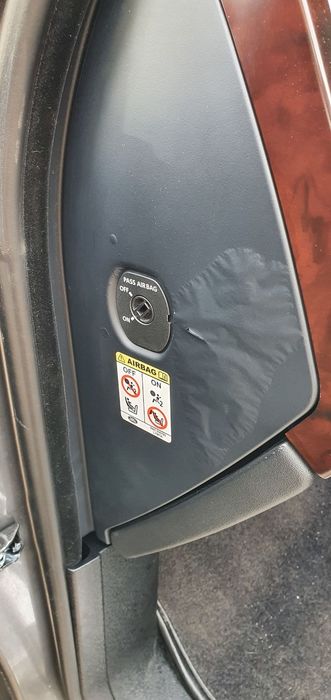 | | Click image to enlarge |
Step 4. Remove the air bag switch plug and put the panel aside (1 min)
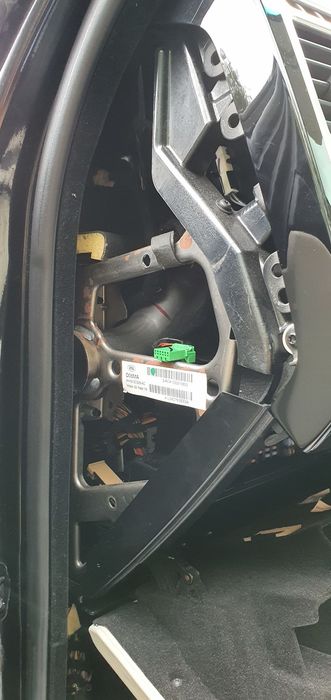 | | Click image to enlarge |
Step 5. Create access to Ground (2 min)
Pull out the lower wheel arch cover.
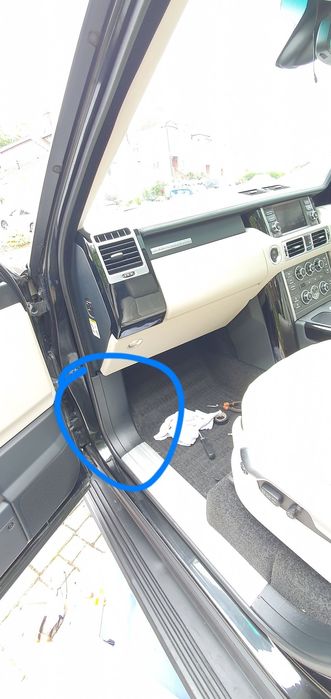 | | Click image to enlarge |
This is quite a sturdy piece of plastic which will withstand some bending. Start by pulling the top and it will gradually pull out. Closing the glove box temporarily will make this job easier.
Once out, this will reveal your grounding point. It's slightly different on the older and newer cars but, in the same location.
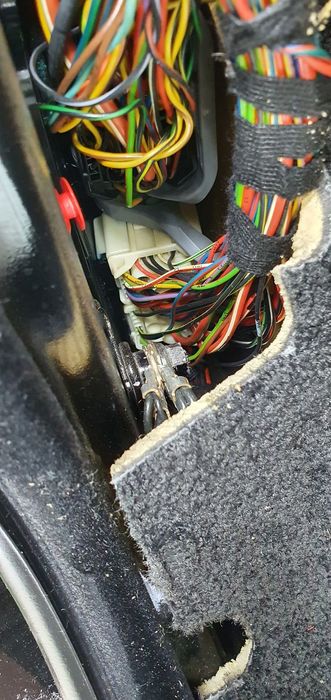 | | Click image to enlarge |
Step 6. Remove the A pillar (3 min)
Flip out the plastic trim saying Airbag and underneath is a torx screw. Undo this and the cover simply pulls out and up.
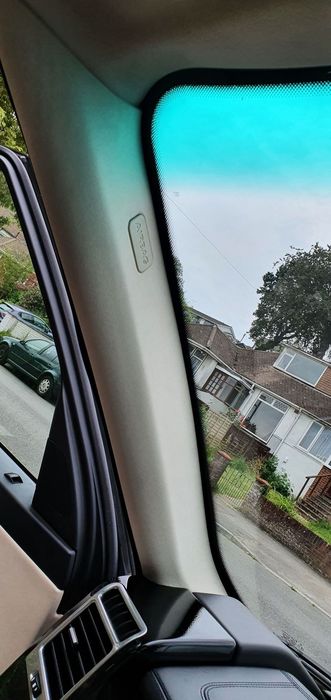 | | Click image to enlarge |
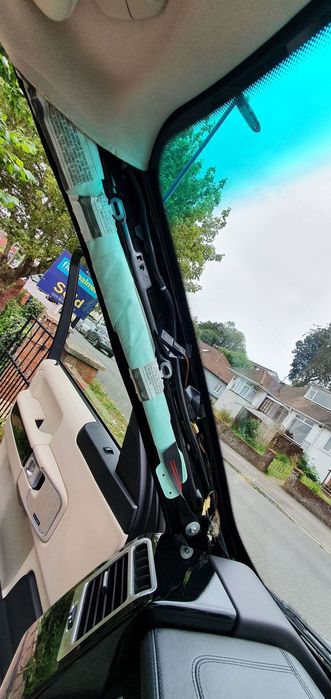 | | Click image to enlarge |
Step 7. Install the hardwire kit. (10 min)
Put a spade connector on the ground cable, loosen the M10 nut, install and re-tighten.
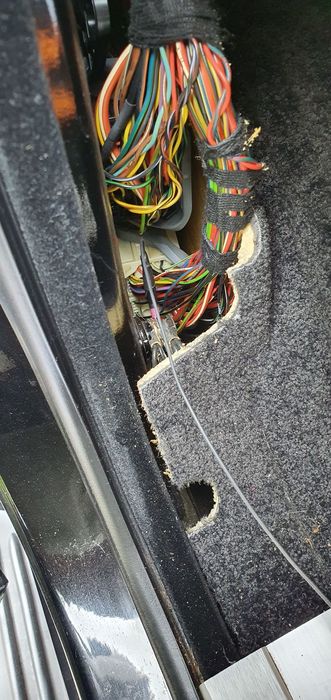 | | Click image to enlarge |
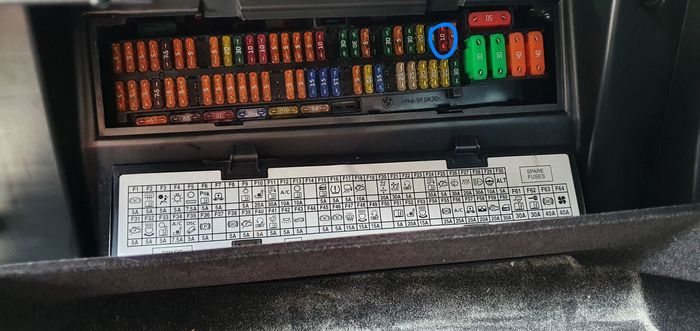
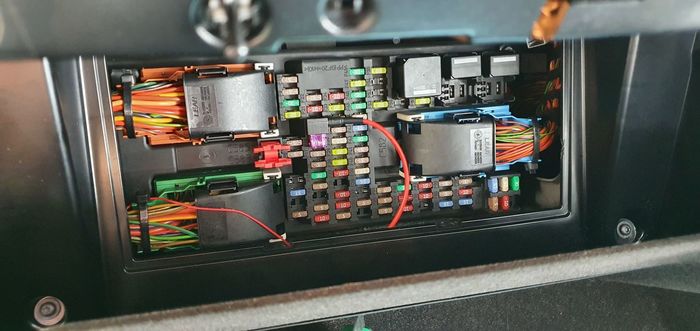
Now, push the positive line through to the fuse box. There's loads of space to get your hand through in the newer cars and still enough to poke it through in older cars. Install the piggyback fuse.The fuse box is different on the old and 2011 cars. Here's both.
SPOILER: To save you the hassle, the heated steering wheel fuse is ignition controlled and doesn't control anything sensitive so, this is the one you want to target.
Older Cars:
Newer Cars:
Step 8. Run the micro USB cable up the pillar and to site (5 min)
Plenty of space to push this through the dash and into the pillar.
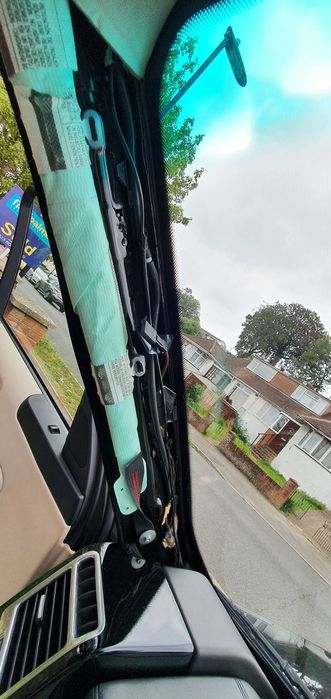 | | Click image to enlarge |
WARNING: THERE IS AN AIRBAG HERE. DO NOT LET THE CABLE FOUL THE AIRBAG'S ABILITY TO DEPLOY IN THE EVENT OF AN ACCIDENT. SECURE THE CABLE (AS PICTURED) WITH TAPE OR CABLE TIE TO THE EXISTING LOOM / WASHER PIPE RUNNING UP THE PILLAR
Now, push the cable inside the headlining. The headlining doesn't need any force to come down. Push the cable behind the lip with one of the plastic trim tools.
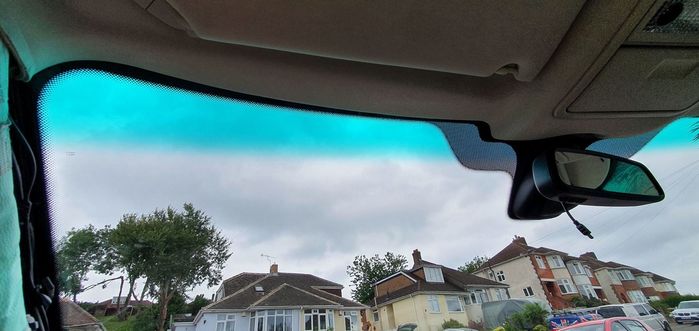
Step 9. Secure the transformer and cabling (3 min)
These are refined cars. You don't want a load of cabling rattling around behind your dash so, find somehwere to secure it. The dashboard frame I find is an ideal and accessible place, with plenty of ventilation to install the transformer and cabling.
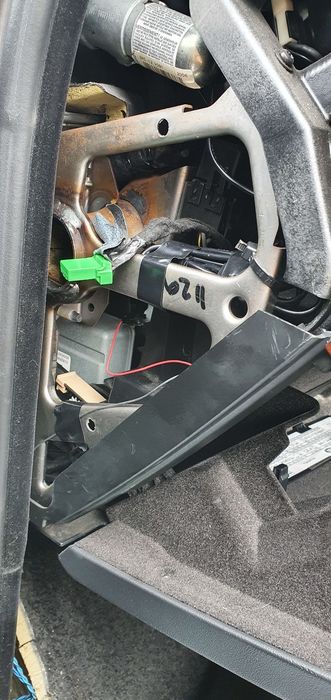 | | Click image to enlarge |
Step 10. Do the reverse and put it all back together. Reconnect the battery. Turn on the ignition (20 min)
Step 11. Mount the dash cam behind the rear view mirror, out of your way and ensure the viewing angle is satisfactory. I always like to slightly angle mine towards the driver position, as it compensates for the slightly off-centre view (2 min)
Job done! 2015 Range Rover Autobiography 4.4 SDV8
|


![]()


