![]() | Home > Maintenance & Mods (L322) > FFRR '02 Rear Suspension Dismantle & Rebuild |
![]() ![]() |
|
|
Joe90 Member Since: 29 Apr 2010 Location: Hampshire Posts: 6416 ![]() ![]() |
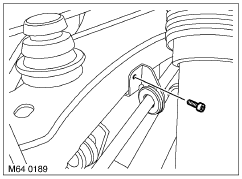
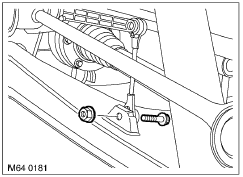
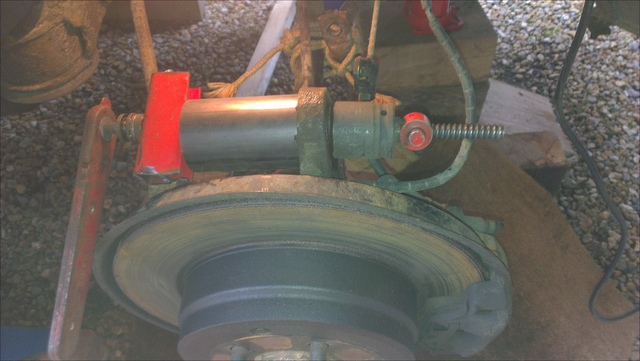
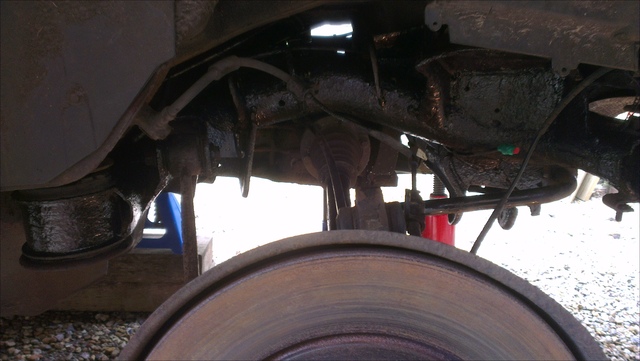
Been gathering parts and bits and pieces for this for a while, and some leave from work has provided me with the opportunity to dismantle my rear suspension and replace all the bushes, tie rods and links. Airbags and dampers are OK, but these are the easier items to remove!
|
||
![]() |
|
Joe90 Member Since: 29 Apr 2010 Location: Hampshire Posts: 6416 ![]() ![]() |
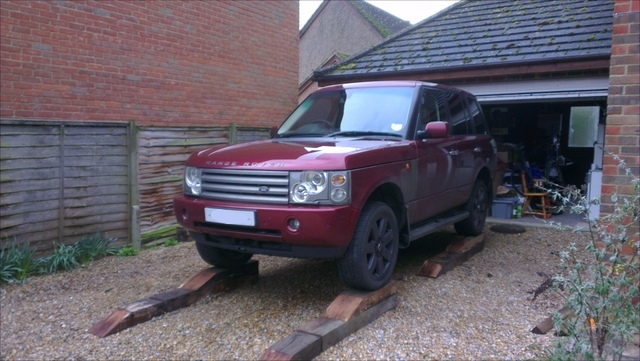
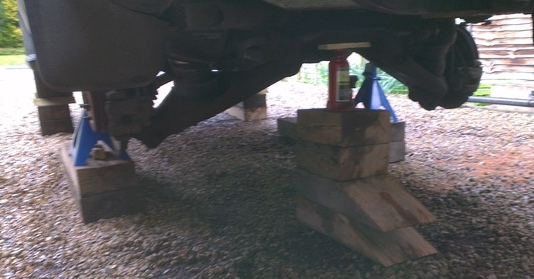
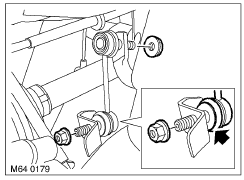
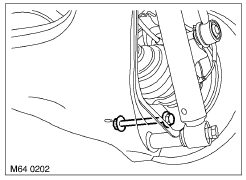
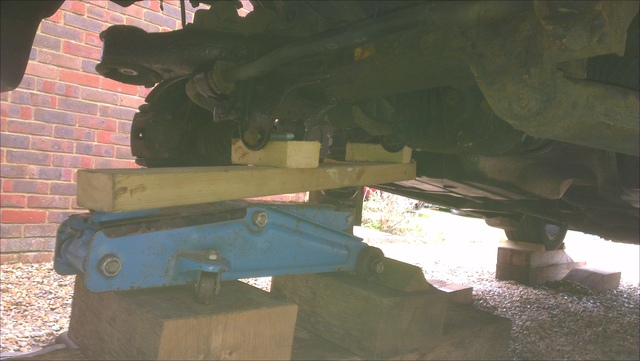
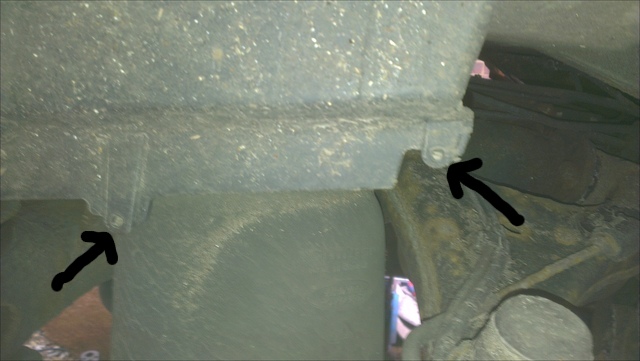
1. Get the car in the air.
Now to depressurise the suspension. Support the lower arm with a jack! Read my IID manual, clambered up into the car (long way up for me!) and switched on the ignition, resisting the temptation to start the car to see what it sounded like without the exhaust on! Now this is where I made a bit of a cockup: Adjust left rear corner only adjusted heights so I then went into Deflate All Corners, damn the whole car started to drop! I put my foot on the brake as the car dropped to its bump stops all round. This tipped the front right down and the back up in the air. Fortunately all the jacks held, but had to pump up the safety jack on the subframe to get purchase again. Added some support to the other side too. Off to review IID documentation to see how to depressurise one corner again. Undid the screw (8 mm) that secures the airbag spigot. That is it on the left of the image ![]() Next job was to remove the bolt holding the shock absorber in place. Tight! This is a 21mm nut and bolt, same size as a standard spark plug socket. Only required one section of trampoline leg on my 16" breaker bar to get it moving! Lovely and clean and new on the inside. I'll be re-using this nut and bolt. ![]() Finally for day 1 (it was past 6pm) I removed the lower outer bush nut and bolt (22mm nut, 21 mm bolt). Tight again, required two sections of trampoline leg to get it going. Helps to have some short extensions to get outside the brake disc. Tapped the bolt out with an old drill bit. ![]() Tidy up, supper and cup of tea! Any comments or suggestions need to go in the sister thread for this how to: http://www.fullfatrr.com/forum/topic17428.html . Experience is the only genuine knowledge, but as time passes, I have forgotten more than I can remember ![]() Volvo V70 P2 2006 2.4 Petrol 170bhp Estate SE MG Midget Mk1 1962 Previous: L322 Range Rover TDV8 3.6 2008; L322 Range Rover TD6 3.0 2002; P38A Range Rover V8 1999 |
||||
![]() |
|
Joe90 Member Since: 29 Apr 2010 Location: Hampshire Posts: 6416 ![]() ![]() |
Got an earlier start today, out there by 0830
Lower side ![]() The larger rearward bush was in fairly good nick, no movement with a long bar in the hole. The forward bush looked to be in a right old state: ![]() ![]() and offered some movement with a long bar in the hole. Not sure what the gunge is, grease from inside the bush? 2. Removing Upper Arm Started on the outer bush on the hub. Duly marked reference marks on the hub and the bolt for refit. First time I needed to apply upward pressure. I placed some blocks of wood between the rubber bump stop on the upper arm and the body where the bump stop hits. Take care not to foul the brake line. ![]() Again, 21mm nut and 18mm bolt, but this time the fancy eccentric one. The bolt end ain't so good. The 18mm socket span when I applied load, so I banged an 11/16th onto it, which held. The nut took the breaker bar and two trampoline legs to get it going. I bashed out the bolt and replaced it with an old drill bit just to hold everything together. Rave suggests removing the spring clip at the top of the air spring. This would allow the air spring to fall out, given it had been released from the lower arm. Decided to remove the air spring, which was a cinch when compared to the front end. A little bit of air left over in the bag on releasing the connector (12mm open ended spanner needed), a wiggle on the air bag and out it came. This gave me a bit more working space. Also decided to remove the damper (3 x 17mm nuts). Rave instructions, "lift" carpet, means fight and struggle with carpet, side covers, etc. - made that much more difficult by being 3ft higher in the air than normal. I also took out the height sensor, breaking one of the multiplug clips in the process. Also discovered that the height sensor connector to the lower arm was broken ![]() I now had the best access I was going to get to the inner bolts on the upper arm, without dropping the subframe. Having a selection of ratchets and extension bars is vital. My old ratchet was the perfect fit for the forward bush bolt. I was just able to get the breaker bar on the other end in a vertical position. Again 21mm nut, 18mm bolt, but you might need a short socket on the forward bush nut.And then one flat at a time started working the nut off. The bolt went loose fairly quickly, but the nut stayed tight to the end of the thread ![]() Use a socket with a UJ connection and a short extension. Slide these into position, and start turning, the short extension will eventually wind itself up and rest against the body, allowing you to undo the nut, flat by flat..... ![]() (Also see air bag connector nicely wrapped up!) Eventually was able to release the upper arm from its confines. (Putting back together will be fun, as tightening up has to be done at standard ride height!)
In better condition than the lower arm....
The inner bushes were in the same state as the lower arm forward bush, but no play....
And one for Mick, an Eccentric Hole ![]() ![]() I did stop for lunch at some point, and spent the rest of the afternoon (after a break for rain) derusting and kurusting. I discovered one of the possible reasons for the clonking/tyre wear. The top bush on the hub was all wobbly. You could move the inner part around with your finger! The new bush just doesn't move. Tea and a scone tonight, courtesy of my daughter ![]() Any comments or suggestions need to go in the sister thread for this how to: http://www.fullfatrr.com/forum/topic17428.html . Experience is the only genuine knowledge, but as time passes, I have forgotten more than I can remember ![]() Volvo V70 P2 2006 2.4 Petrol 170bhp Estate SE MG Midget Mk1 1962 Previous: L322 Range Rover TDV8 3.6 2008; L322 Range Rover TD6 3.0 2002; P38A Range Rover V8 1999 Last edited by Joe90 on 24th Mar 2013 12:58am. Edited 1 time in total |
||||||||||
![]() |
|
Joe90 Member Since: 29 Apr 2010 Location: Hampshire Posts: 6416 ![]() ![]() |
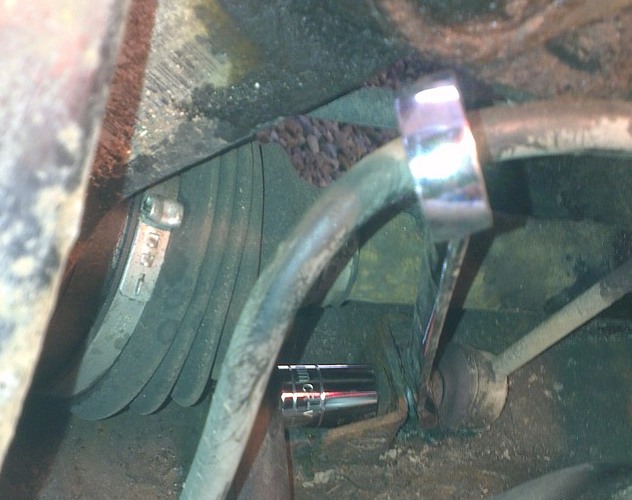
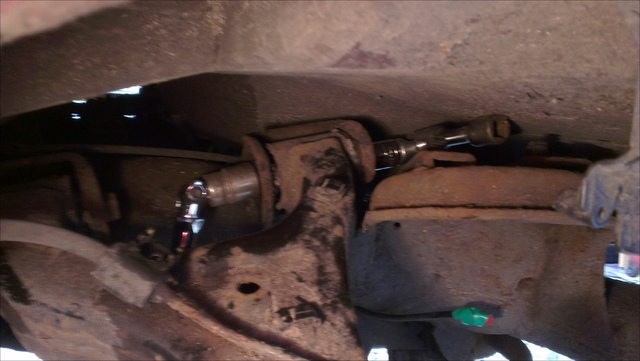
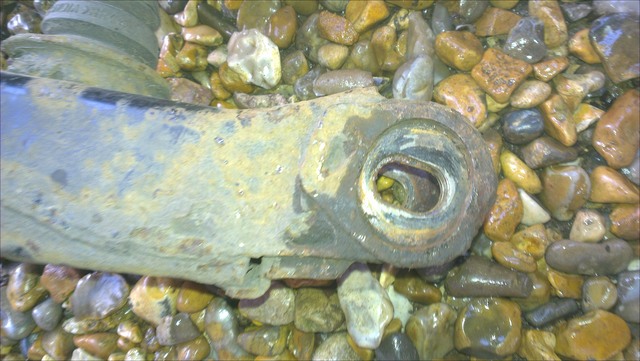
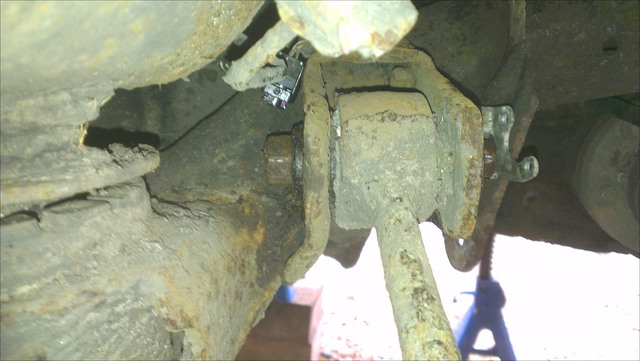
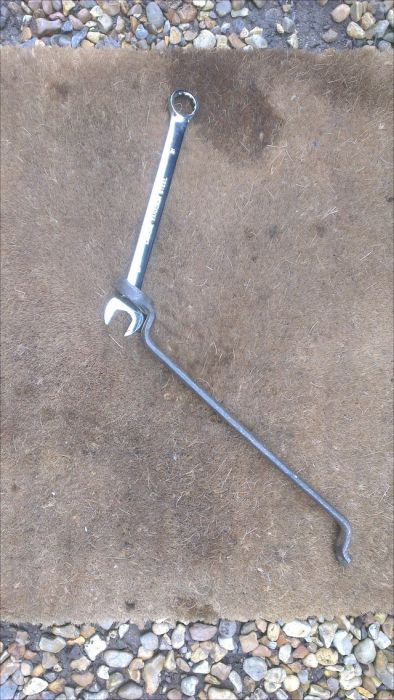
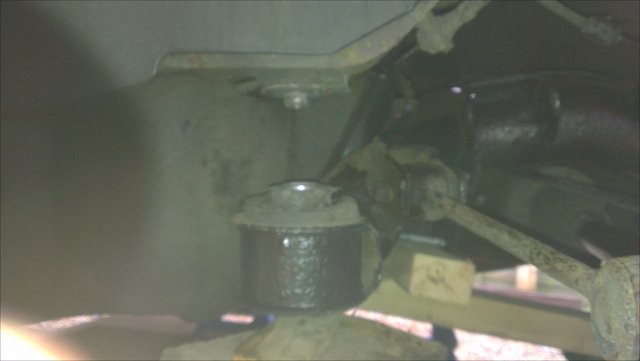
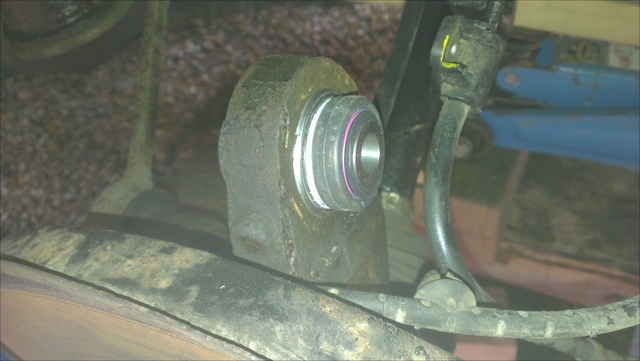
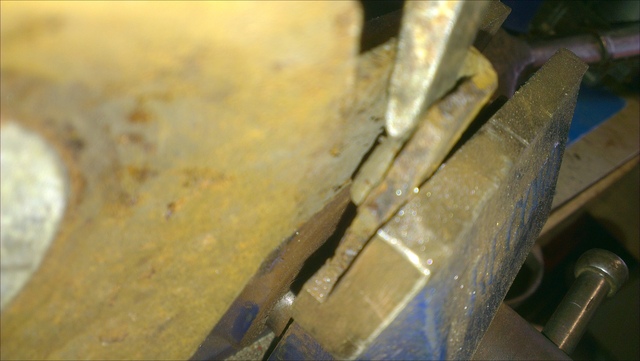
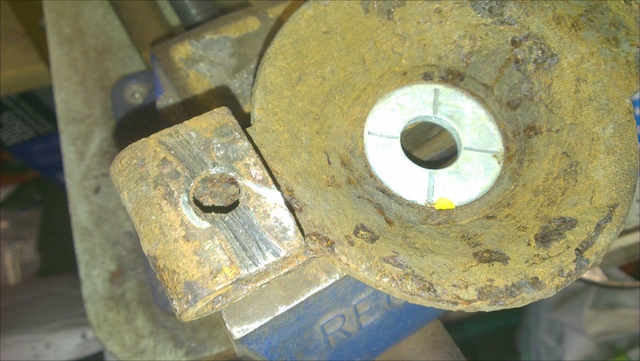
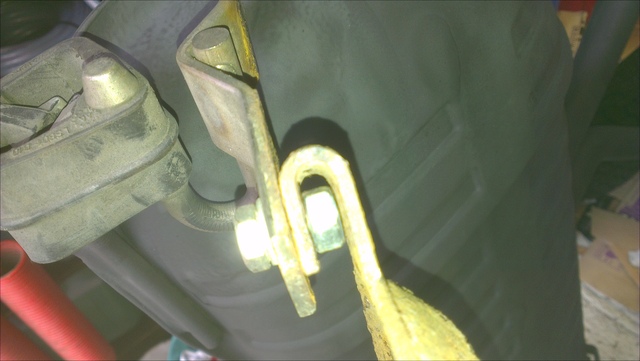
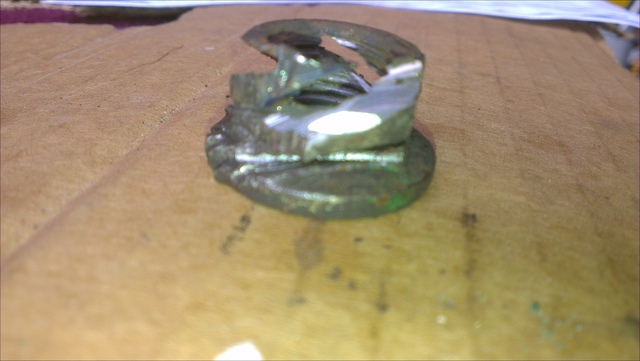
Had a few other real world things to do today so not a great deal done, but time consumed by problem ball joint!
At the other end, things didn't get much better. The 18mm eccentric bolt is on the rearward side, and this span round with an 18mm socket on it. ![]() So needed to use the 21mm ring spanner on the other end. Not much leverage with just a spanner, so used one of my old, old large ring spanners to get extra pull.
Fortunately bolt stayed put and nut started moving. Tie rod left in place for now, to hold hub in position. Lunch 5. Painting Applied first coat of HT paint to the exhaust, makes it look much better Applied Kurust to subframe I could get to: ![]() Applied coat of Hammerite "hammered" Black to upper and lower arms and damper. ![]() Tea ![]() Bushes tomorrow ![]() ![]() Any comments or suggestions need to go in the sister thread for this how to: http://www.fullfatrr.com/forum/topic17428.html . Experience is the only genuine knowledge, but as time passes, I have forgotten more than I can remember ![]() Volvo V70 P2 2006 2.4 Petrol 170bhp Estate SE MG Midget Mk1 1962 Previous: L322 Range Rover TDV8 3.6 2008; L322 Range Rover TD6 3.0 2002; P38A Range Rover V8 1999 |
||||||
![]() |
|
Joe90 Member Since: 29 Apr 2010 Location: Hampshire Posts: 6416 ![]() ![]() |
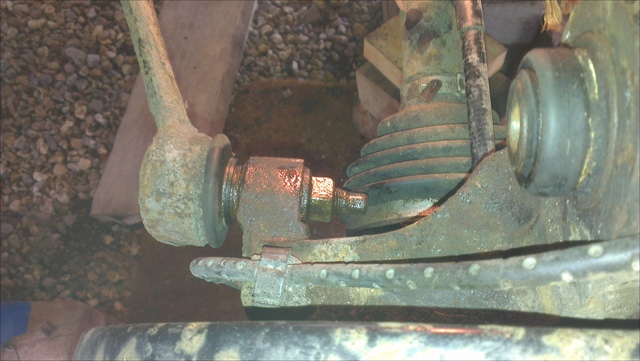
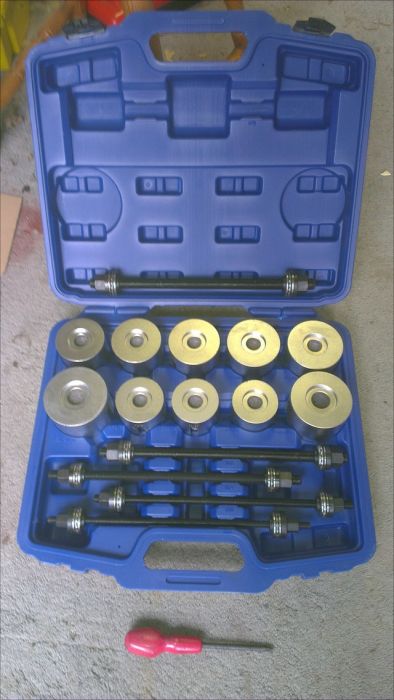
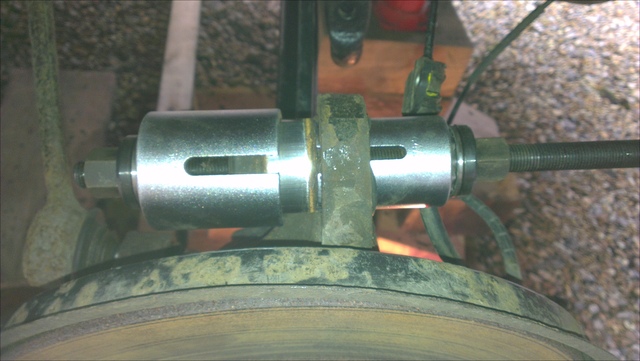
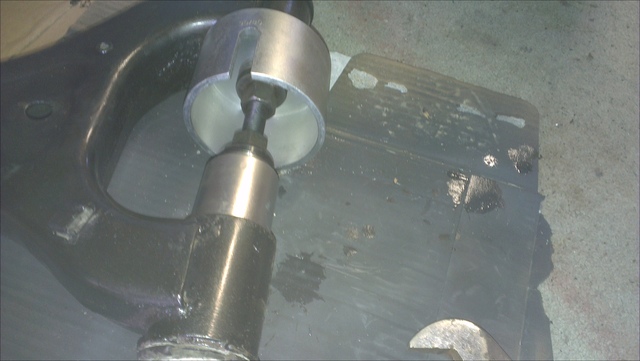
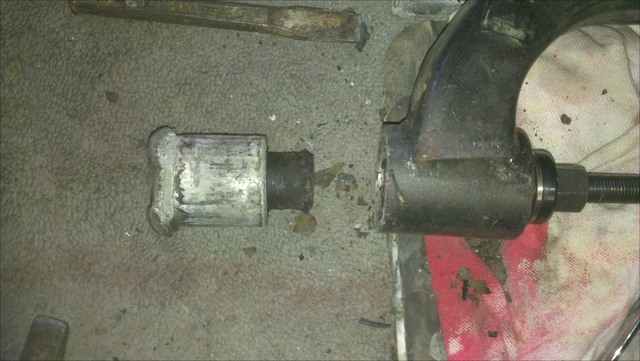
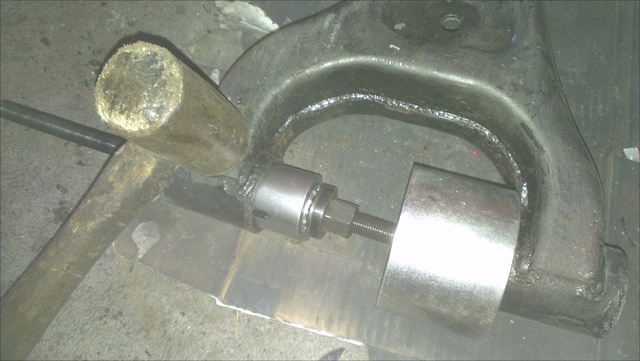
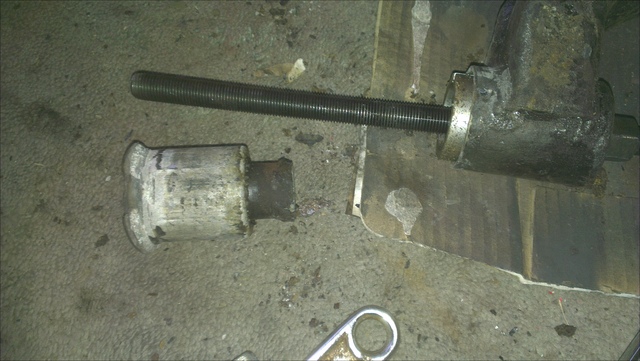
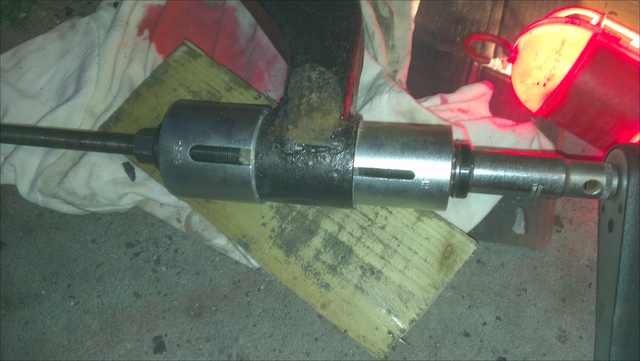
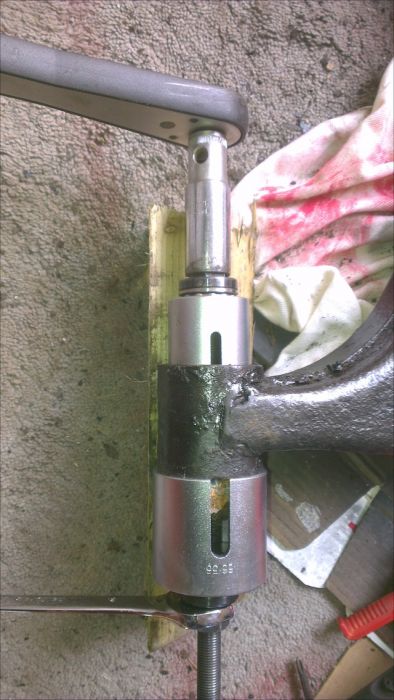
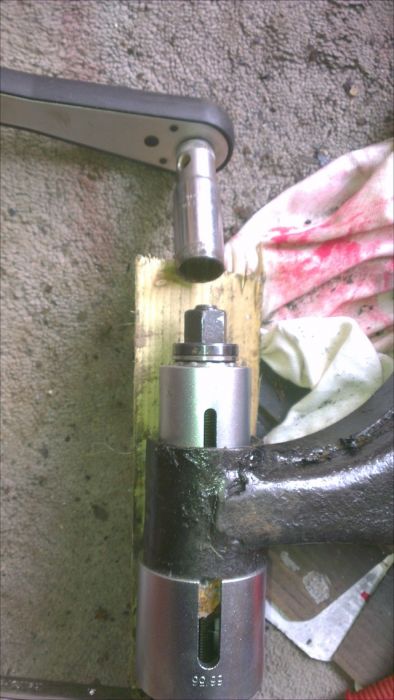
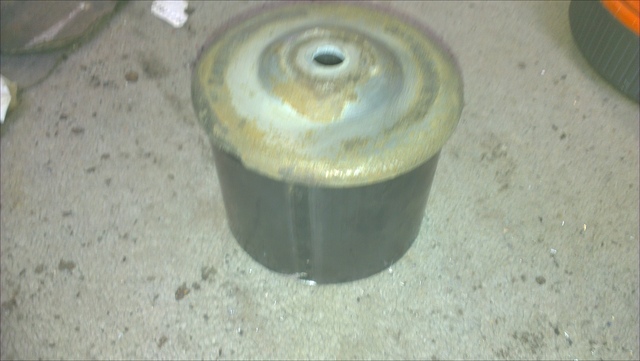
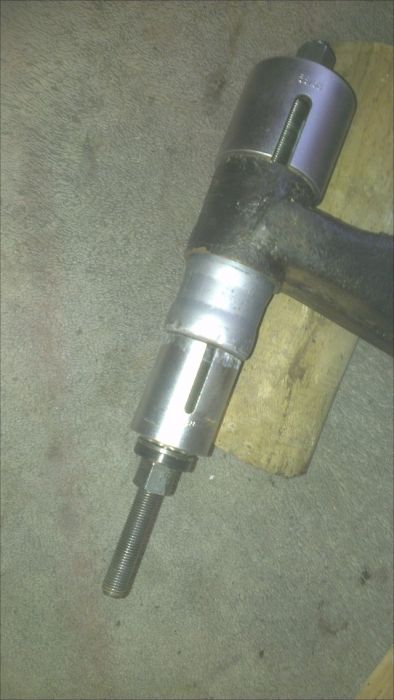
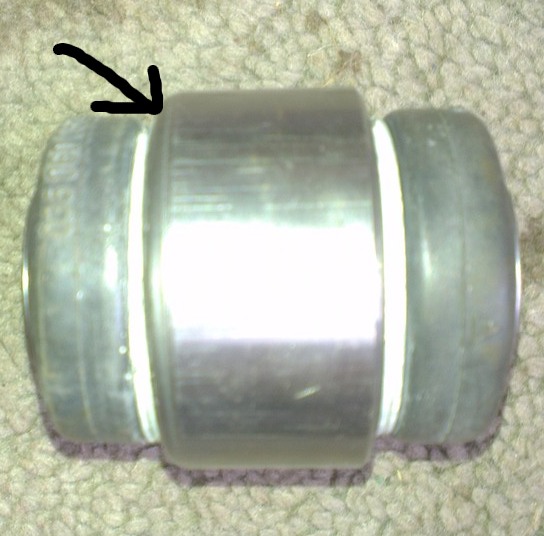
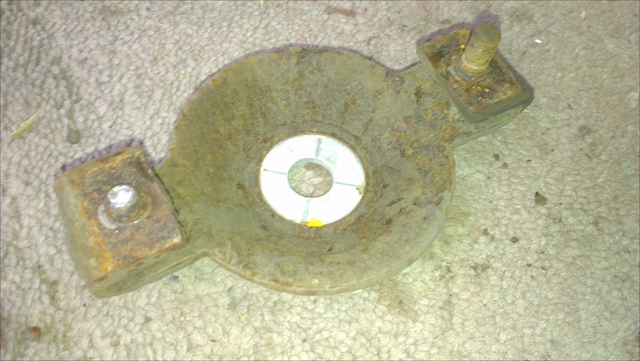
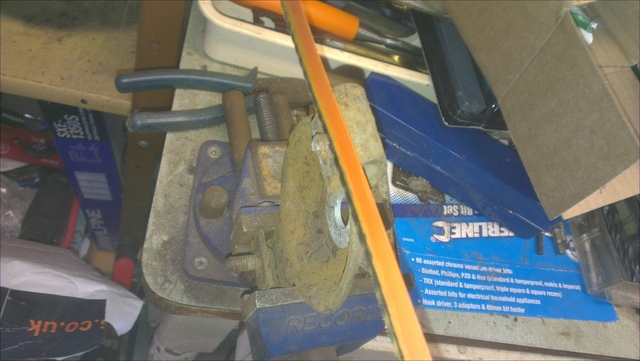
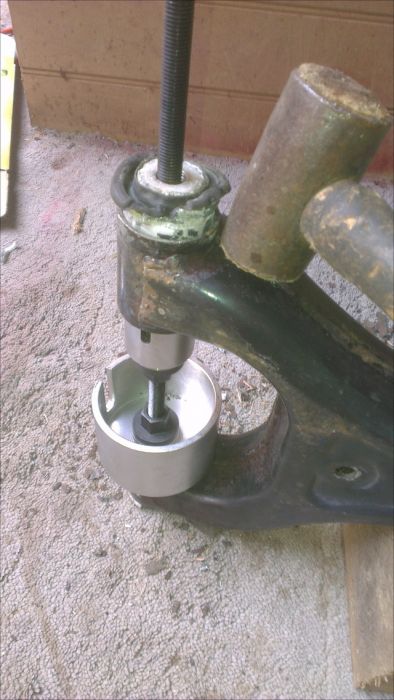
Bush pressing kit arrived today, so set to work on pressing out and replacing all the bushes on the hub, the arms and the subframe. It is a lot bigger than the ebay picture conveys, ( I put a standard Stanley Philips screwdriver in shot to give scale) case is @ 48cm wide by 40cm deep, and weighs @ 40lbs. As impressed as fisha was - the mutts nuts!!
It helps to have the new bushes available, and also a digital caliper vernier guage, to get the sleeve sizes right. It was also spitting with rain, so mostly kept me trapped inside the confines of an overflowing garage! 1. Second Coat of HT Paint to Exhaust Image to follow 2. Hammerite to the subframe ![]() 3. Hub Bushes See fisha's post for hub bushes, much the same as me. Sleeve sizes for me: Upper: M14 Rod (21 mm nuts) - as for all other bushes except the one below Pressing out: Inner 44 mm Outer 56 mm Lower: M16 Rod (23 mm nuts) Pressing out: Inner 52 mm Outer 70 mm These bushes were much easier to press out than I expected. Tighten up, one loud crack, then slowly eased out without too much of a fight. Found that the lower bush was also wobbly. Press kit in action on top hub bush: ![]() Lunch: Curry MustGos 4. Upper Arm Bushes These chaps required a bit of reverse thinking, as they needed to be pushed out rather than pulled, using the other bush housing as a stop point. However, the press kit didn't come with a short cap, so had to use the largest sleeve round the wrong way to push against. ![]() ![]() Sleeve sizes for me: Pressing out: Inner 44 mm Now these bushes refused to budge, not being nice steel ones, some kind of alloy casing which had oxidised, so much so that I started to widen the gap and the orientation between the two bush housings. On the basis that if it went in, it will come out! Cold chisel and hammer, ![]() ![]() to work around the outer edge, then all of a sudden....crack, and the bush popped out about 1cm. Tightened up again, attack with cold chisel, crack, and popped out some more, eventually wound it out. The other side wouldn't budge with the cold chisel approach, but a sound thwack with the hide mallet on the outside of the housing and crack, out popped the bush 1cm. Repeat as before! ![]() ![]() No wobble on these bushes. As previously mentioned, the inner bushes need to be tightened back up at standard height setting. A rough measure from the top of the upper arm in front of the bump stop to the curve at the top of the inner wing is @ 13.5 inches. Close enough is good enough! 5. Lower Arm Bushes Sleeve sizes for me: Forward Pressing out: Inner 50 mm Outer 54 mm This one needed an inner sleeve the same size as the bush itself, because the bush had such a thin edge to it. The bush just came out slowly and surely, no loud cracks this time. But I then had to press out the sleeve with another sleeve! ![]() No wobble on this bush. This is as far as I managed to get today. Everything is taking a lot longer than I expected, but always does the first time you do something. Hopefully I can do some catching up tomorrow and over the weekend Learnt I should wait until I have replaced the bushes before hammeriting the suspension arms, paint not hardening off quick enough in the cold weather. Supper & Beer, mmmm Any comments or suggestions need to go in the sister thread for this how to: http://www.fullfatrr.com/forum/topic17428.html . Experience is the only genuine knowledge, but as time passes, I have forgotten more than I can remember ![]() Volvo V70 P2 2006 2.4 Petrol 170bhp Estate SE MG Midget Mk1 1962 Previous: L322 Range Rover TDV8 3.6 2008; L322 Range Rover TD6 3.0 2002; P38A Range Rover V8 1999 Last edited by Joe90 on 21st Mar 2013 10:52pm. Edited 3 times in total |
||||
![]() |
|
Joe90 Member Since: 29 Apr 2010 Location: Hampshire Posts: 6416 ![]() ![]() |
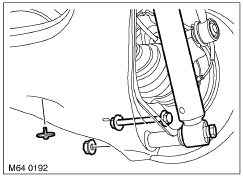
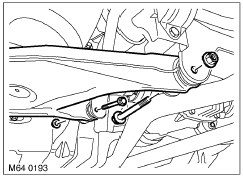
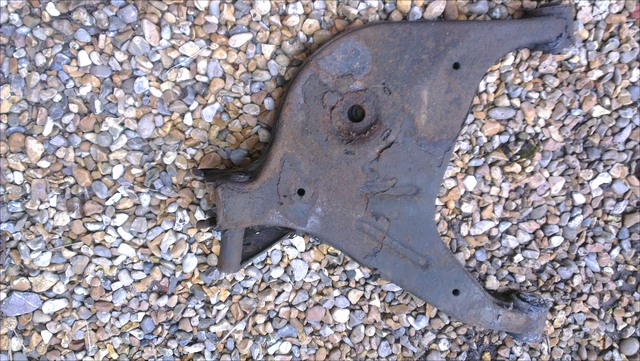
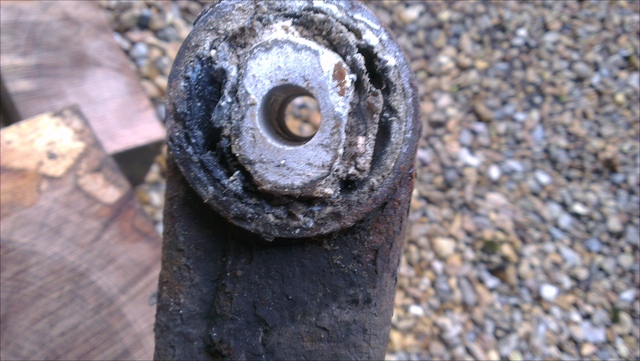
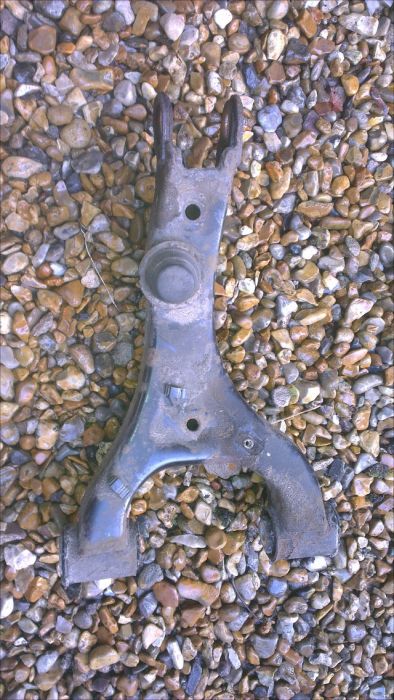
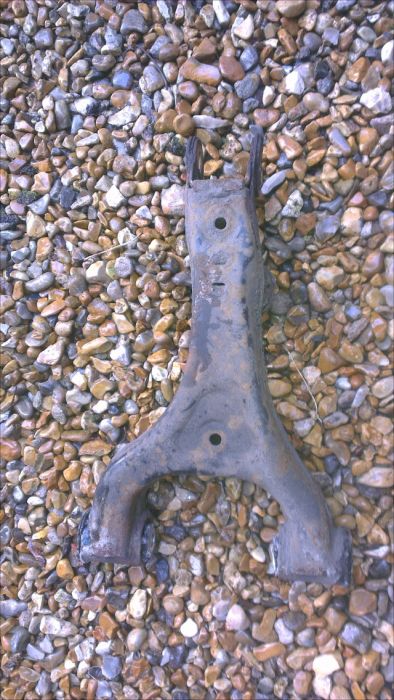
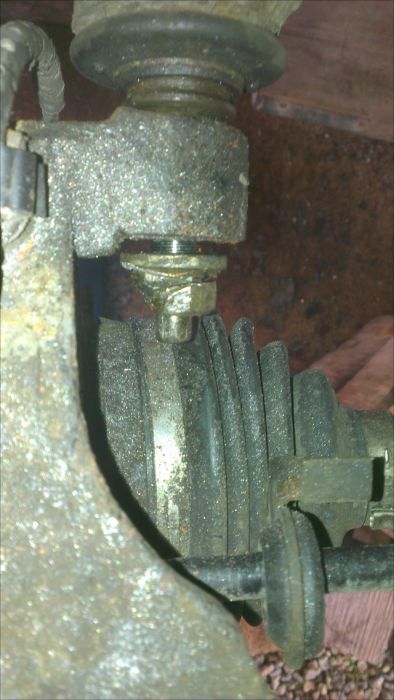
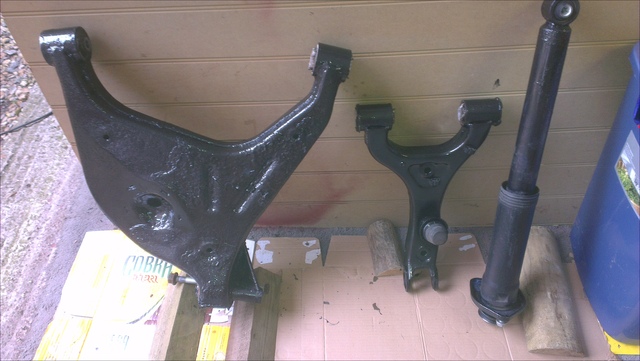
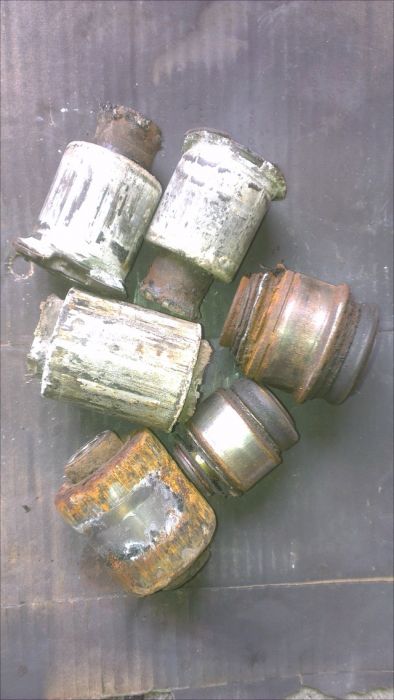
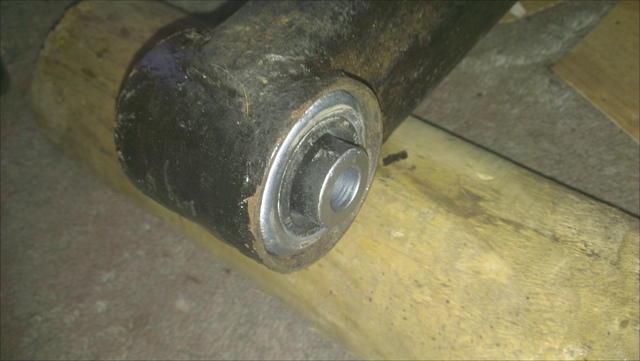
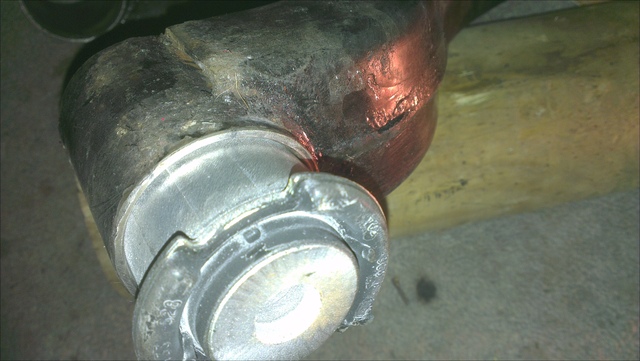
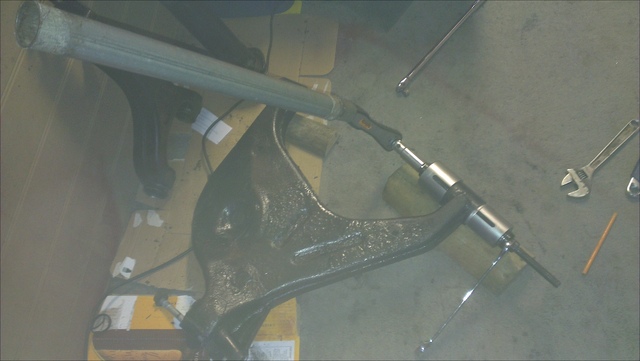
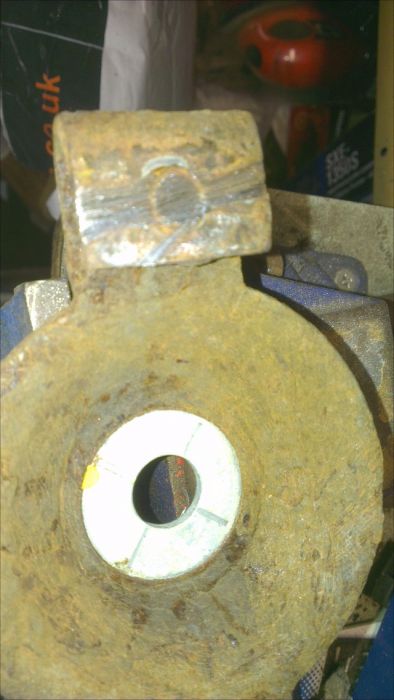
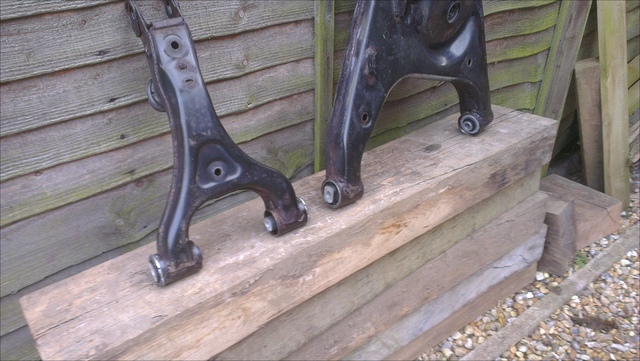
1. Finish Removing Lower Arm Bushes
At last, all the main suspension bushes were out!
Top Tip: Keep a nut at one end of the press bar, then when you can you can use a socket and ratchet
Heavy rain ! 2. Subframe bushes OK, brought back into service some of the parts from my Acme bush pulling kit, namely the large piece of pipe and the crossbar. Put the jack under the subframe (on the lower arm mounts), ![]() took the strain, had a good poke about above the subframe to check there was nothing going to be snagged, loosened off the two bush bolts @ 1 inch and started lowering. Came down nice and gently, then removed the two bolts and lowered in stages until I had a gap of @ 15cm. ![]() ![]() Then applied my press kit with pipe (a perfect fit on the underside of the subframe around the bush) and crossbar (cut from old jack). Looks a bit like a stack of saucepans ![]()
Sadly the crossbar started to deform under pressure, and without anything else to use about me, I have had to admit defeat for the moment ![]() Had a think about using the end plate from the forward subframe bush instead, which fitted perfectly over my pipe "sleeve" ![]() but thought better of it. Lunch 3. Start Rebuilding (hooray!) Cleaned out all the bush housings and mating faces on the two arms with a sanding wheel then some 400 wet and dry with WD40. Lower Arm: Rearward bush eased in slowly and surely, and I got dead centre first time! Pressing in: Inner 48 mm Outer 58 mm
![]() Forward bush, also went in nicely, had to be aligned square with the weld on the side of the arm, and the centre of the bush had to stick out 6.8mm each side. I could only measure 6.74mm each side with my vernier guage, so guess that will have to do ![]() Pressing in: Inner 54 mm Outer 58 mm
![]() Upper Arm: These also needed to be aligned correctly, I used the reference marks I made prior to removing the old bushes, a couple of little nicks in the housing with a hacksaw, against the little lobes on the bush. Pressing in: Inner 52 mm Outer 56 mm ![]() ![]() Finally using my new best friend and favourite tool, which has doubtless already paid for itself (The Bush Pressing Kit), I pulled the two ends of the upper arm back into line with each other (hard work). I'll have to stress the time and patience it takes to remove and fit new bushes, I only managed a quarter turn on the nut at a time, this with a 30" extension on the end. Occasionally, the push/pull was light enough to allow a ratchet. Its great anaerobic exercise and beats pumping iron at the gym! (Not that I go!) ![]() If dry I should have it all back together tomorrow! Any comments or suggestions need to go in the sister thread for this how to: http://www.fullfatrr.com/forum/topic17428.html . Experience is the only genuine knowledge, but as time passes, I have forgotten more than I can remember ![]() Volvo V70 P2 2006 2.4 Petrol 170bhp Estate SE MG Midget Mk1 1962 Previous: L322 Range Rover TDV8 3.6 2008; L322 Range Rover TD6 3.0 2002; P38A Range Rover V8 1999 Last edited by Joe90 on 22nd Mar 2013 10:32pm. Edited 2 times in total |
||||||||||||||||
![]() |
|
Joe90 Member Since: 29 Apr 2010 Location: Hampshire Posts: 6416 ![]() ![]() |
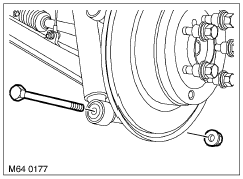
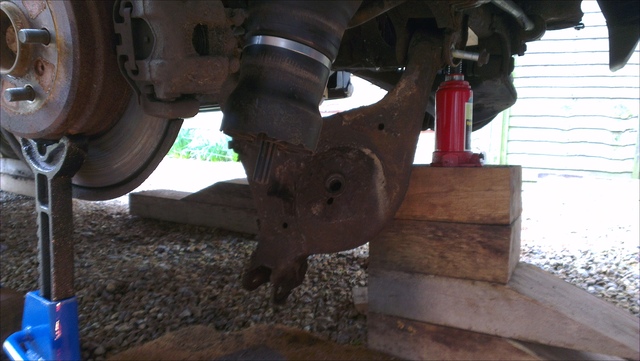
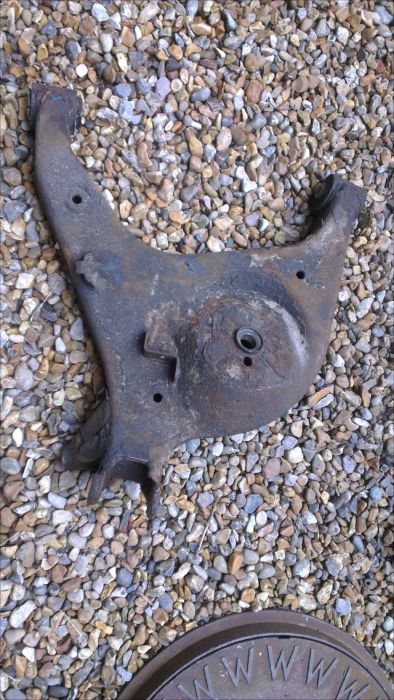
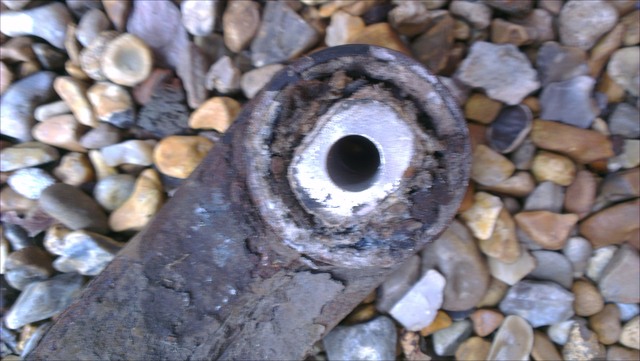
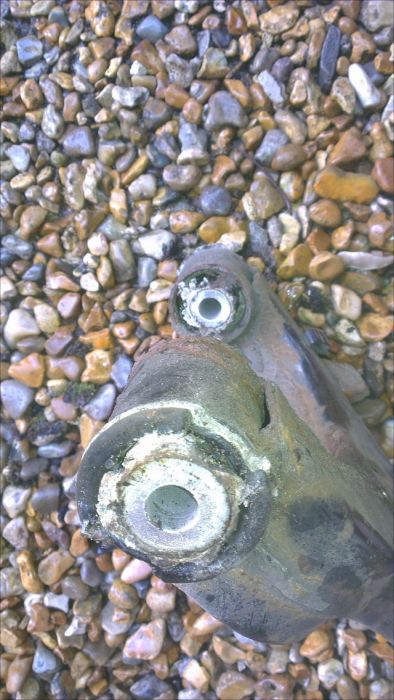
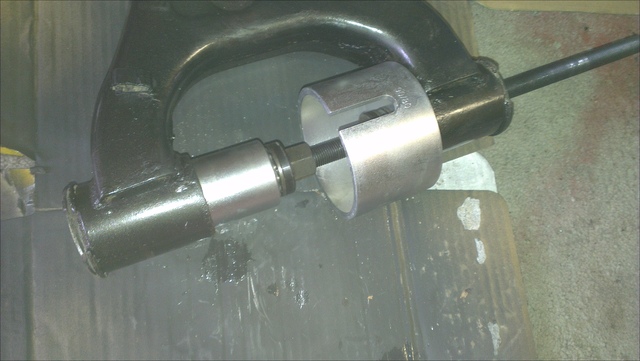
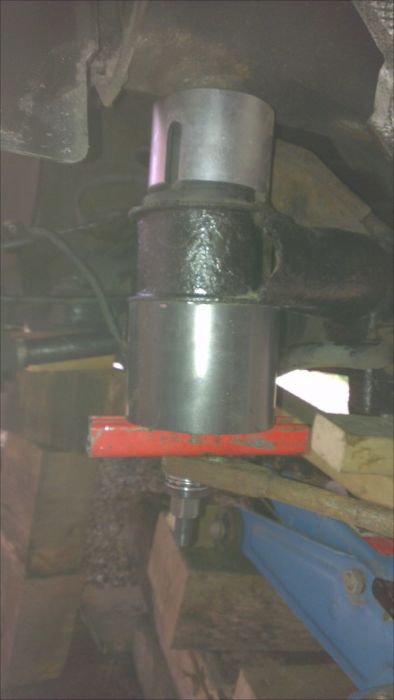
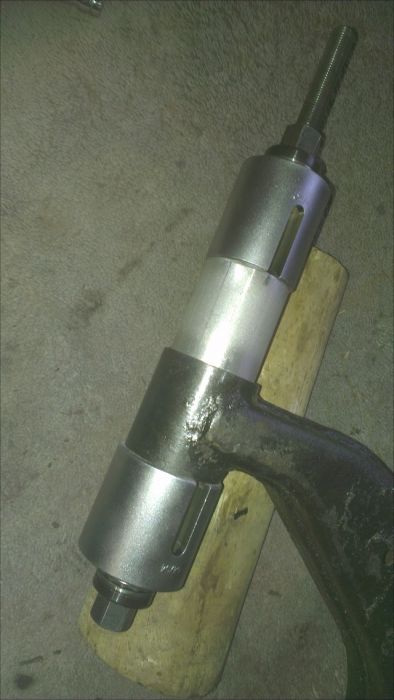
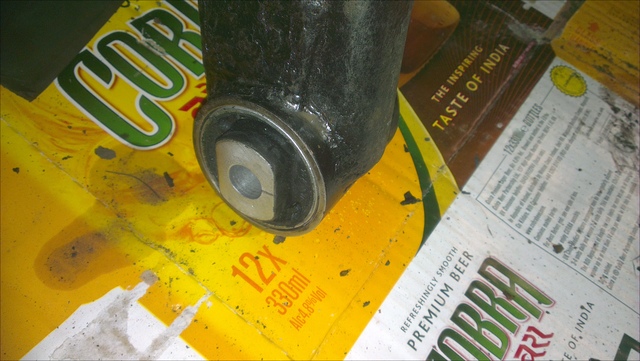
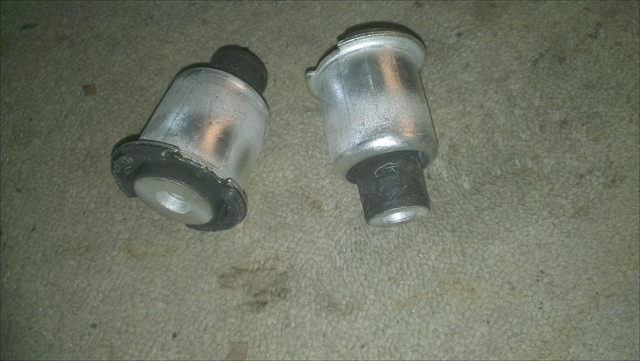
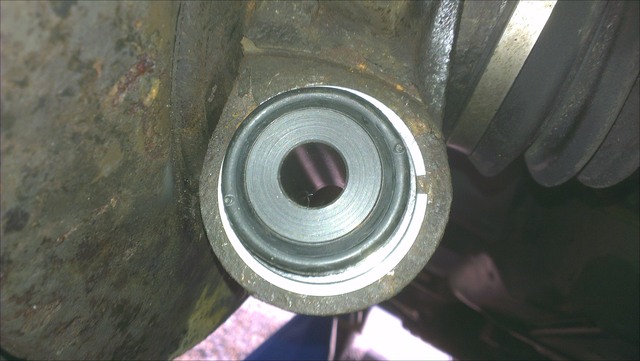
1. Hub Bushes Replaced
Top Press In: Inner 50 mm Outer 56 mm Top Bush in place ![]() Fancy washer for eccentric bolt: ![]() Bottom Press In: Inner 50 mm Outer 70 mm ? (forgot to record, will resolve when RHS done) Bottom Hub Bush in place, showing new circlip: ![]() 2. Tie Rod Replaced My 10 mm spanner (open end) was good enough for most of the nut turning, but finished with an adjustable spanner. The big nut goes tight/solid quite quickly. Up the other end, lined up reference marks for eccentric bolt and tightened 3. Lower Arm Refitted It's quite heavy, so locating it single handed is a pita. Best thing to do is locate one bush and get a bolt in halfway, then you can swing the arm up for the other bush mounting and get a bolt in place there to, then tap through, nuts on. Don't tighten at this stage. 4. Anti Roll Bar Link Replaced Fiddly, getting onto the 18mm flat and holding the spanner in place. You may need a jack under the lower arm to align with the ARB. 5. Air Bag Refitted The usual fight getting the connector in place and then tightening up. Minimum four hands needed! Never seems to require as much doing up as it does undoing. I made a bit of a mistake when taking the air bag off, because I allowed the bag to fully extend. Trying to roll the lower part of the bag back over itself is not easy. Then compressing the upper part of the bag to get it to fit in made it look all crumpled. Fingers crossed it sorts itself out when I repressurise. 6. Upper Arm Refitted As for lower arm, but much lighter. Locate the bushes on the mountings, may take a bit of bashing with the hide mallet from all directions. Don't be tempted to locate it onto the hub bush as you will loose lateral movement. Lining up the rearward bush is tricky as you have to slide the bolt in above the airbag (the difficult end!). My UJ/small extension did its thing again to assist with tightening the nut. I had to do a bit of levering down on the forward bush, take care here as the brake pipes are just above it! 7. Am I Missing Something? Just noticed that the rear inner wing on both sides has two holes. Should something be fitted here? ![]() Experience is the only genuine knowledge, but as time passes, I have forgotten more than I can remember ![]() Volvo V70 P2 2006 2.4 Petrol 170bhp Estate SE MG Midget Mk1 1962 Previous: L322 Range Rover TDV8 3.6 2008; L322 Range Rover TD6 3.0 2002; P38A Range Rover V8 1999 Last edited by Joe90 on 25th Mar 2013 12:57pm. Edited 2 times in total |
||||
![]() |
|
Joe90 Member Since: 29 Apr 2010 Location: Hampshire Posts: 6416 ![]() ![]() |
Bloody cold today, snowed on me several times
Place in suitable vice, and use a cold chisel to bang on the inner part of the press fit. ![]() This should release leaving a nice hole ![]() And you can then use a suitable nut and bolt (put the nut in the gap) ![]() A previous owner had also broken one thread off on the rearward mounting on the towbar, I wasted too much time on this, couldn't drill or tap it out, so left it for now. probably an easy fix with some kind of slide on clip? 2. Fit Hub Nuts and Bolts Again for the top eccentric bolt, align with reference marks and tighten in place. 3. Refit Damper Locate three bolts into the body, slot the damper onto the hub and fit nut and bolt. Then fit the three nuts to the top of the damper inside the car. 4. Fiddly Bits Refit Height Sensor and replace multiplug. Reattach Hand brake cable, brake line and brake/ABS sensor cable to upper arm (and for the latter to the clips on top of the airbag upper mounting) 5. Tightening up Using a jack under the lower arm, now raise the suspension to standard ride height (483mm hub centre to wing, or 13.5in from top of upper arm by bump stop to curve in inner wing) Tighten all nuts and bolts to specificed torque. 6. Refit the Exhaust This is easier as a two man job, so No.1 son brought into play, to hold up the silencer box (huff & puff ![]() Went back together a treat, and my new exhaust mountings, whilst a bit of a fiddle to get the nuts in the right place, worked well. 7. Moment of Truth! Time to start the car and repressurise the suspension! Cleared away the centre safety jack, refitted the wheels and placed some blocks under the wheels, just lightly supporting the tyres. Still up on the side jacks at this stage. The car had been down on its bump stops since Monday (day 1) and not started with exhaust off, I had been leaving the car unlocked with the bonnet released, just in case. Now 7 days on, with temperatures @ 2 degrees or below all week. Key in, turn to ignition, glow plug lights out, very slow turnover, but he started up. IID Tool in, reactivated EAS, Up comes the front ![]() ![]() Using IID Tool, I increased heights to the rears again, which lifted left rear of the jack, but couldn't get up high enough to lift off the right rear, so then reduced heights to where they were. Stuck a jack under the forward subframe mounting and pumped up to release Right rear jack. Switched off, locked up and left car in off road overnight. By the morning, still up, no leaks, car started fine, no messages - other than the obligatory how f...ing cold its been ![]() Experience is the only genuine knowledge, but as time passes, I have forgotten more than I can remember ![]() Volvo V70 P2 2006 2.4 Petrol 170bhp Estate SE MG Midget Mk1 1962 Previous: L322 Range Rover TDV8 3.6 2008; L322 Range Rover TD6 3.0 2002; P38A Range Rover V8 1999 Last edited by Joe90 on 25th Mar 2013 12:45pm. Edited 2 times in total |
||||
![]() |
|
Googsy Member Since: 02 Jun 2011 Location: Where men are men and sheep are nervous. Posts: 2947 ![]() ![]() ![]() |
Joe your a legend I kind of follow what your doing as it seems complex but I admire your persistence with such a big project |
||
![]() |
|
Joe90 Member Since: 29 Apr 2010 Location: Hampshire Posts: 6416 ![]() ![]() |
Took a day of rest today, fed up with spending all day on my knees in the freezing cold.
|
||
![]() |
|
Joe90 Member Since: 29 Apr 2010 Location: Hampshire Posts: 6416 ![]() ![]() |
Damn I have an air leak.
|
||
![]() |
|
Joe90 Member Since: 29 Apr 2010 Location: Hampshire Posts: 6416 ![]() ![]() |
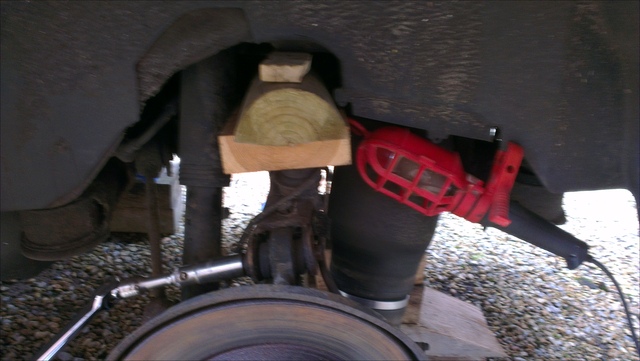
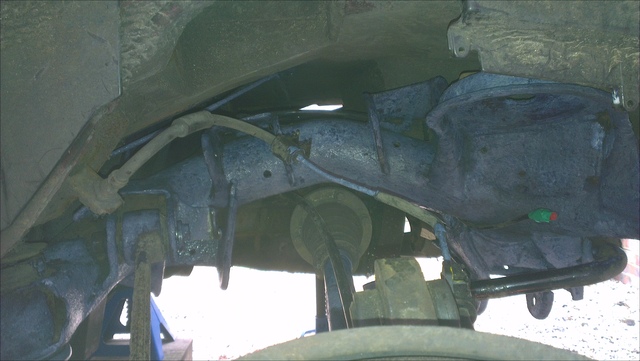
Took on the Rear Right today with good weather promised for the weekend. Didn't get started until @ midday and finished @ 8pm. Most items appeared to undo much easier on this side as compared with the rear left, or I've got stronger! I took quite a different approach this time, based upon what had been learned from the other side.
|
||
![]() |
|
Joe90 Member Since: 29 Apr 2010 Location: Hampshire Posts: 6416 ![]() ![]() |
Nice sunny morning 10 am start!
Inner bushes replacement (as per left side) A little squirt of WD40 on the bush and inner faces helps to ease the bush in. ![]() Right, fed up of winding things. Wire brush the exposed subframe where I can, then Kurust the two arms and the subframe. Finish removing the tie rod. Got fed up with the hacksaw, so took my angle grinder to the nut! Scary but it worked. Molegrips and spanner saw the end of the nut. ![]() Kurust dried, so now applied a coat of Black Hammerite to the two arms and the subframe. Final job today was to remove the two hub bushes. Top one no problem. Bottom one, can't find the end of the circlip, actually can't find the circlip! Manyana! Anyway had to go in and cook supper. Finished @ 6pm. . Experience is the only genuine knowledge, but as time passes, I have forgotten more than I can remember ![]() Volvo V70 P2 2006 2.4 Petrol 170bhp Estate SE MG Midget Mk1 1962 Previous: L322 Range Rover TDV8 3.6 2008; L322 Range Rover TD6 3.0 2002; P38A Range Rover V8 1999 |
||||
![]() |
|
Joe90 Member Since: 29 Apr 2010 Location: Hampshire Posts: 6416 ![]() ![]() |
MON
|
||
![]() |
|
![]() ![]() |
|
All times are GMT |
< Previous Topic | Next Topic > |
Posting Rules
|
Site Copyright © 2006-2025 Futuranet Ltd & Martin Lewis
