 | Home > Maintenance & Mods (L322) > Replacing Rear Hub Bushes - How To |
 
|
|
|
| fisha Member Since: 25 Sep 2009 Location: Scotland Posts: 1457 
|
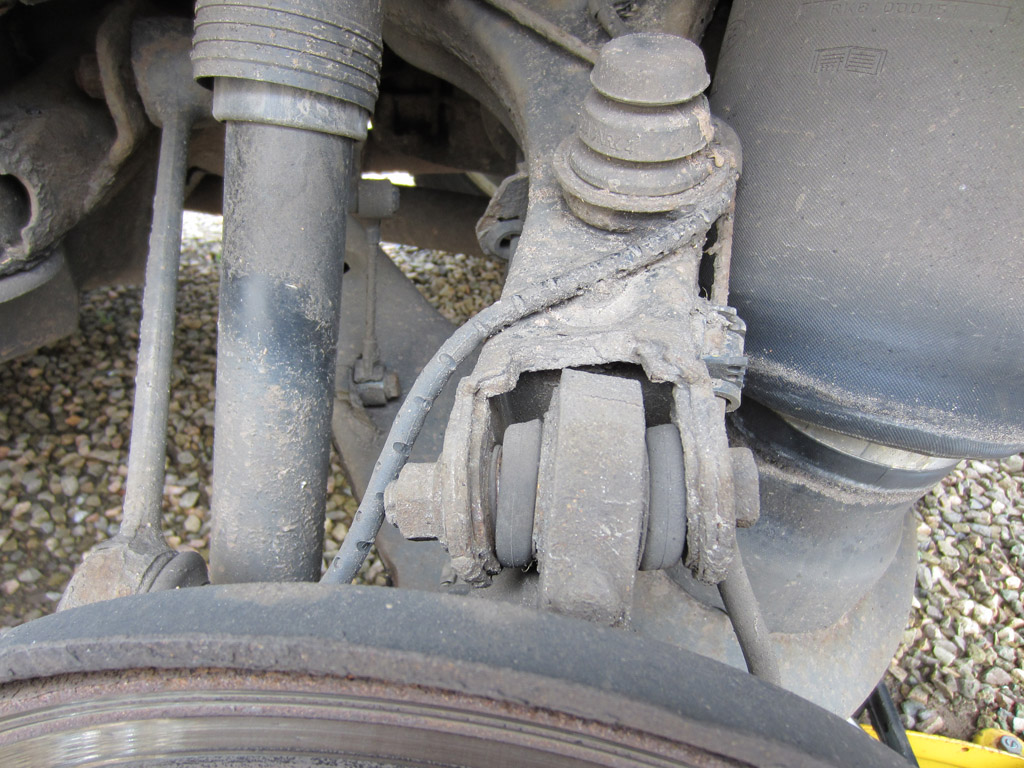
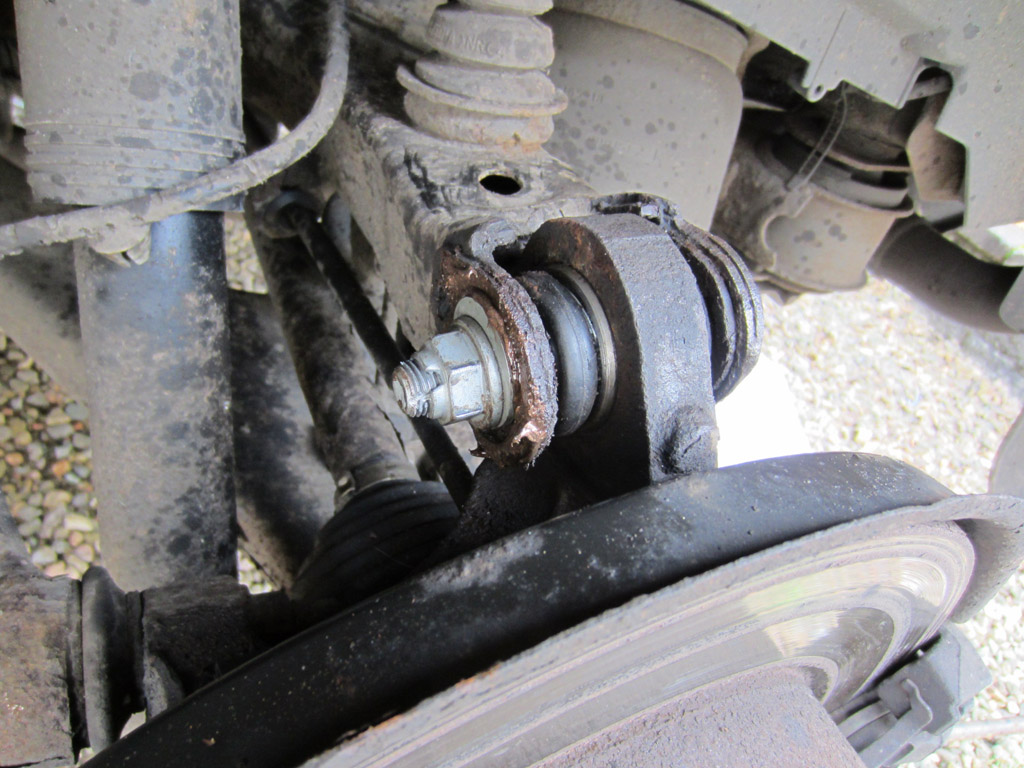
Ok doky. One of the MOT advisories was the rear hub bushes, top and bottom, both sides. I've put it off long enough, but the time came to change them. Over the last wee while, I've been collecting up the parts ... and tools.
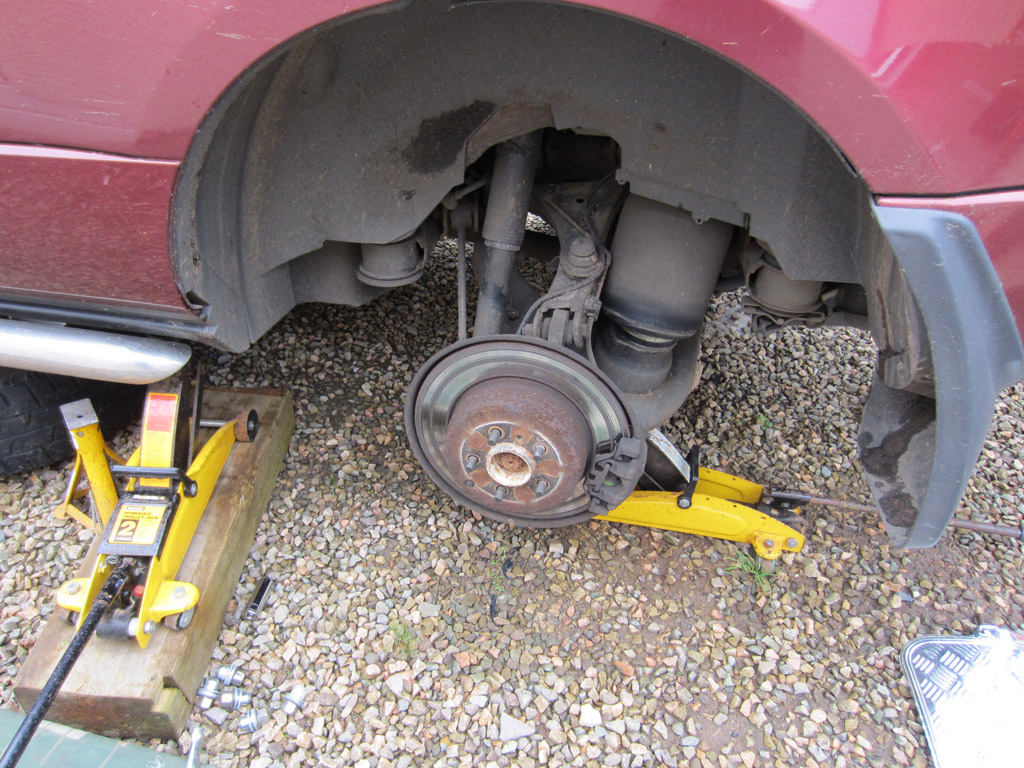
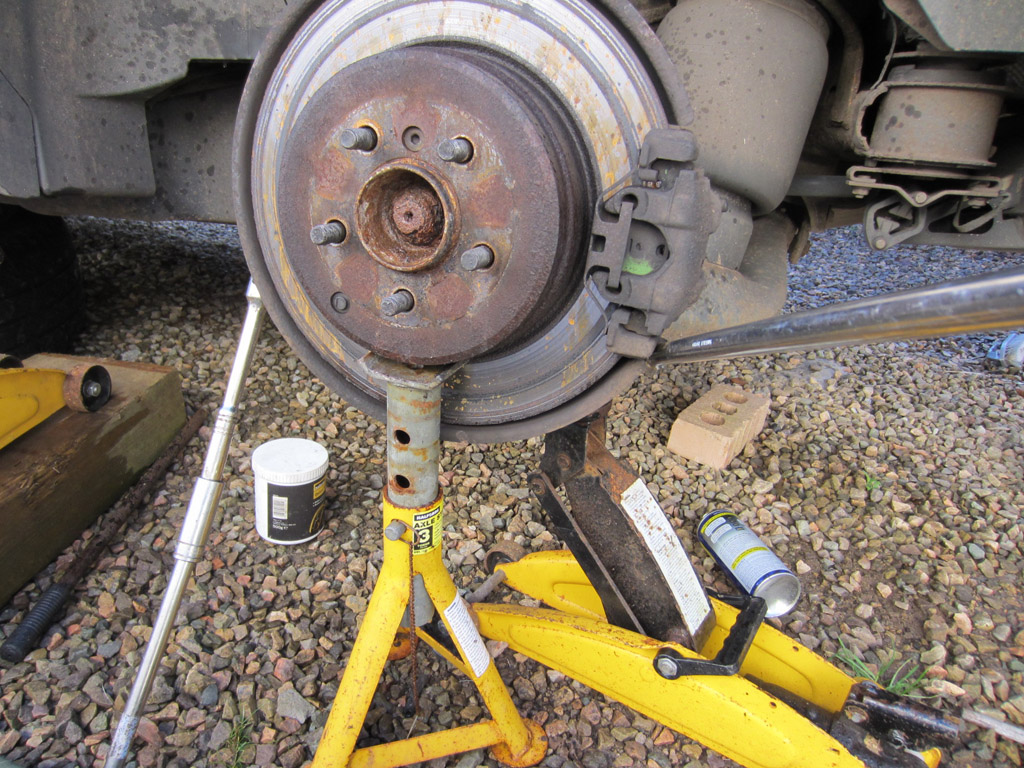
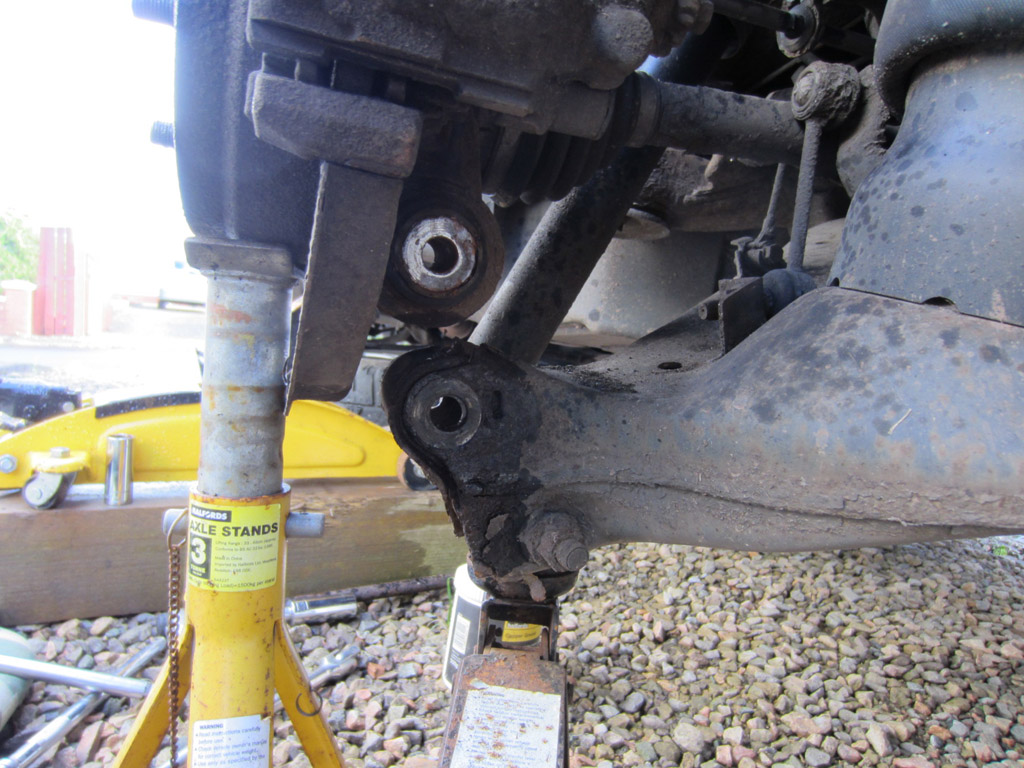
I worked like this: 1 trolley jack under the rear jack point to move the body, one jack under the lower arm, and the spare tyre under the chassis in case things went wrong. I also have out of shot something under the towbar to catch that if things drop.
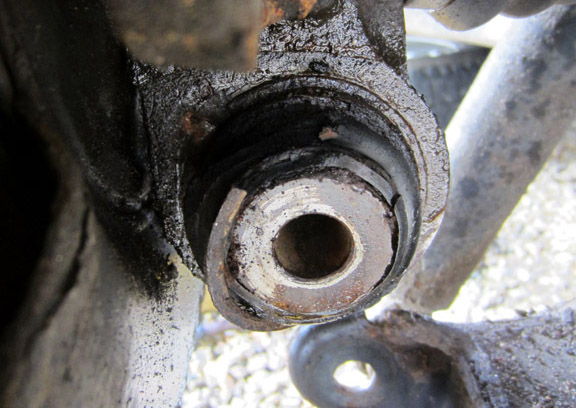
First and foremost, clean things up a bit:
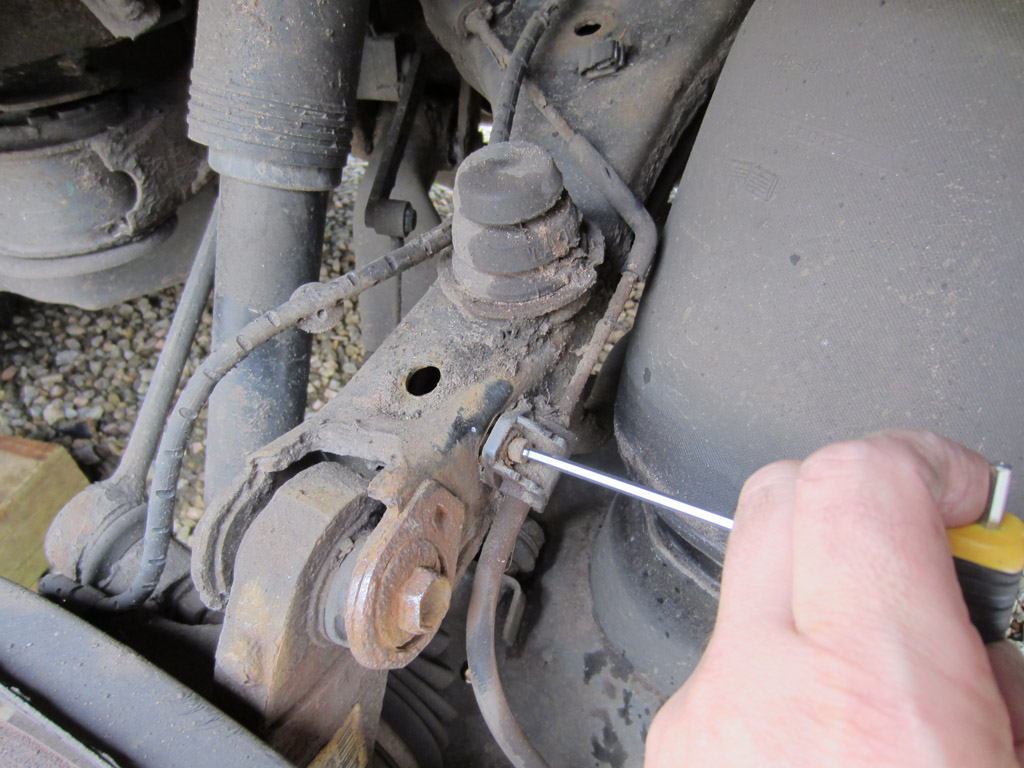
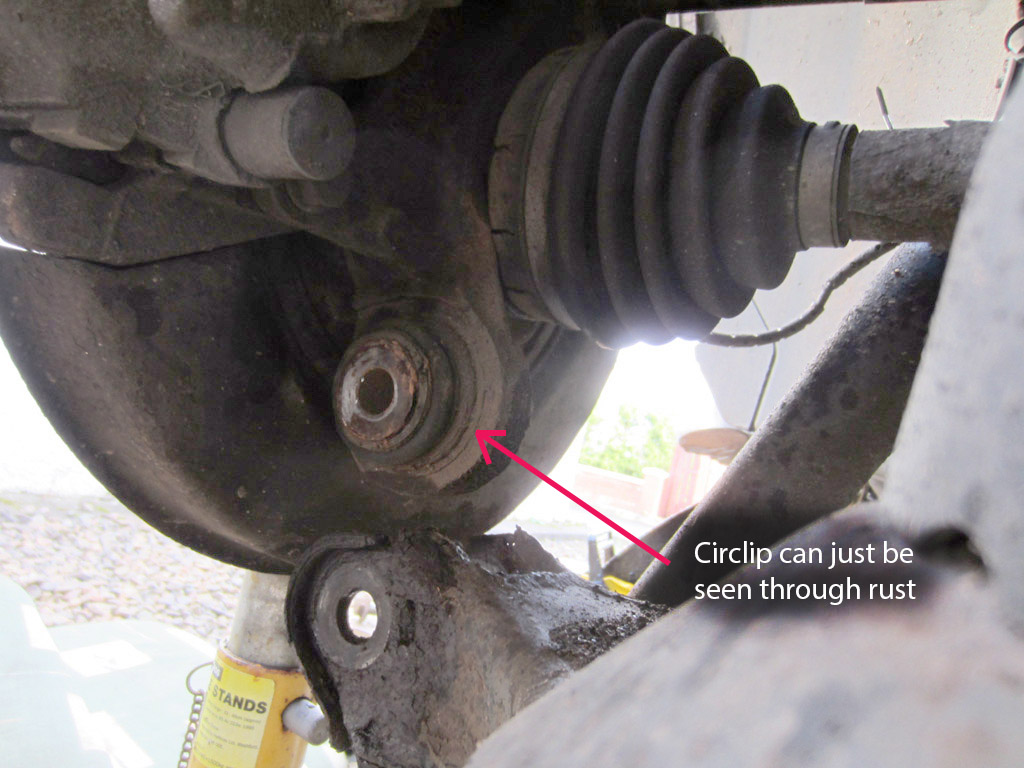
Remove the brake pipe ... again which is rusted ... that needs replaced too ...
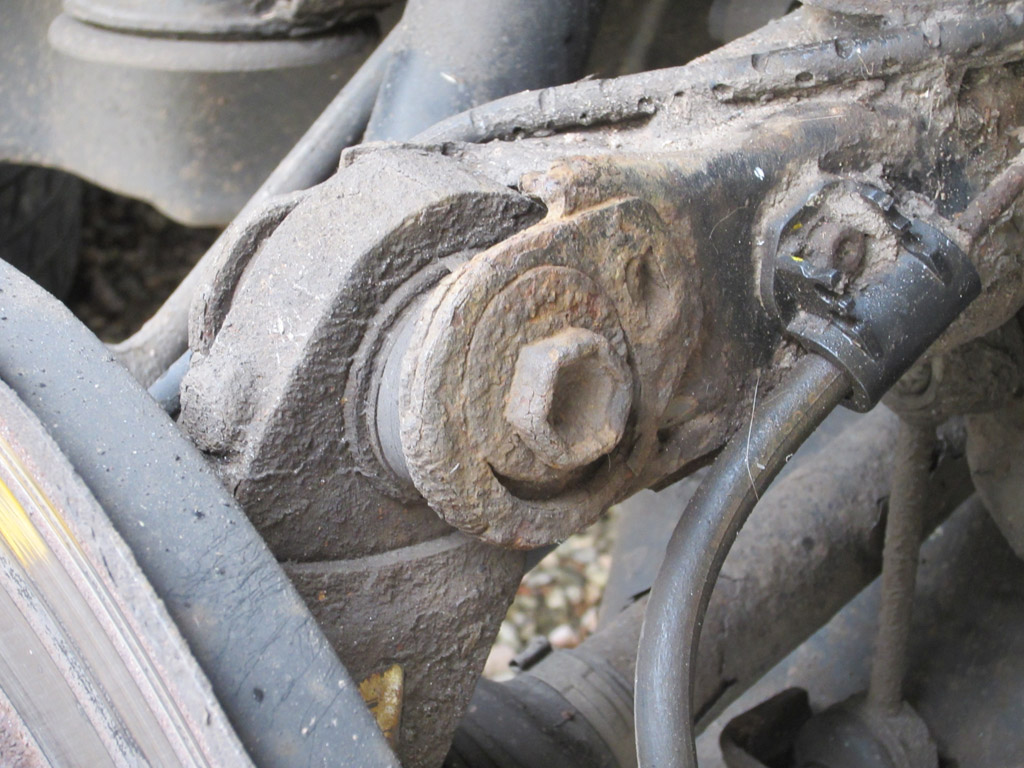
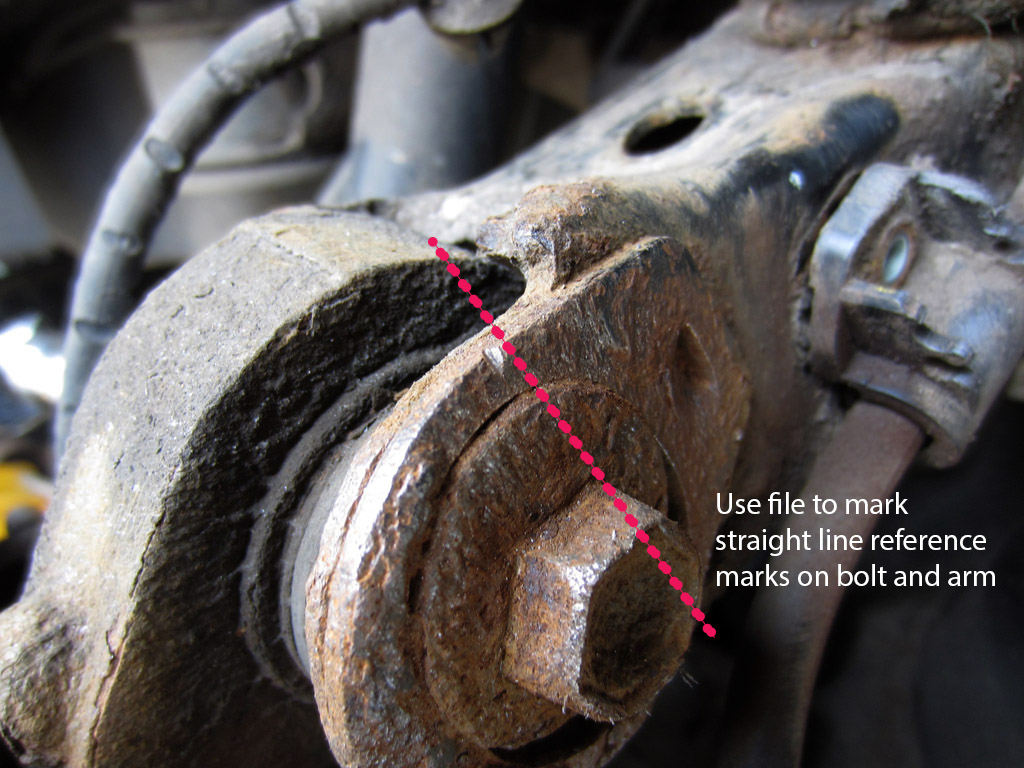
I then used a file to mark the line from the longest part of the eccentric bolt met the arm and which face on the bolt it came from. this was so I could then put the new bolt back in the same alignment:
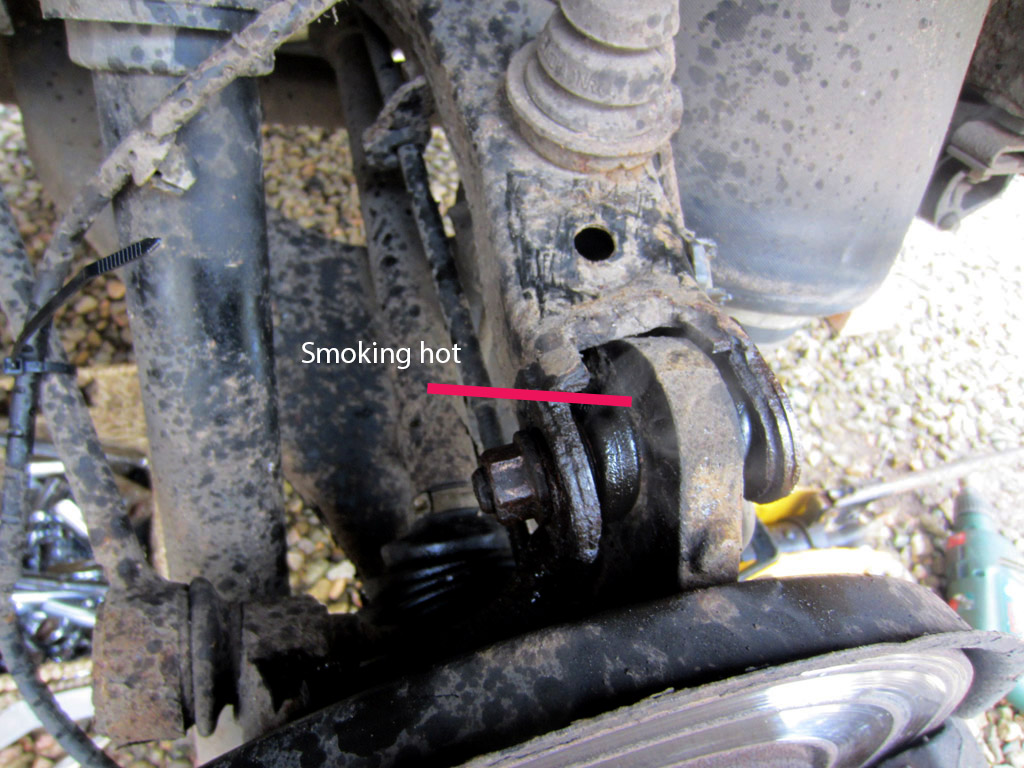
This sod wasn't for shifting ... so heat gun time to thermal shock the parts:
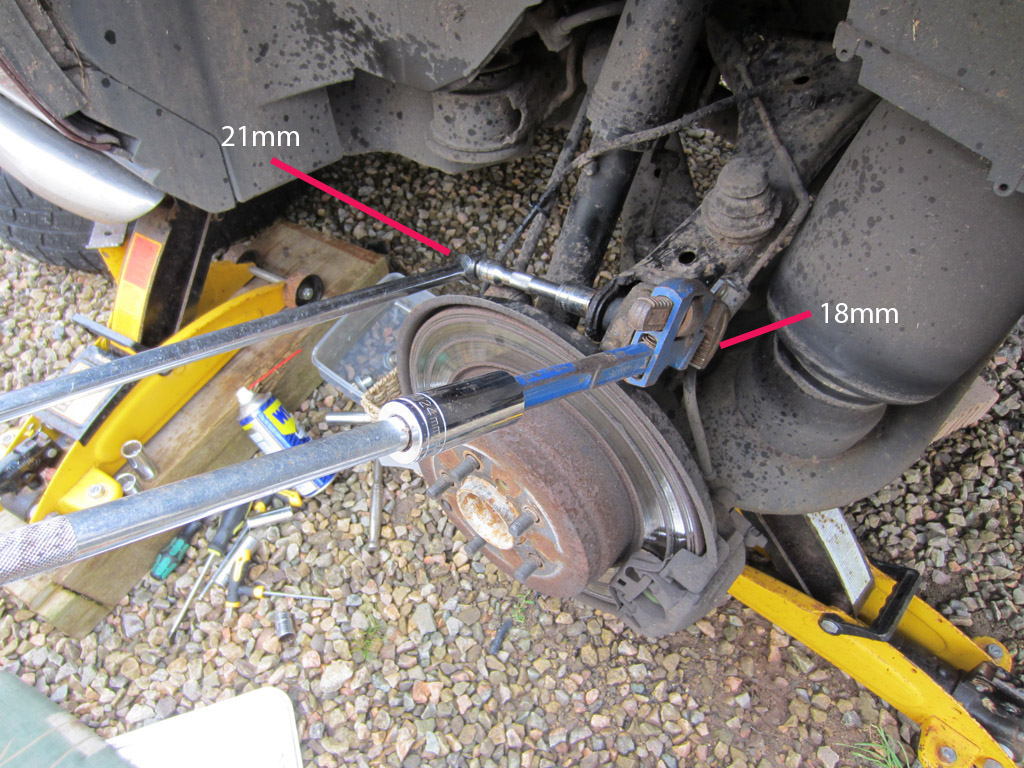
The nut is 21mm, and the bolt head 18mm. I rounded the bolt head off trying to loosen it. Finally got things moving by using a plumbers wrench. A common tool I've used :
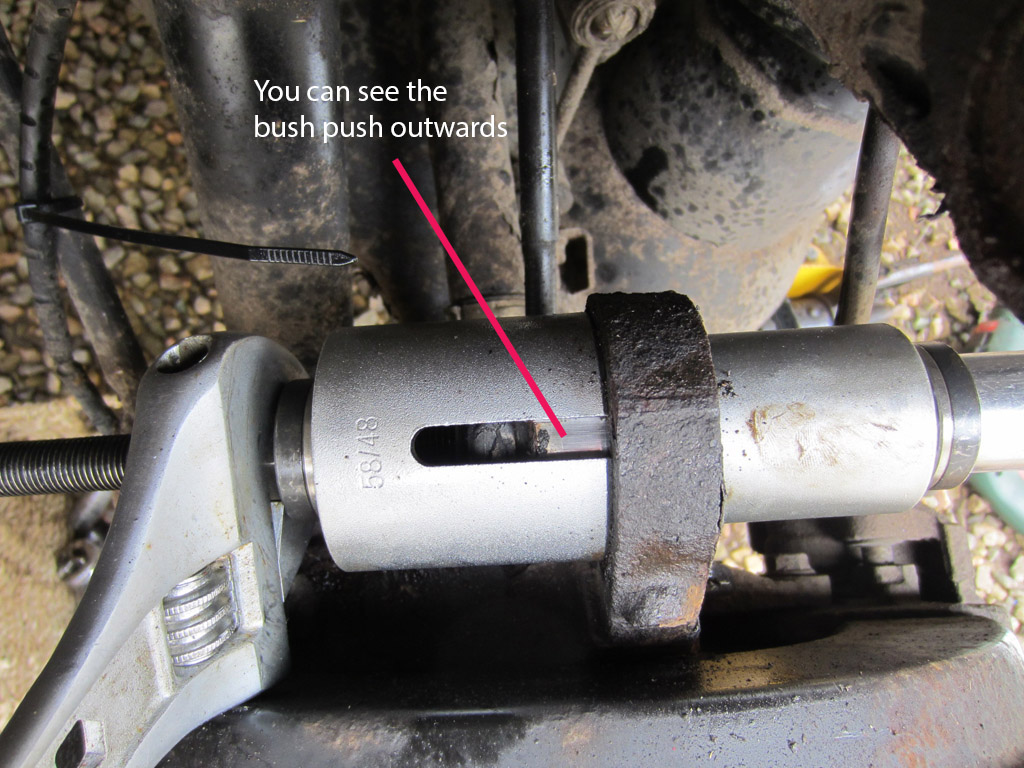
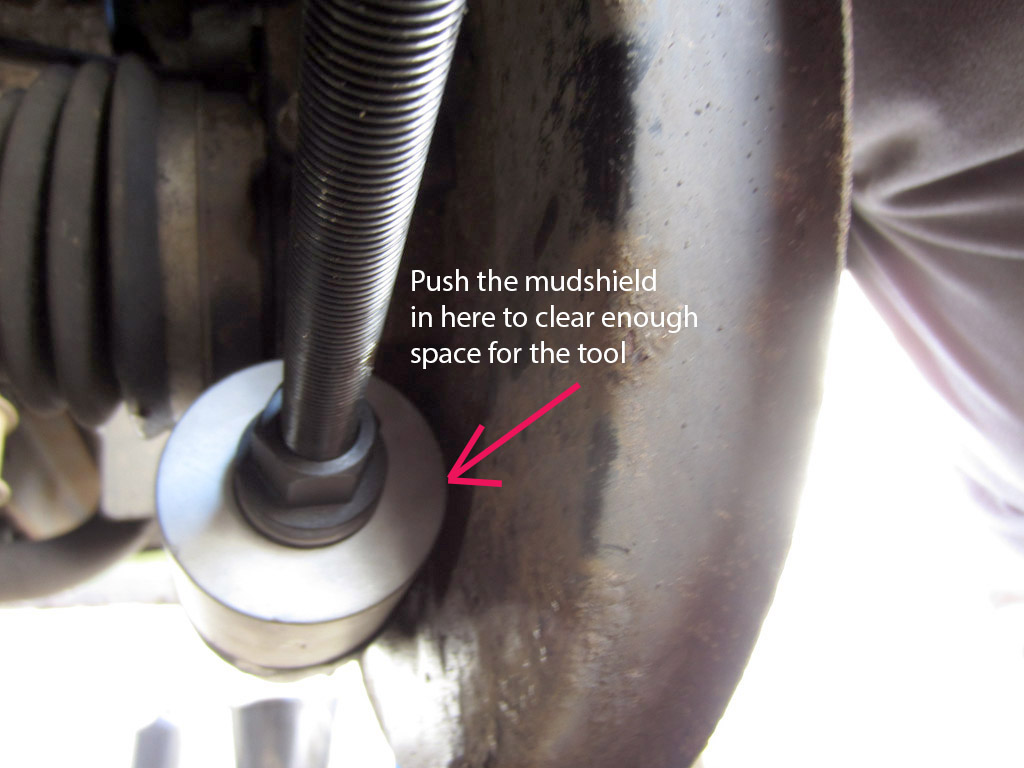
Once loosened off and bolt hammer out, you probably find the upper arm pops upward away from the hub. At this point, the brake pipe will be stretched wuite a lot, which is why you should undo the clip! Next stage is to setup the press ... at this point its destruction only removal. I can see no way of using a press without damaging the rubber seal AND getting the drift of the press through the hub hole:
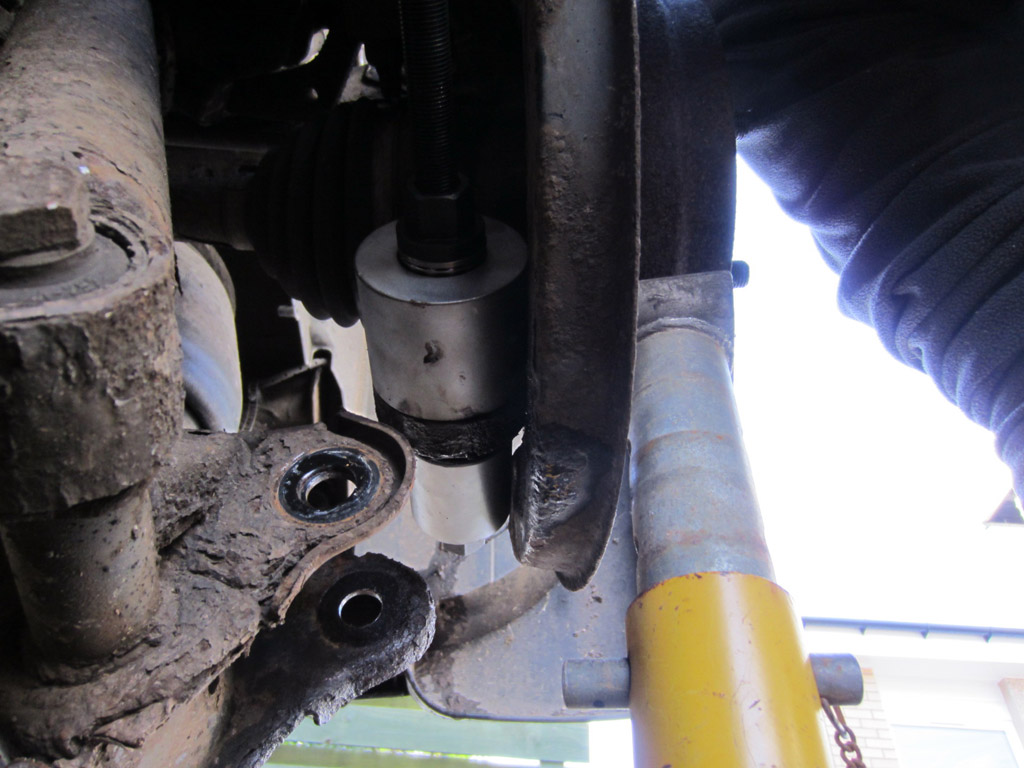
Then just a case of tightening up the nuts of the press. I will say that it took quite a lot of pressure to build up before it started shifting. I also use the heatgun to get the hub really hot so that it expanded a bit to loosen its grip. The bush came out in steps with loud TINK sounds each time it moved.
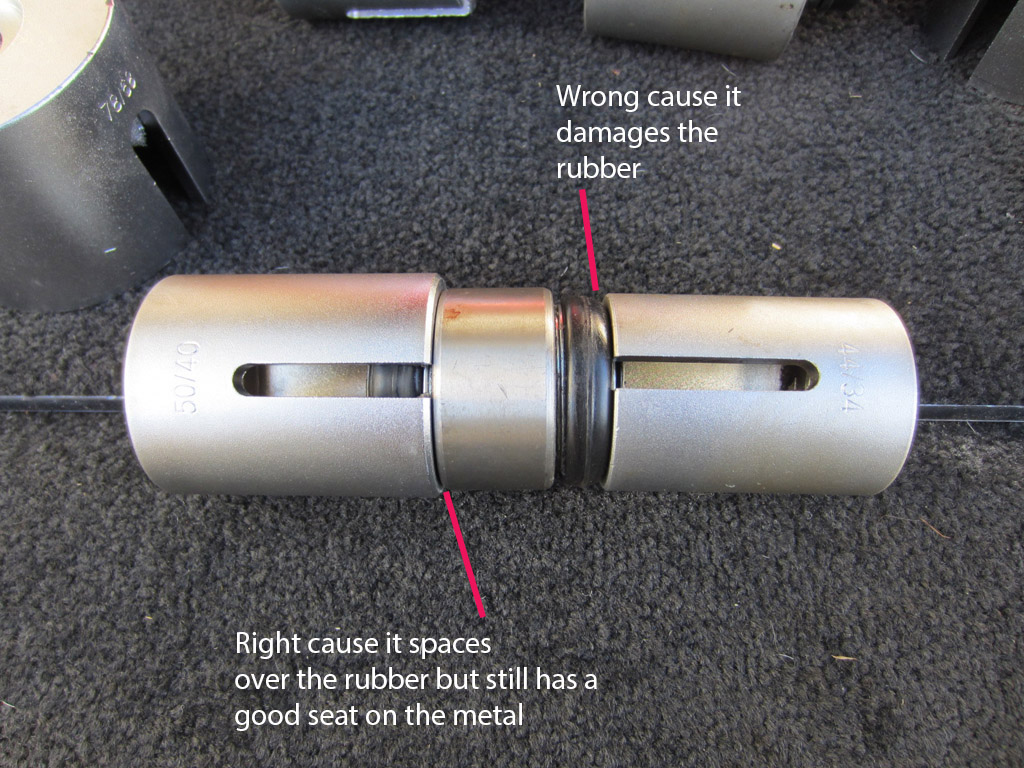
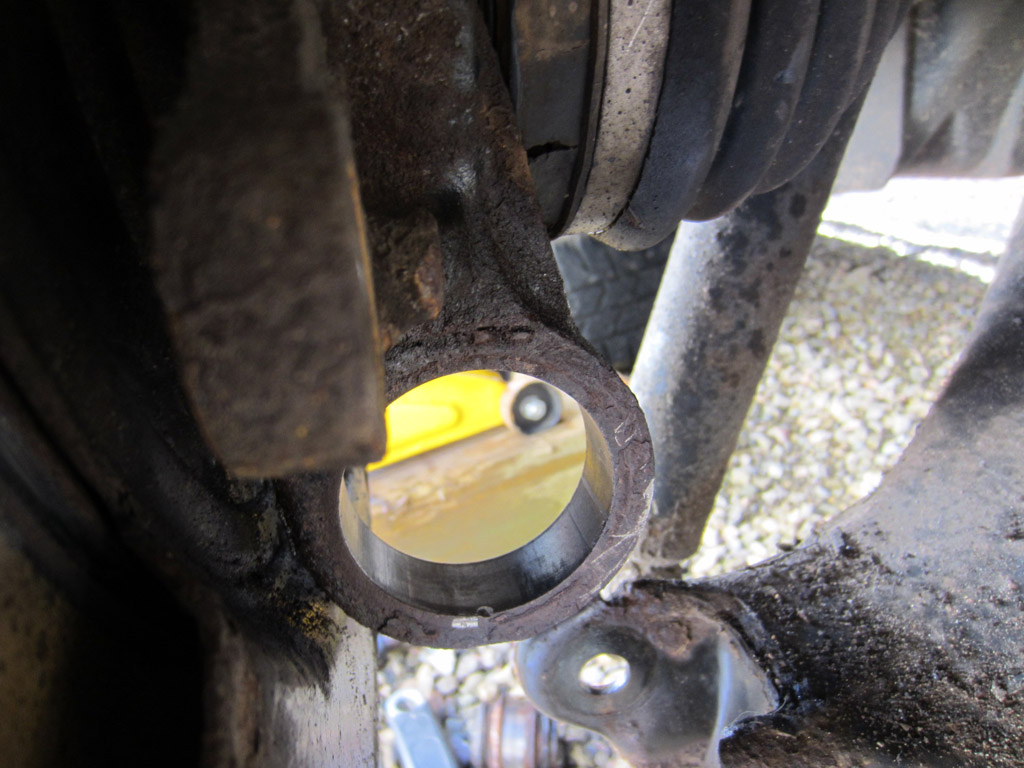
Sorry, didn't take a pic of the hub without the bush in it ... Anways ... pushing in the new bush. ** This bit is important ***. for the side that you'll push the new part in with, you need to get the correct size. The drift should be big enough to cover over the rubber without crushing, but small enough to press properly on the metal outer of the bush. If you use the same drift you pushed the bush out with, you'll damage the rubber ( ask me how I know ! ) See below: the one on the left is the correct size, the one on the right is what I used to push the bush out with.
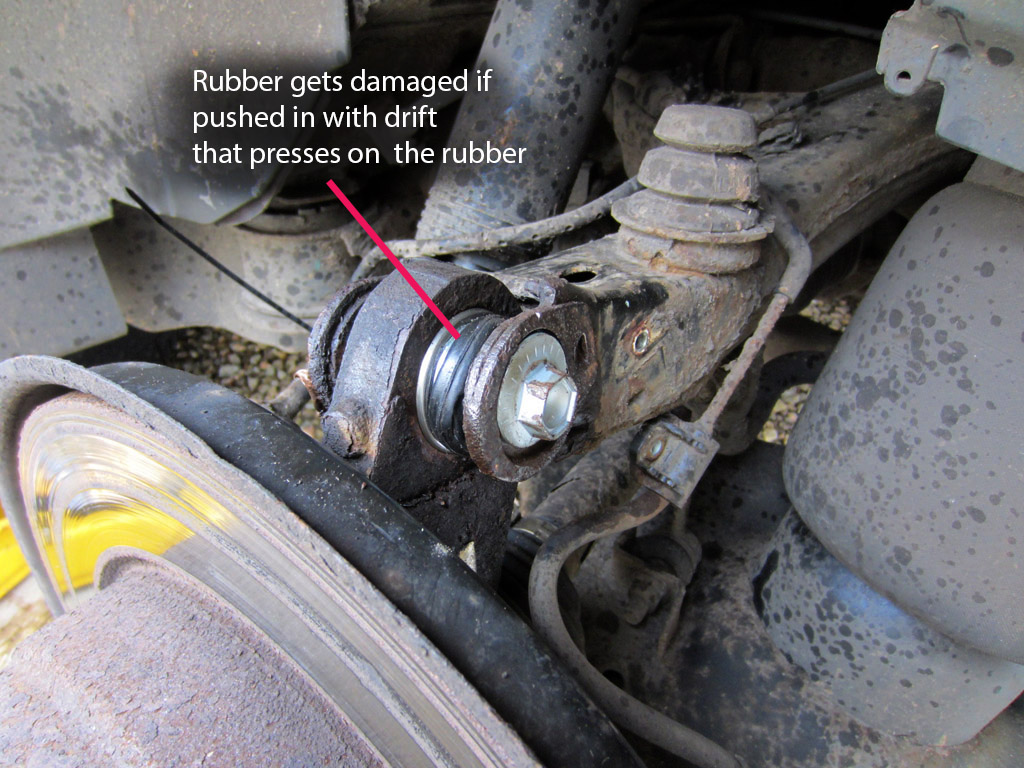
Then you can push the new bush back in to the correct depth. the RAVE manual mentions put the chamfered edge to the rear ... both sides of mine were chamfered the same amount ... go figure. If you crush the rubber, you get this:
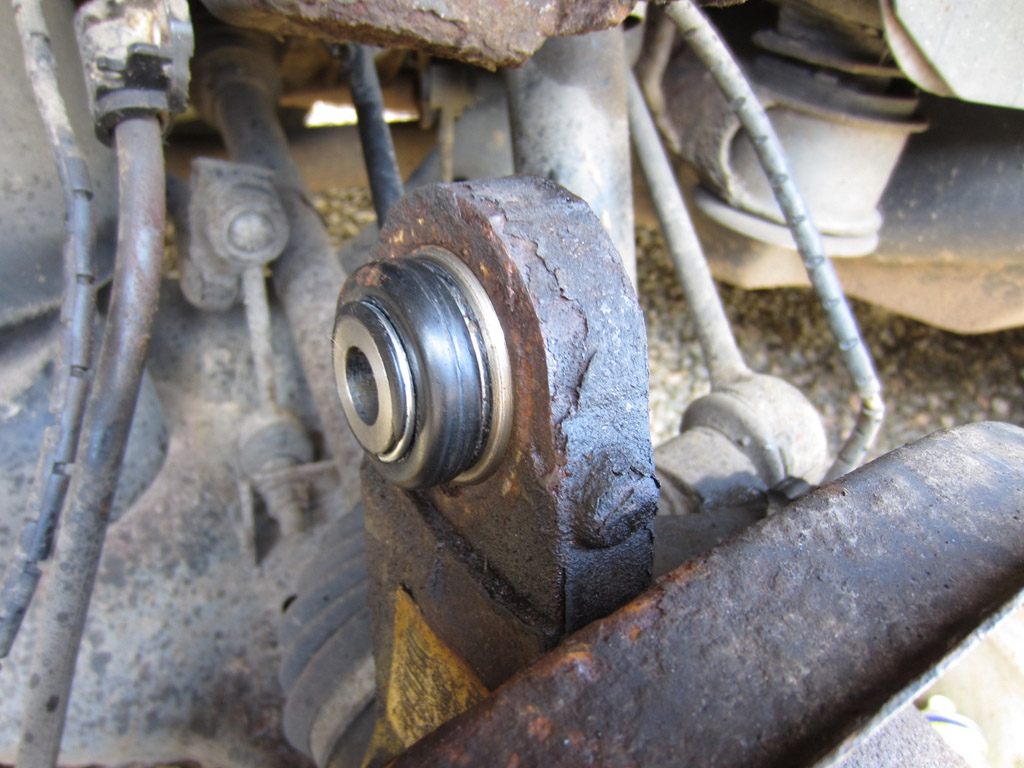
If you dont, you get this:
You can then use the lower arm jack to push the hub back up to meet the upper arm. You may find that you also need to drop the body downwards to meet it as well ( hence 2 jacks ). Put the new eccentric bolt in and washer, and realign with the mark on the arm. then holding the bolt head in the right alignment, tighten up the bolts as per manual. Jobs a goodun:
Last edited by fisha on 12th Sep 2012 9:56am. Edited 2 times in total |
||||||||||||||||||||||||||||
|


| Joe90 Member Since: 29 Apr 2010 Location: Hampshire Posts: 6419 
|
Great work fisha
|
||
|
| SteveMFr Site Sponsor Member Since: 22 Nov 2009 Location: Strasbourg, France Posts: 1641 |
Nice write up! |
||
|
| fisha Member Since: 25 Sep 2009 Location: Scotland Posts: 1457
|
Joe,
|
||
|
| nicedayforit Member Since: 11 Jun 2011 Location: Beside the Solway Posts: 3979 
|
Good write up. |
||
|
| fisha Member Since: 25 Sep 2009 Location: Scotland Posts: 1457
|
I've ordered the new flex pipes that run down the arms ... easier that way and about �18 a side which is fine. Be interesting to see what they are made of when they arrive.
|
||
|
| Joe90 Member Since: 29 Apr 2010 Location: Hampshire Posts: 6419
|
I am not going to try to take the hub off, do it in-situ just as you did. I can see the need for the jack under the lower wishbone to stop the airbag trying to fill. I guess battery disconnection would also help ?
|
||
|
| fisha Member Since: 25 Sep 2009 Location: Scotland Posts: 1457
|
i suppose it would help ... i never bothered. V8 or else ... |
||
|
| stan Site Moderator Member Since: 13 Jul 2010 Location: a moderate moderated moderator moderating moderately in moderation Posts: 35629 
|
took the liberty to wiki this excellent how to... ... - .- -.
|
||
|
| fisha Member Since: 25 Sep 2009 Location: Scotland Posts: 1457
|
The orientation between the eccentric oval of the bolt head and the 6 bolt faces are the same between the new and old bolts. So when I marked the old bolt head, it allowed me to place the new and old bolts side by side and make sure that I new which face should be facing the mark on the arm. For both sides, the reality was that I chose the longest part of the eccentric oval shape to mark where it met the arm. With that, it wouldn't really of mattered about marking the bolt head as long as I made sure the longest part of the new bolt also met the arm in the same place. Sounds more complicated than it really is. Mark the longest point of the oval in all cases, and match that with the longest point of the new bolt and you'll not go wrong. V8 or else ... |
||
|
| Joe90 Member Since: 29 Apr 2010 Location: Hampshire Posts: 6419
|
|
||
|
| Joe90 Member Since: 29 Apr 2010 Location: Hampshire Posts: 6419
|
Having failed to tighten up my rear airbag correctly, I had to have that side apart again.
|
||
|
| Dijit Member Since: 09 Jul 2012 Location: Glasgow Posts: 167  
|
The brake pipe running transversely across the car at the rear is an absolute doddle if done this way. My 2002 4.4 failed its MOT last year for this. I have access to a ramp. The problem is from below you can hardly see the pipe much less reach it with a spanner. The answer is to raise the suspension to off road height and go in from above. The pipe once you undo the joints is simply pushed into clips on the subframe. Use a proper brake pipe spanner and you'll have the old one off in ten minutes. Now I had to replace a number of the pipes and was not prepared to use steel. I bought copper. I then having cut, bent and fitted the first pipe had to to remove it again to allow another to be replaced. I was surprised to find how work hardened the copper had become. I consider that over time these could with vibration fracture. When I investigated I was shocked to discover the Americans have banned copper brake pipes. I had to hunt to find Kunifer and that's great. So my message is do NOT use copper under any circumstances. If you're used to working with small bore pipe this, from above, is a 30 minute doddle. Couple of other tricks. Remove the master cylinder cap cover the top with a plastic bag and screw the cap back on tight. That stops air getting in and so reduces the brake fluid from pouring out. Btw, Kunifer is roughly the same price as copper. I have a good source if anyone is stuck finding a supplier. Rehab is for quitters!!! RR 2007 3.6 TDV8 Java Black * RR 2007 3.6 TDV8 Zermatt silver * RR 2000 P38 4.6 Met red * Mercedes 300TE 4-Matic * Jaguar 420 (1969) * Nissan 300Z Citroen XM 2.5TD X 6 Bentley Continental R Hydrocon Highlander Hydrocon Hamilton Hydrocon Huntly Am told the ones with a * are to be offered for sale! 😳 Departed LR 1992 110 2.5TD RR 2000 Holland & Holland 4.6 LPG RR 4.2 Supercharged with LPG, Vogue SE 2007 Buckingham Blue RR 2002 4.4 V8 Zambesi Silver |
||
|
| DoubleRL322 Member Since: 05 Jul 2016 Location: Orlando, FL Posts: 25  
|
Wow, excellent write up!
|
||
|

|
|
| All times are GMT + 1 Hour |
< Previous Topic | Next Topic > |
Posting Rules
|
Site Copyright © 2006-2025 Futuranet Ltd & Martin Lewis
![]()
