| Ignition replacement - how to! | |
2008 TDV8
Having posted elsewhere about a series of random errors/problems, which I knew was probably CAN bus related, I initially thought it was somehow linked to the power steering pump replacement (e.g. I'd knocked/dislodged a wire) as the problem occurred at the same time. I'd also replaced the Sat Nav DVD drive, so had two potential fault inducing areas.
Anyway, as per my previous post, the other week, when we were away, the car refused to start (no lights on the dash, etc.) and I realised it was an ignition problem (low voltage on fuse 1 and 5 reinforced this).
There's not a huge amount (that I could find) on how to replace the ignition switch on a 2008 model, there are some really helpful bits including noting it's a Valeo/BMW unit. Mikey notes in a post that you can get away with minimal dash dismantling and had I done it before and knew how the connector fits/disconnects, etc., I'm sure I could do it with less taking apart, but this was my first time and so I thought I'd share my experiences.
This is a 2008 TDV8 VSE, UK RHD
Disconnect battery!
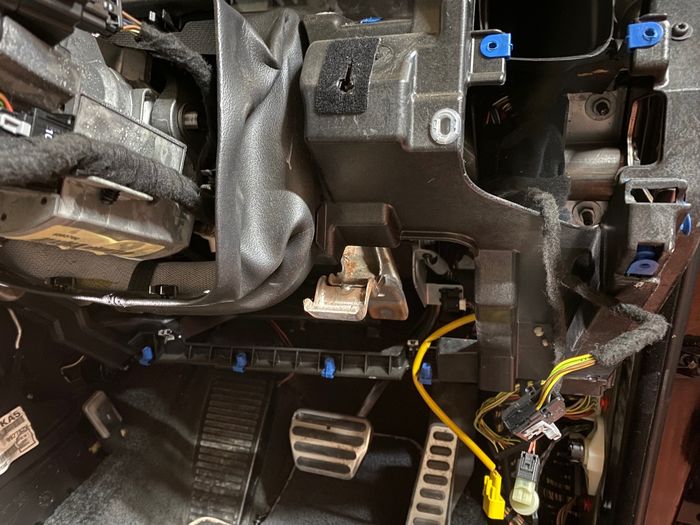
First off, remove the sill cover (just pull it upwards, it's quite firmly fixed - four clips securing), then focus on the lower drivers side kick panel (with the bonnet release). There's a separate piece that pulls away and then a Torx securing the bonnet release handle. The panel itself then slides towards you.
Then the centre console outer covers (both sides) - single Torx at the rear and then clips at the front, pull towards you.
Next the black pedal cover (i.e. the panel with the light, OBD port, etc). Secured with three Torx screws and various cables to disconnect (OBD, footwell light, transit rocker switch).
With a bit of a wiggle the panel will drop down.
I then removed both dash ends (covered on a Powerful UK video, particularly how to remove the actual vent bit). Fairly straight forward - both panel ends pull off, then a number of visible Torx screws, but you do need to remove the vent to reveal another screw. Cables on vents to unplug and light switch.
Next for me was the dash top. Centre speaker grill needs to be carefully pulled upwards to remove ( 2 x Torx underneath) and dash top centre air vents (2 x Torx screws underneath). There are three metal clips at the front and hooks at the back, so best to gently lever at the front first. A little bit delicate, so go steady.
You've then got Torx along the top (4 bigger Torx), then one either end (plus the 2 under the speaker and 2 under the top air vent).
Remove the black panel above the top cubby box (with Range Rover badge on it). Torx to the left hand side (revealed when you took the nearside air vent out, then pull (3 x horrid metal clip things). This will reveal three more Torx. With all that done, the top of the dash should now be loose.
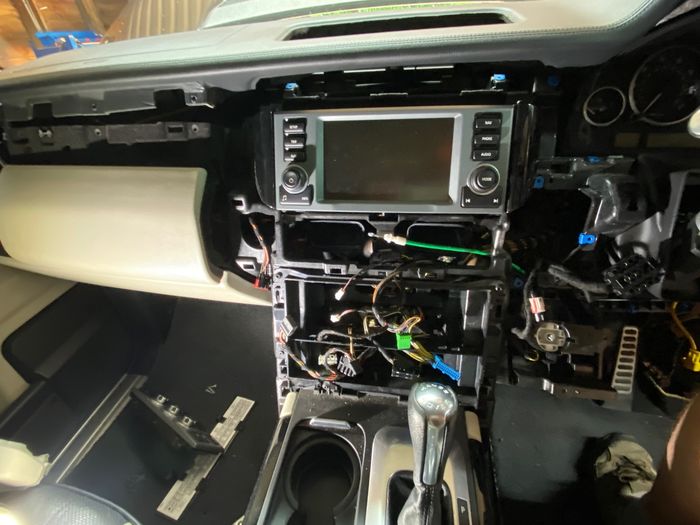
I lifted it upwards (I didn't remove to save messing about with passenger side airbag) to give me access to 2 x Torx screws securing the black trim just below the dials (one is high on the left, the other obvious on the right. This then pulls upwards and outwards.
This then reveals the top two screws holding the big panel (with lower drivers air bag in it) that's below the steering wheel. There's another visible Torx on the right (where you took the vent out) and about five at the bottom (you will have revealed these when you removed the pedal cover panel earlier.
This whole panel will then lift out, but you'll need to disconnect the airbag and courtesy light.
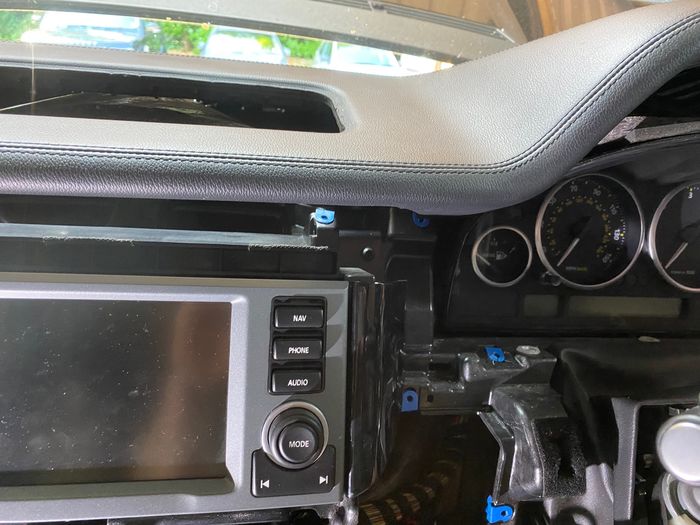
I then removed the centre air vents (Powerful UK video on this again, but exactly the same principle as the two either side). Numerous connectors and the vent control arm (pulls out - very obvious).
I then removed the panel that the centre vents sit in (i.e. the panel with the ignition switch, cubby release, etc.). Four clips top and bottom either side. Bit of a fluff and I used plastic levers. Note it goes under the cubby inner facia so you need to prise it out.
You can now, finally, get access to the ignition switch. Three Torx screws secure the panel to the dashboard and two secure the switch to the panel itself, I undid all of them.
The switch then comes out fairly easily and you can undo the two grub screws (small flat blade) that secures the electronic switch (the problem) to the front end of the ignition (i.e. the bit you put the key in).
The connector is fairly obvious (pull out end tab and connector splits).
As per other posts, mine was a BMW Valeo unit and I replaced with a BMW rather than Land Rover as it was cheaper.
I did take out the centre controls to clean them, but didn't need to. I took the steering shroud off, but didn't need to.
Not actually a bad job all in all.
As always, really careful with the trim so you don't break tabs off, etc.
Refit is the reverse.
All errors, issues now cleared 
|