garyRR
Member Since: 13 Mar 2021
Location: Hampshire
Posts: 1480


|
| How To: L322 Full LED Interior/Exterior Upgrade - Full Guide | |
So, after searching the forum, I actually found very little on the topic and there are some absolutely nonsense videos out there on how to change the bulbs (*cough* Powerful UK *cough*).
So, I'm writing you a guide on how to upgrade all of the following lights to LED and will add each one to this as the parts arrive, explain how to do it and the part and why I chose it.
**A WORD OF WARNING** where possible, buy LEDs from brands you've heard of. My previous experience is that custom designed retrofit units are generally pretty decent but I cannot stress enough how much to avoid unknown brand LED bulbs - the price might be tempting but all they ever do is start playing up after a while. Good LEDs will last the life of the car so, invest where possible.
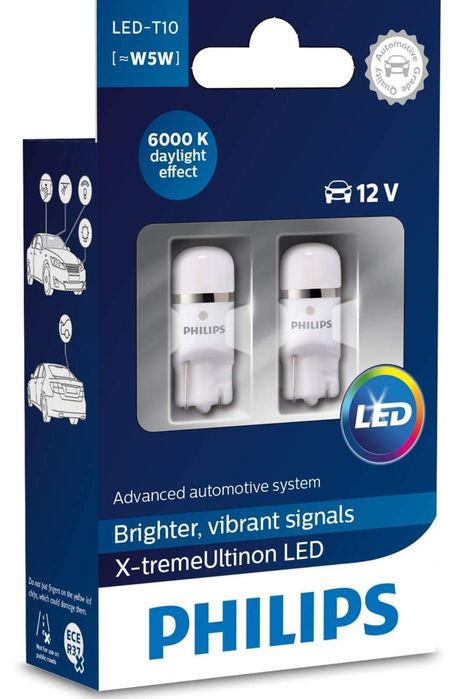
For my W5W T10 bulbs (for which 11 are required in my chosen set up), I chose the Philips ones. A well known brand and I previously fitted these bulbs on my Mercedes - after 4 years they had never given me a problem. The bulbs also dim. They are not Canbus compatible so, are for interior use.
 | | Click image to enlarge |
1. Convenience lights (front of vehicle, lower dash)
2. Cabin lights and reading lights (in the roof)
3. Footwell Lights
4. Boot Lights
5. Door Puddle Lights
6. Glove box Light
7. Mirror Puddle Lights (Canbus)
8. Numberplate Lights (Canbus)
9. Reversing Lights (Canbus) (tbc if I will do this or not)
10. LED Comfort Lighting Retrofit (like the new RRs have). I've just done this install as well and a full write up. See my article here, if you fancy doing this too: https://www.fullfatrr.com/forum/post624201.html#624201
Difficulty: Easy
Tools required:
- plastic trim removal set
- flat blade screwdriver and clean tea towel
- microfibre cloth and interior detailer (for wiping your fingerprints off once you're done with each lamp, if you keep your car as pristine as I do)
- Insulation tape
1. Convenience Lights (2x W5W/T10) (5 minutes)
These will take you less than a minute to change each. It made me laugh when some videos suggest taking off side trim etc to get to them.
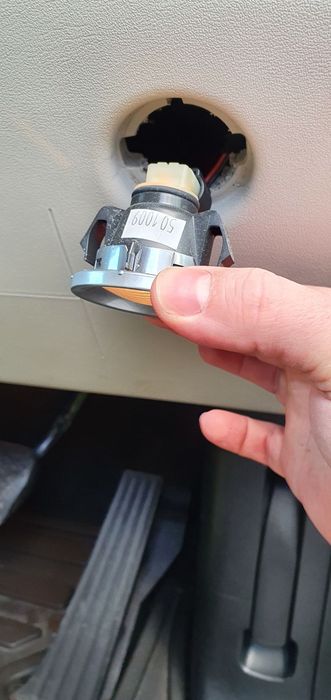
There is a light in each side of the dash. They're kept in place by a horizontal clip on the left and right side. Grab one of the plastic trim removal tools and simply lever it where the clip will be. The light will pull right out. Remove the multiplug, twist the bulb holder anti-clockwise and swap the bulb over. Plug back into the multiplug to confirm it is the correct way around (Philips logo facing down) then secure the bulb holder again and push the light back into place.
 | | Click image to enlarge |
Repeat on the other side and you are done.
I chose the Philips LEDs for steps 1 and 2 because they're ultra reliable, not too bright and these are the units where there aren't LED retrofits.
WRC 681681 Philips X-Treme Ultinon Ledx2 W5W 12V https://www.amazon.co.uk/dp/B0759MBSQB/ref...&psc=1
2. Cabin lights and reading lights (6x W5W/T10) (5 minutes)
These take no longer than 2 minutes each for the front and rear light clusters.
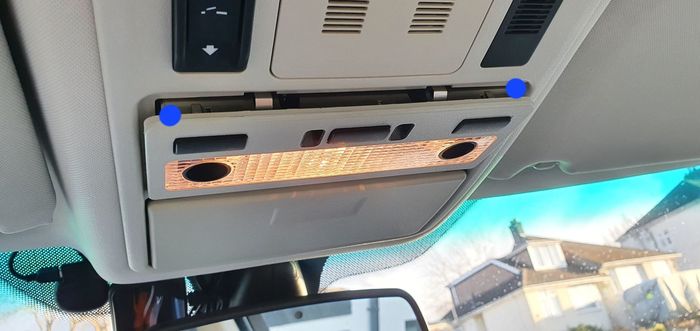
Once again, grab your plastic trim tool and this time, begin levering in the locations marked in blue, working your way inwards. It will reveal the two metal clips holding each unit in - now simply just lift it out.
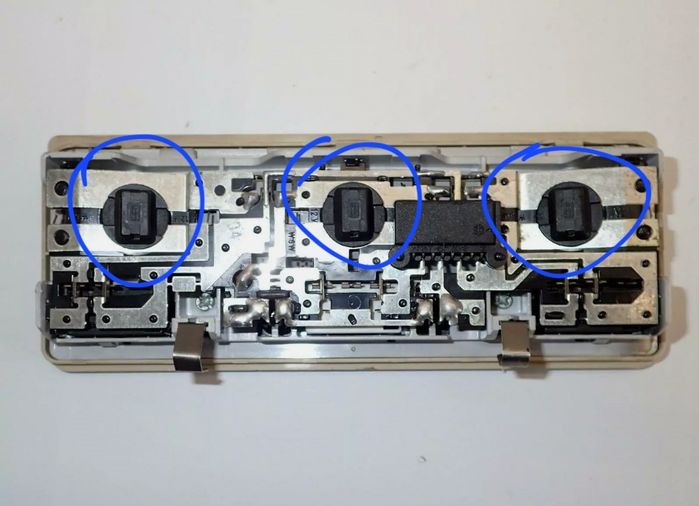
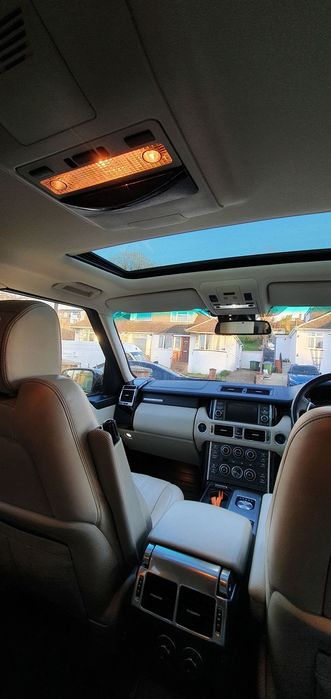
There's 3 bulbs in each unit. Just twist each bulb holder, pop in the new LED bulb, switch the light on and check the bulb is the correct way around, move onto the next one. Once you're done with the unit, push the forward end into its holder then push it back into place on its clips.
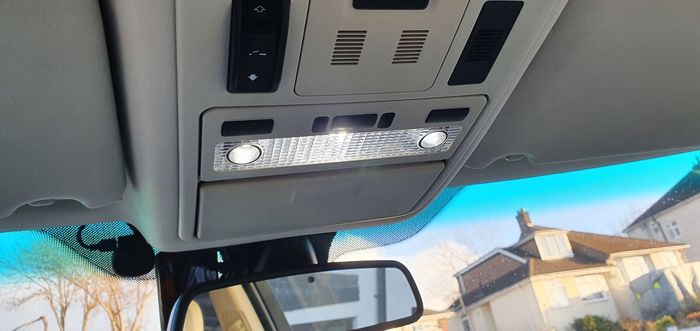
Massive improvement!
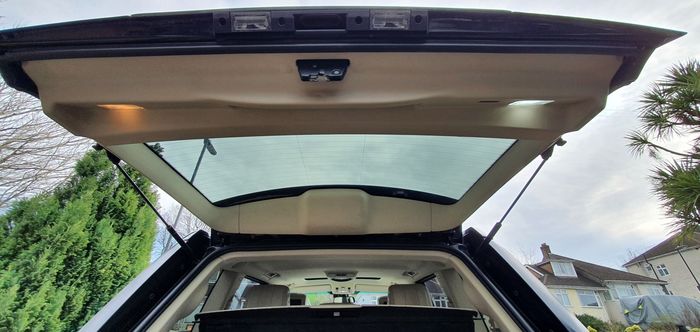
Now move onto the rear. It's exactly the same as the front - this photo really shows the difference in the light.
 | | Click image to enlarge |
3 and 4. Footwell Lights and Boot Lights (5x retrofit light units OR 3x 28mm festoon, 2x W5W/T10) (10 minutes)
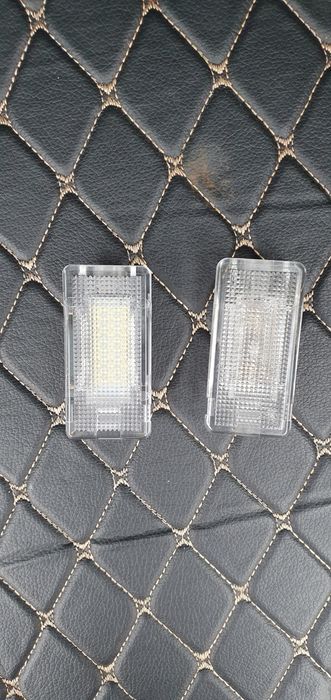
These steps are easy - they're all the same light unit, if you've bought the retrofits. If you've bought bulbs, the boot light and the two footwell lights are a 28mm festoon and the two tailgate lights are W5W/T10. I chose the LED retrofit units because, i wanted the boot lights to be as bright as possible.
If you want to save yourself a tad of cash, you can use one of the tailgate light units and utilise the spare Philips LED bulb you have and move this unit to the boot light, meaning you only need to order 4x retrofit units [two for tailgate, two for footwells]
All these lights remove and install the same way and all are direct retrofits.
 | | Click image to enlarge |
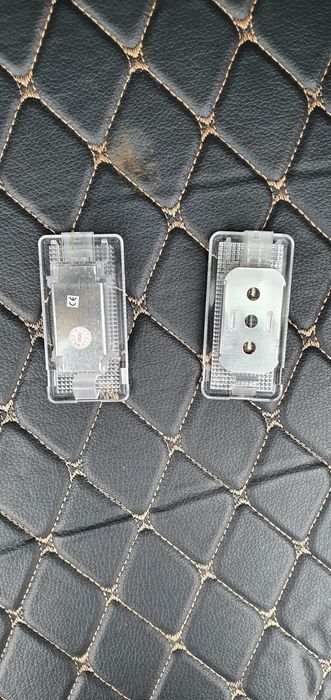 | | Click image to enlarge |
Firstly, i find the multiplug fits better by slightly bending the pins in the retrofit units to better align with the plug. This takes about 10 seconds per plug. Just follow the below photo - put your screwdriver 3/4 the way along the pin and bend towards the shorter side of the socket.
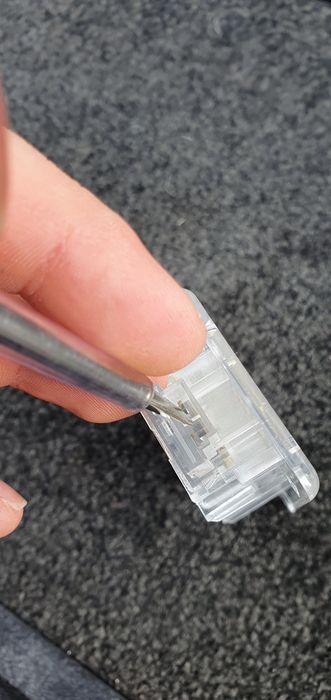 | | Click image to enlarge |
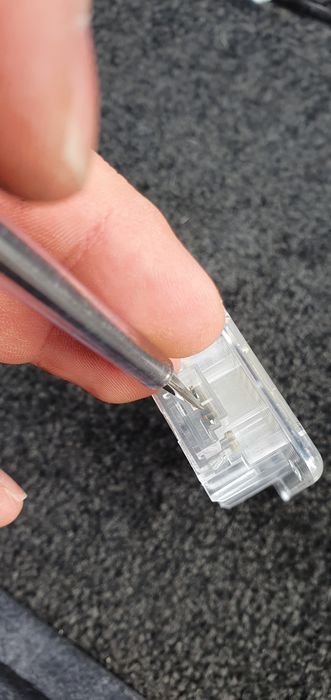 | | Click image to enlarge |
With that out the way, let's move on to fitting.
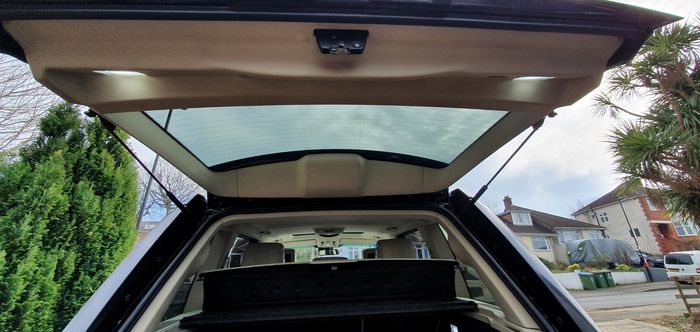
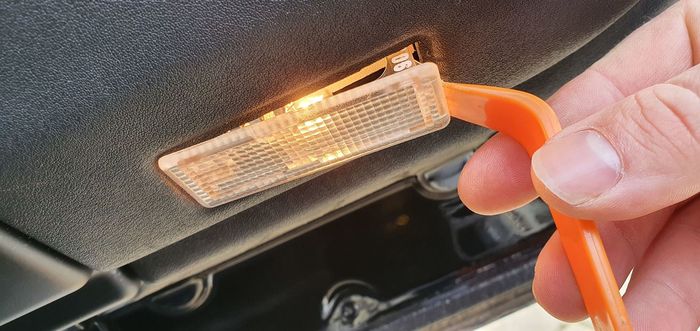
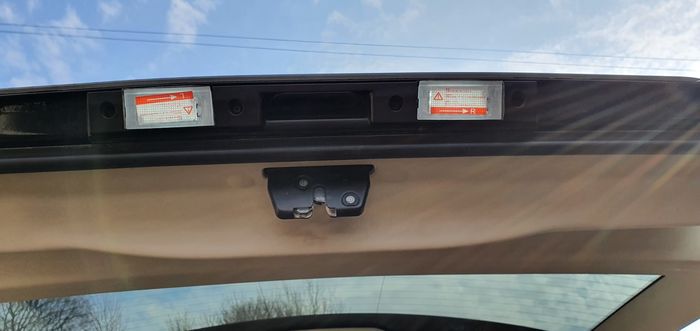
I'll start with the tailgate. All lights have a notch in either side to put a screwdriver in. So, do just this and the lamp pops out.
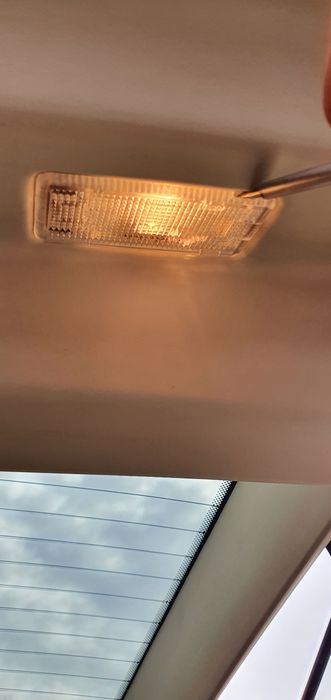 | | Click image to enlarge |
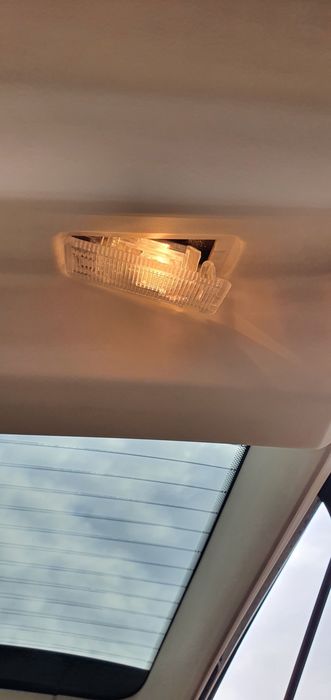 | | Click image to enlarge |
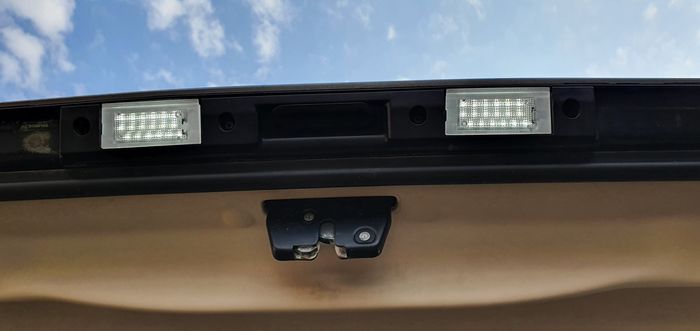
Now just unplug and plug in the new lamp (with your freshly bent pins):
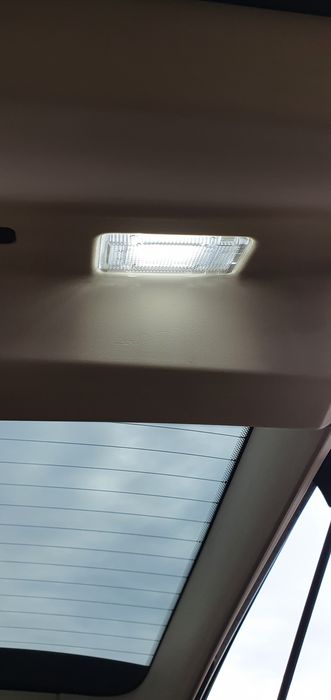 | | Click image to enlarge |
Looking better already:
Repeat for the other side:
Now for the boot light. Exactly the same - screwdriver in the notch and pop it out.
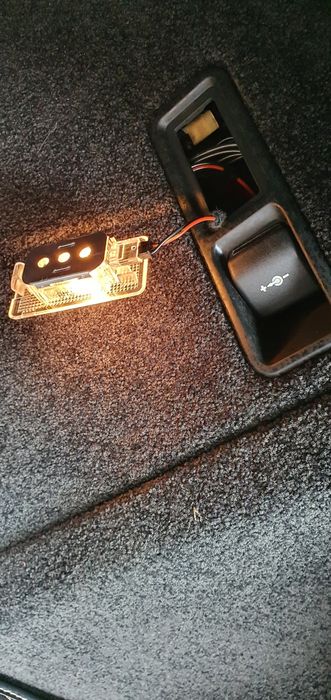 | | Click image to enlarge |
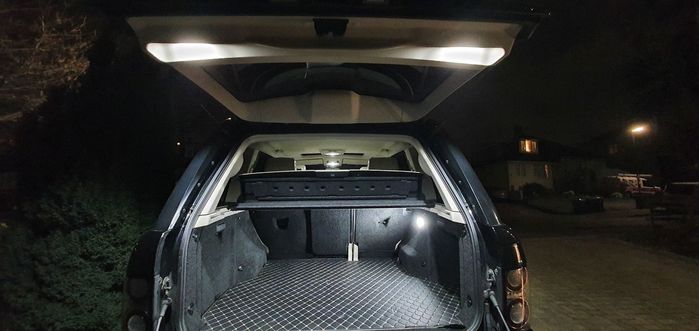
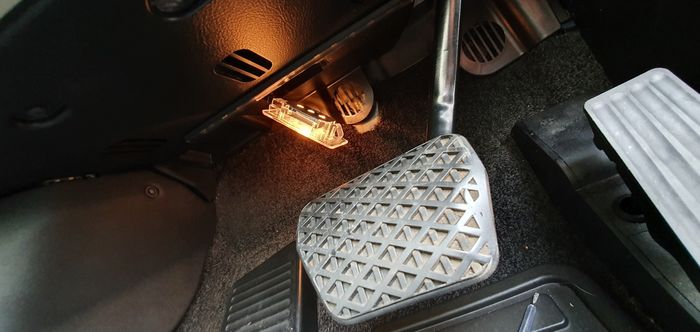
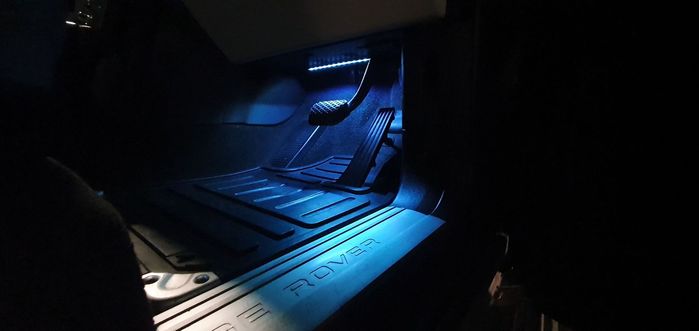
Now time to move on to the footwell lights. Screwdriver in the notch and pop it out, unplug and plug in the new unit:
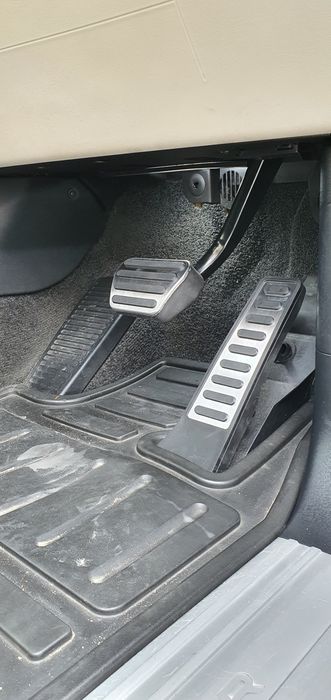 | | Click image to enlarge |
You'll notice my pedals have magically changed from rubber to aluminium. These were also fresh in my delivery so, i fitted these at the same time (5 minute job)
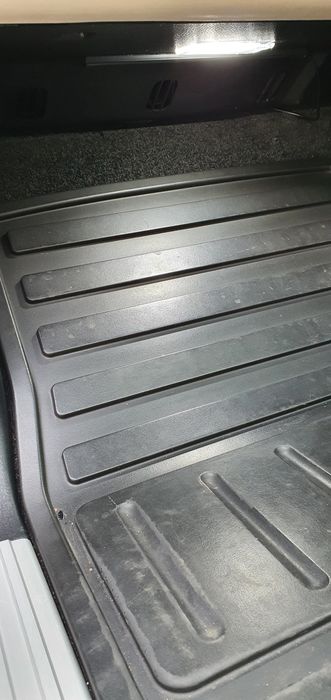 | | Click image to enlarge |
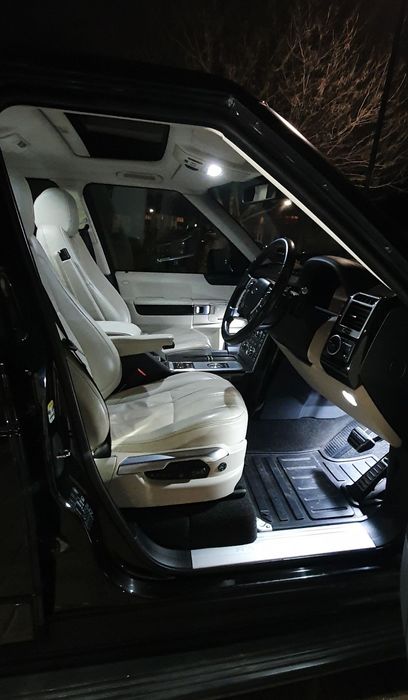 | | Click image to enlarge |
Done!
5. Door Puddle Lights (2x W5W/T10 for Rear Doors and 2x Retrofit 'Range Rover' logo projection lamps for Front Doors) (3 minutes)
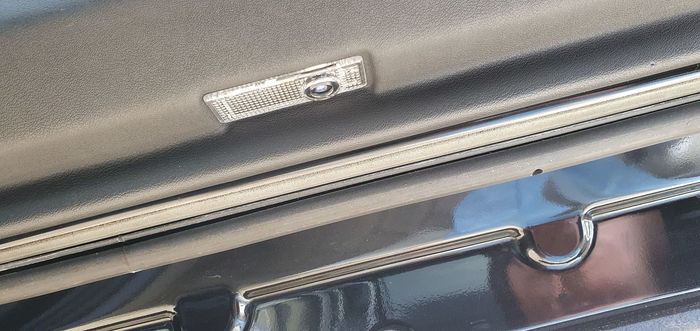
For this bit, I chose a retrofit part for the front doors, an LED projection lamp of the Range Rover logo, which gets projected onto the floor. This wouldn't be possible for the rear doors because on the L322, the position of the lamp and how wide the doors open mean the logo would get projected onto the car body.
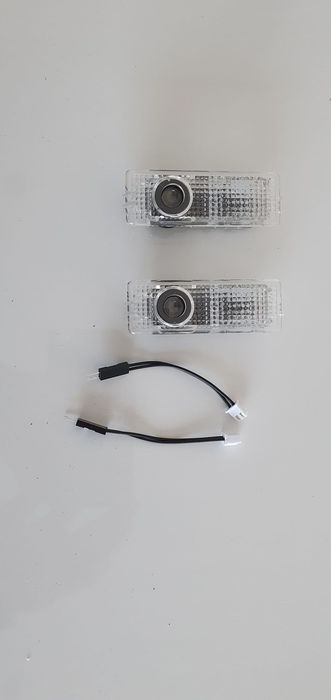 | | Click image to enlarge |
(The two wires aren't actually needed. They come in the box, as these lights are designed for several vehicles. The light units themselves are just plug and play - no 'filing down' of plugs here!)
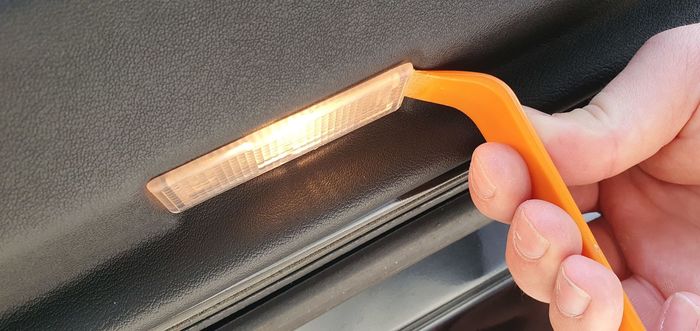
First, the rear doors (however, all lamps are exactly the same and are removed in exactly the same way). Use a plastic trim tool on the edge facing away from the car. You don't need to use any force here - the light will pop straight out. Now, just swap the bulb with one of the Philips LEDs. Correct fitment is the Philips logo facing the lens.
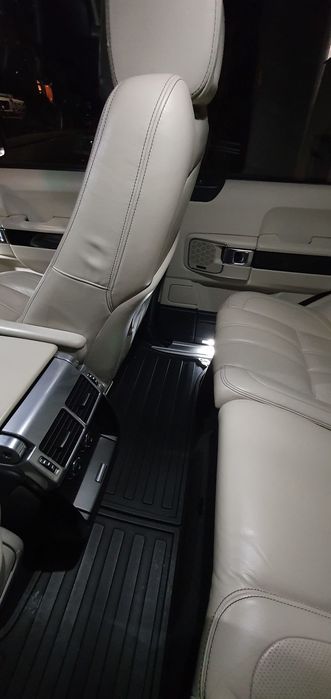 | | Click image to enlarge |
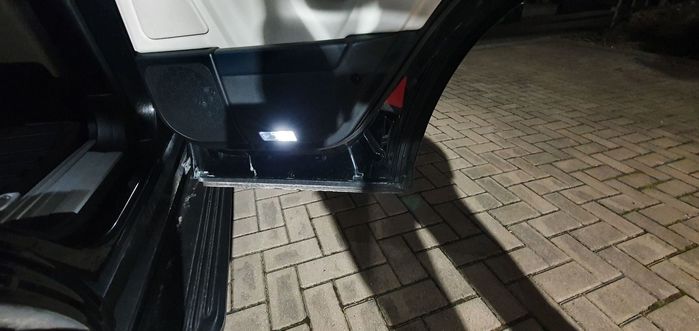
Looks great!
Now, the front doors.
The lamps are the same and remove in the same way.
You can see side by side that the retrofit unit is pretty much identical and well designed.
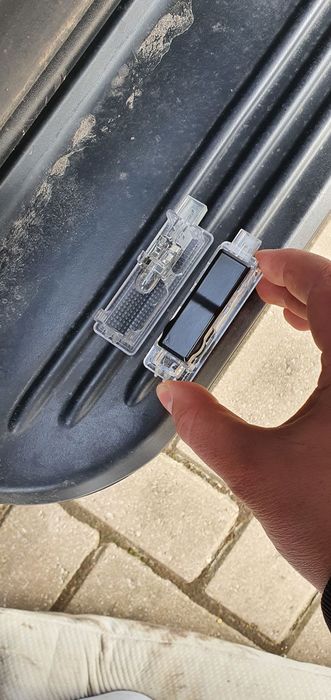 | | Click image to enlarge |
Simply just unplug the old light and plug in the new one. The lights are set up directionally (for left and right) so, check the light against your hand that you have connected the correct lamp for the correct side.
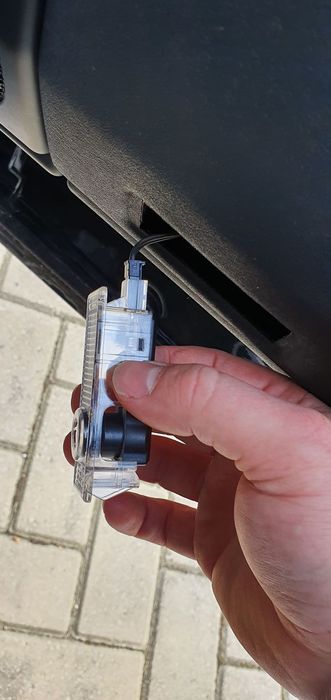 | | Click image to enlarge |
Now just pop back in. Ta da!
WOW
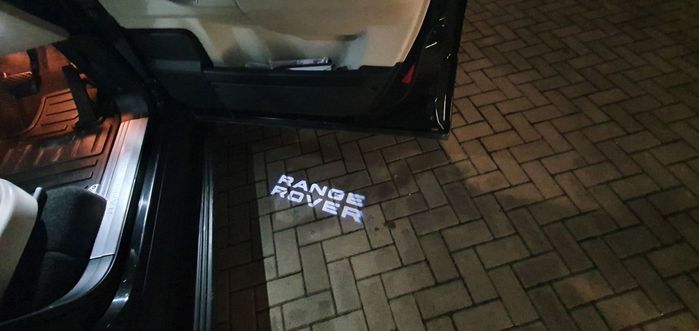
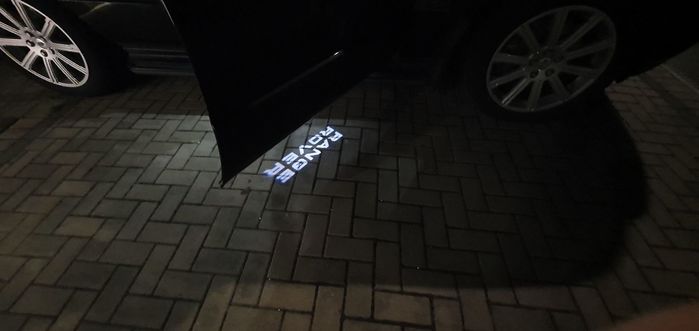
(The lenses rotate, if you want the logo in a slightly different orientation)
They look fantastic!
6. Glove Box Light (1x W5W/T10 [2010-2012] or 28mm Festoon [2006-2010]) (15 minutes)
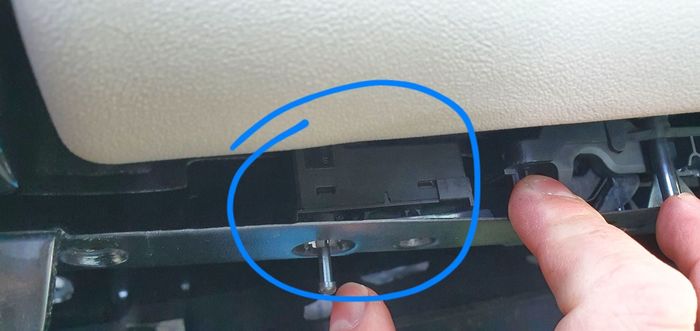
This one is a bit fiddly. You need your T20 Screwdriver and a plastic trim remover (do not use a Screwdriver. The plastic in this area is thin).
The bulb varies on vehicles. 2011 onward vehicles have a W5W (such as mine so, another Philips bulb). 2006-2010 vehicles either have a 28mm festoon bulb or the W5W like the newer cars so, check this before you replace this bulb.
Firstly, remove the 4 screws in the roof of the glove box.
Next, remove the 4 screws behind the glove box, around the fuse box.
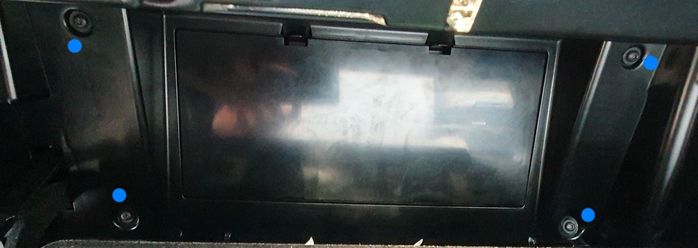
Now, use the plastic trim tool to gently pry both of these locations and the glove box unit will unclip. Do this gently - let the plastic of the trim tools bend and not the glove box!
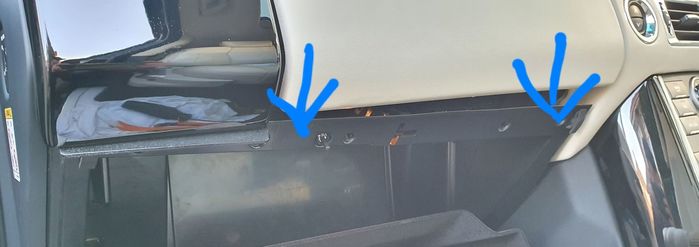
Gently drop it down by about 5cm and this will give plenty of space to disconnect the glove box unit light.
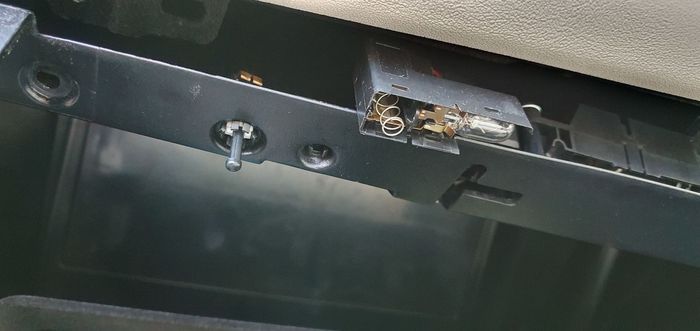
Now for the fiddly bit! Gently unclip the unit. It has 2 small clips on each side. Be careful because there's a metal contact plate, spring and bit of white plastic which could all go walkabout. You now have free access to the bulb. Replace it with the LED bulb and check operation. If you're using the Philips bulbs, it's logo facing down. Then you will need to fiddle around getting the on/off switch to connect back inside its grooves inside the unit. Be patient and keep trying.
Now time to put it back together in reverse order. To re-clip the glove box, use some gentle persuasion. Hold the glove box in place as you return the top 2 screws by the fuse box then, just screw everything else back together and check the alignment of the glove box when closed. Adjust if necessary.
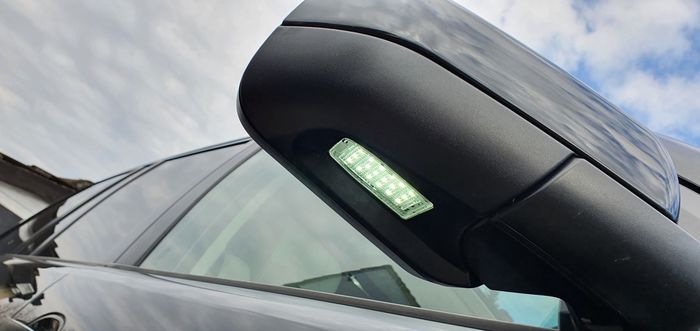
7. Mirror Puddle Lights (2x retrofit units) (15 minutes)
Here i fitted retrofit units, as they already have the built in resistor to prevent a canbus error. No fiddling around needed here, just straight swap!
There's a slight design difference between new and old so, follow carefully:
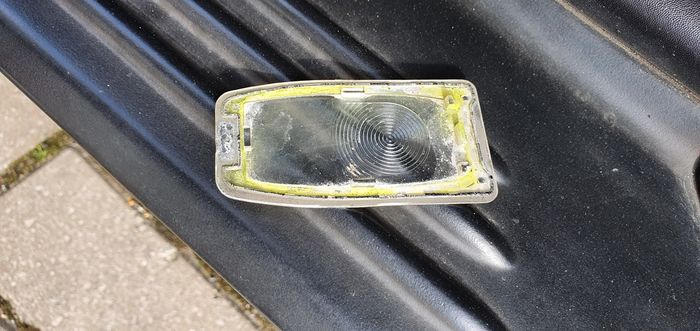
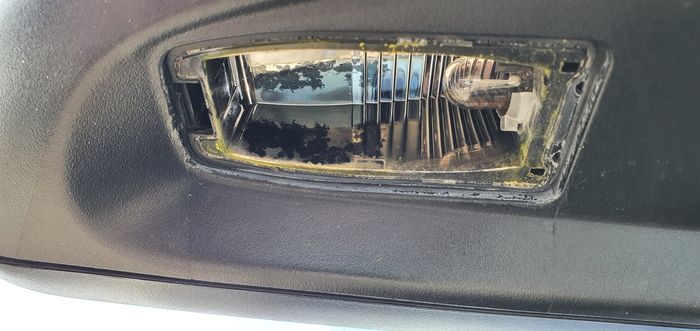
Start by using a screwdriver to unclip the lens on the light unit. Work your way around as to not break the clips. The lens removes first:
This then reveals the bulb unit:
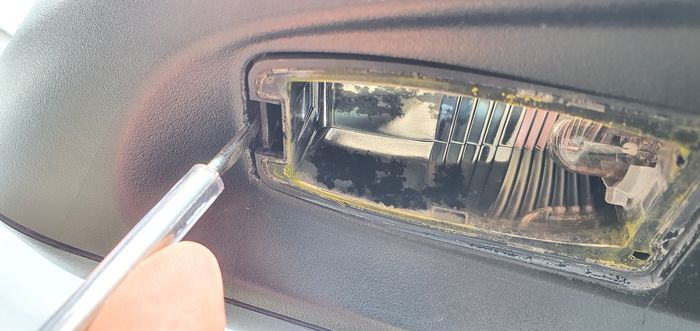
Now, insert the screwdriver on the tab and the unit just lifts straight out:
Next, rotate anticlockwise to remove the bulb holder and remove the bulb:
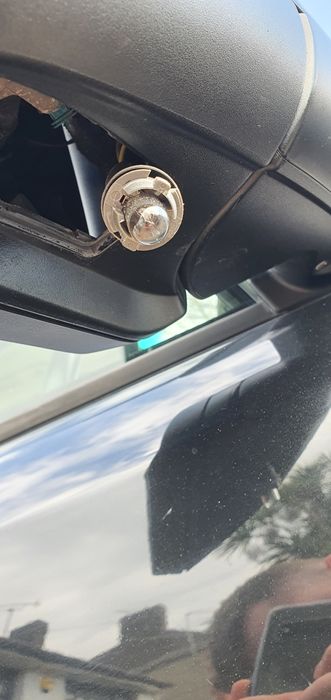 | | Click image to enlarge |
Now plug in the new LED retrofit unit (red on the unit corresponds to yellow on the car) and check operation (lock car and unlock. Light should turn on). One of my bulb plugs was fairly corroded and i had to leave it soaking with electrical cleaner for 10 mins.
Once this is sorted, you want to tape it up, to prevent any stray pressure washer jets (would occur when spraying into the mirror glass) ingressing to the circuit, tape it all up with electrical tape:
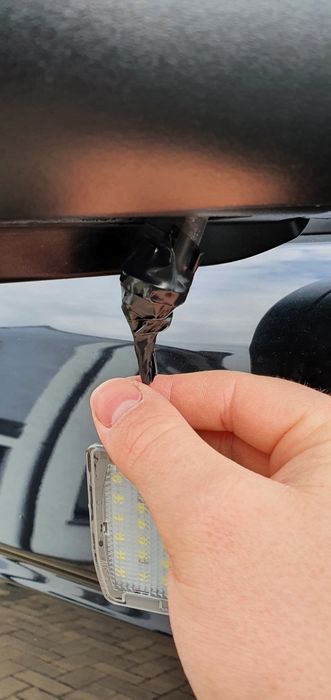 | | Click image to enlarge |
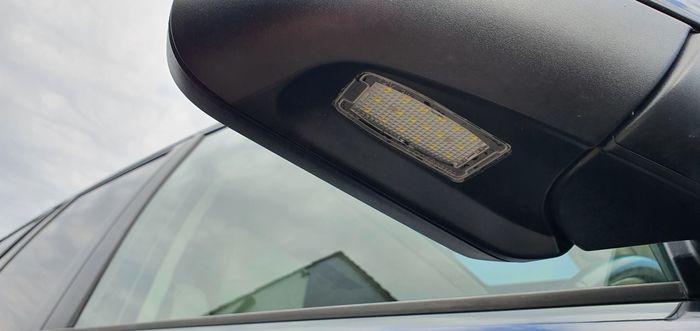
Now push the wiring in the mirror (with the old bulb holder to the back of the mirror as not to foul the mechanism) and put the unit in place. Be warned!!!!! !!Once properly secured, you will hear a *CLICK*. The unit is not properly secured until you hear this sound. Gently press around the unit until you hear this noise.
Ta da!
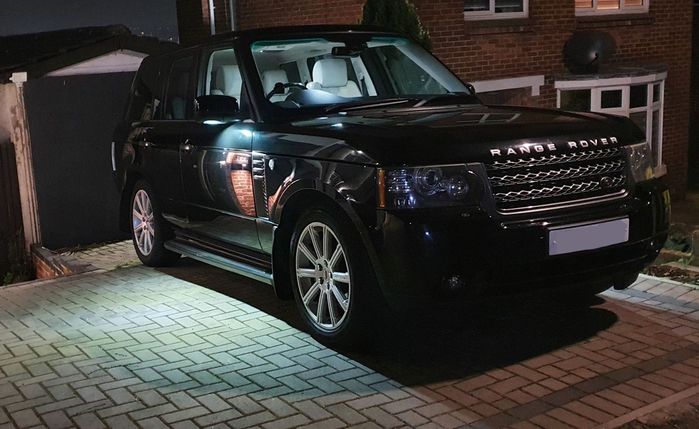
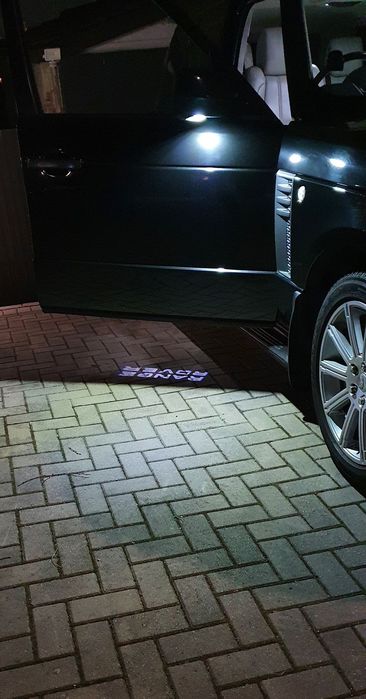 | | Click image to enlarge |
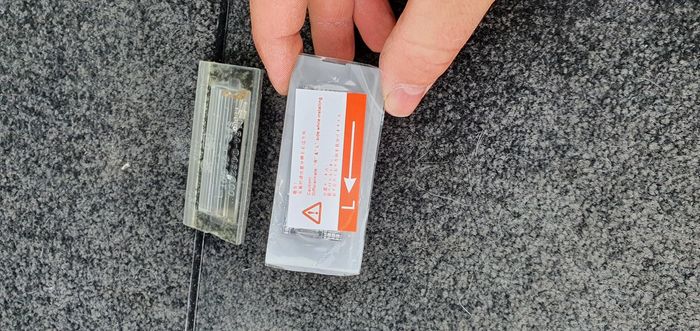
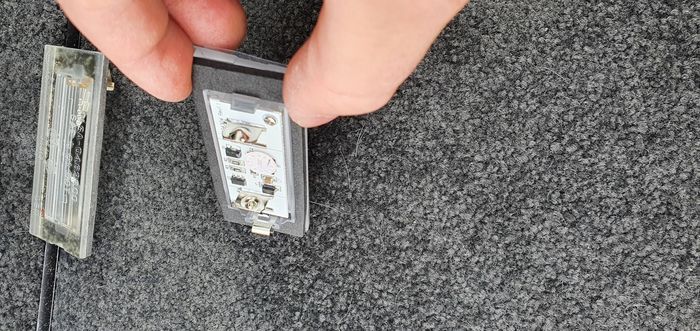
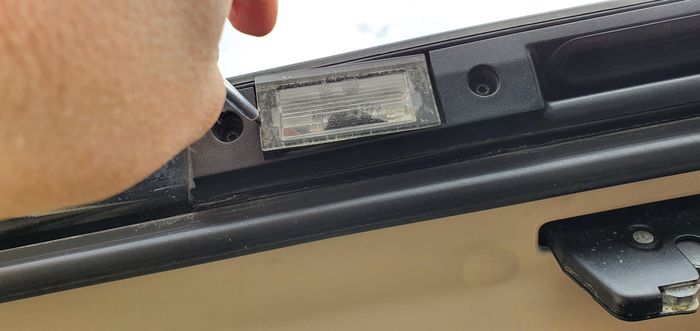
8. Numberplate Lights (2x Retrofit units) (5 minutes)
I chose retrofit units here because these lights also run on the canbus. The retrofit units are actually especially clever in their design -> they incorporate a light lens with a festoon fitting, to pick up the power feed from the car. The retrofit units are directional and come with stickers over the lens identifying which side they go on.
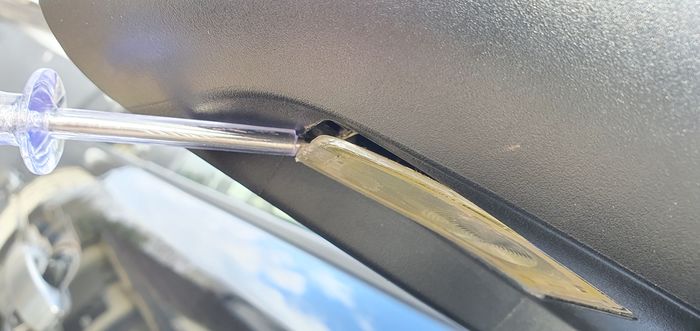
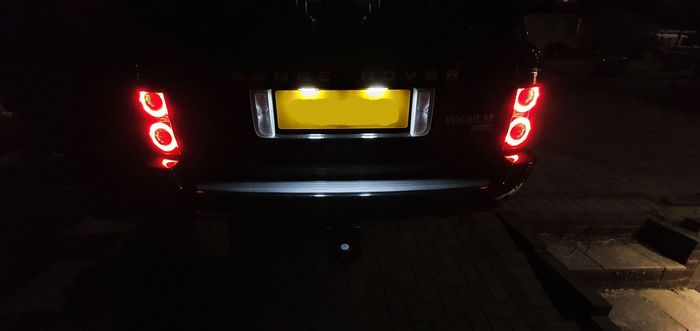
This job is easy. Open the tailgate and locate the notch for a screwdriver on each lens, insert the screwdriver and remove (taking note of the orientation):
Now just swap over with the LED units:
Now turn on the car side lights and check for operation:
Look great and not overly bright!
Hope this helps and inspires others to do the same
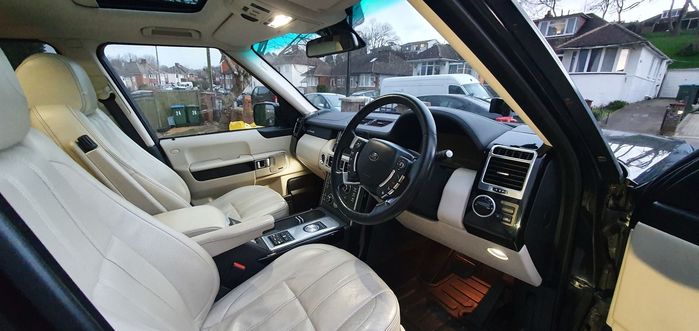 2015 Range Rover Autobiography 4.4 SDV8 2015 Range Rover Autobiography 4.4 SDV8
Last edited by garyRR on 16th Aug 2022 8:37pm. Edited 25 times in total
|


![]()


